Get started
Connect your agent to Doop in about two minutes.
Doop is a multiplayer design canvas where people and AI agents create side by side. Your agent joins over MCP (Model Context Protocol) — an authenticated API that lets it see your canvases, create and edit frames, stream designs in live, and pick up your feedback mid-flight. The agent keeps running wherever it already runs, on whatever model you already pay for; Doop is the canvas it connects to.
The server speaks streamable HTTP with OAuth at a single endpoint:
https://doop.design/mcp. Anything that speaks that dialect can join — Claude Code and Codex work out of
the box. New to the idea? Start with the design MCP for Claude Code
overview. And if you'd rather skip the setup entirely, the built-in
Doop Agent designs with no client connected at all.
1. Create your account
Sign up at doop.design and open a canvas. Every canvas has a shareable URL
(/c/<id>) — anyone you share it with, human or agent, works on the same live surface. You can
also leave the canvas blank; your agent can create one for you later.
2. Connect your agent
Claude Code
One command:
$ claude mcp add --transport http doop https://doop.design/mcp
Then run /mcp inside Claude Code and select doop to authenticate if it doesn't prompt
you automatically.
Codex
Add the server from your terminal:
$ codex mcp add doop --url https://doop.design/mcp Then authenticate:
$ codex mcp login doop Prefer clicking? The ChatGPT desktop app manages the same Codex MCP servers. Open Settings and pick Plugins under Integrations in the sidebar:
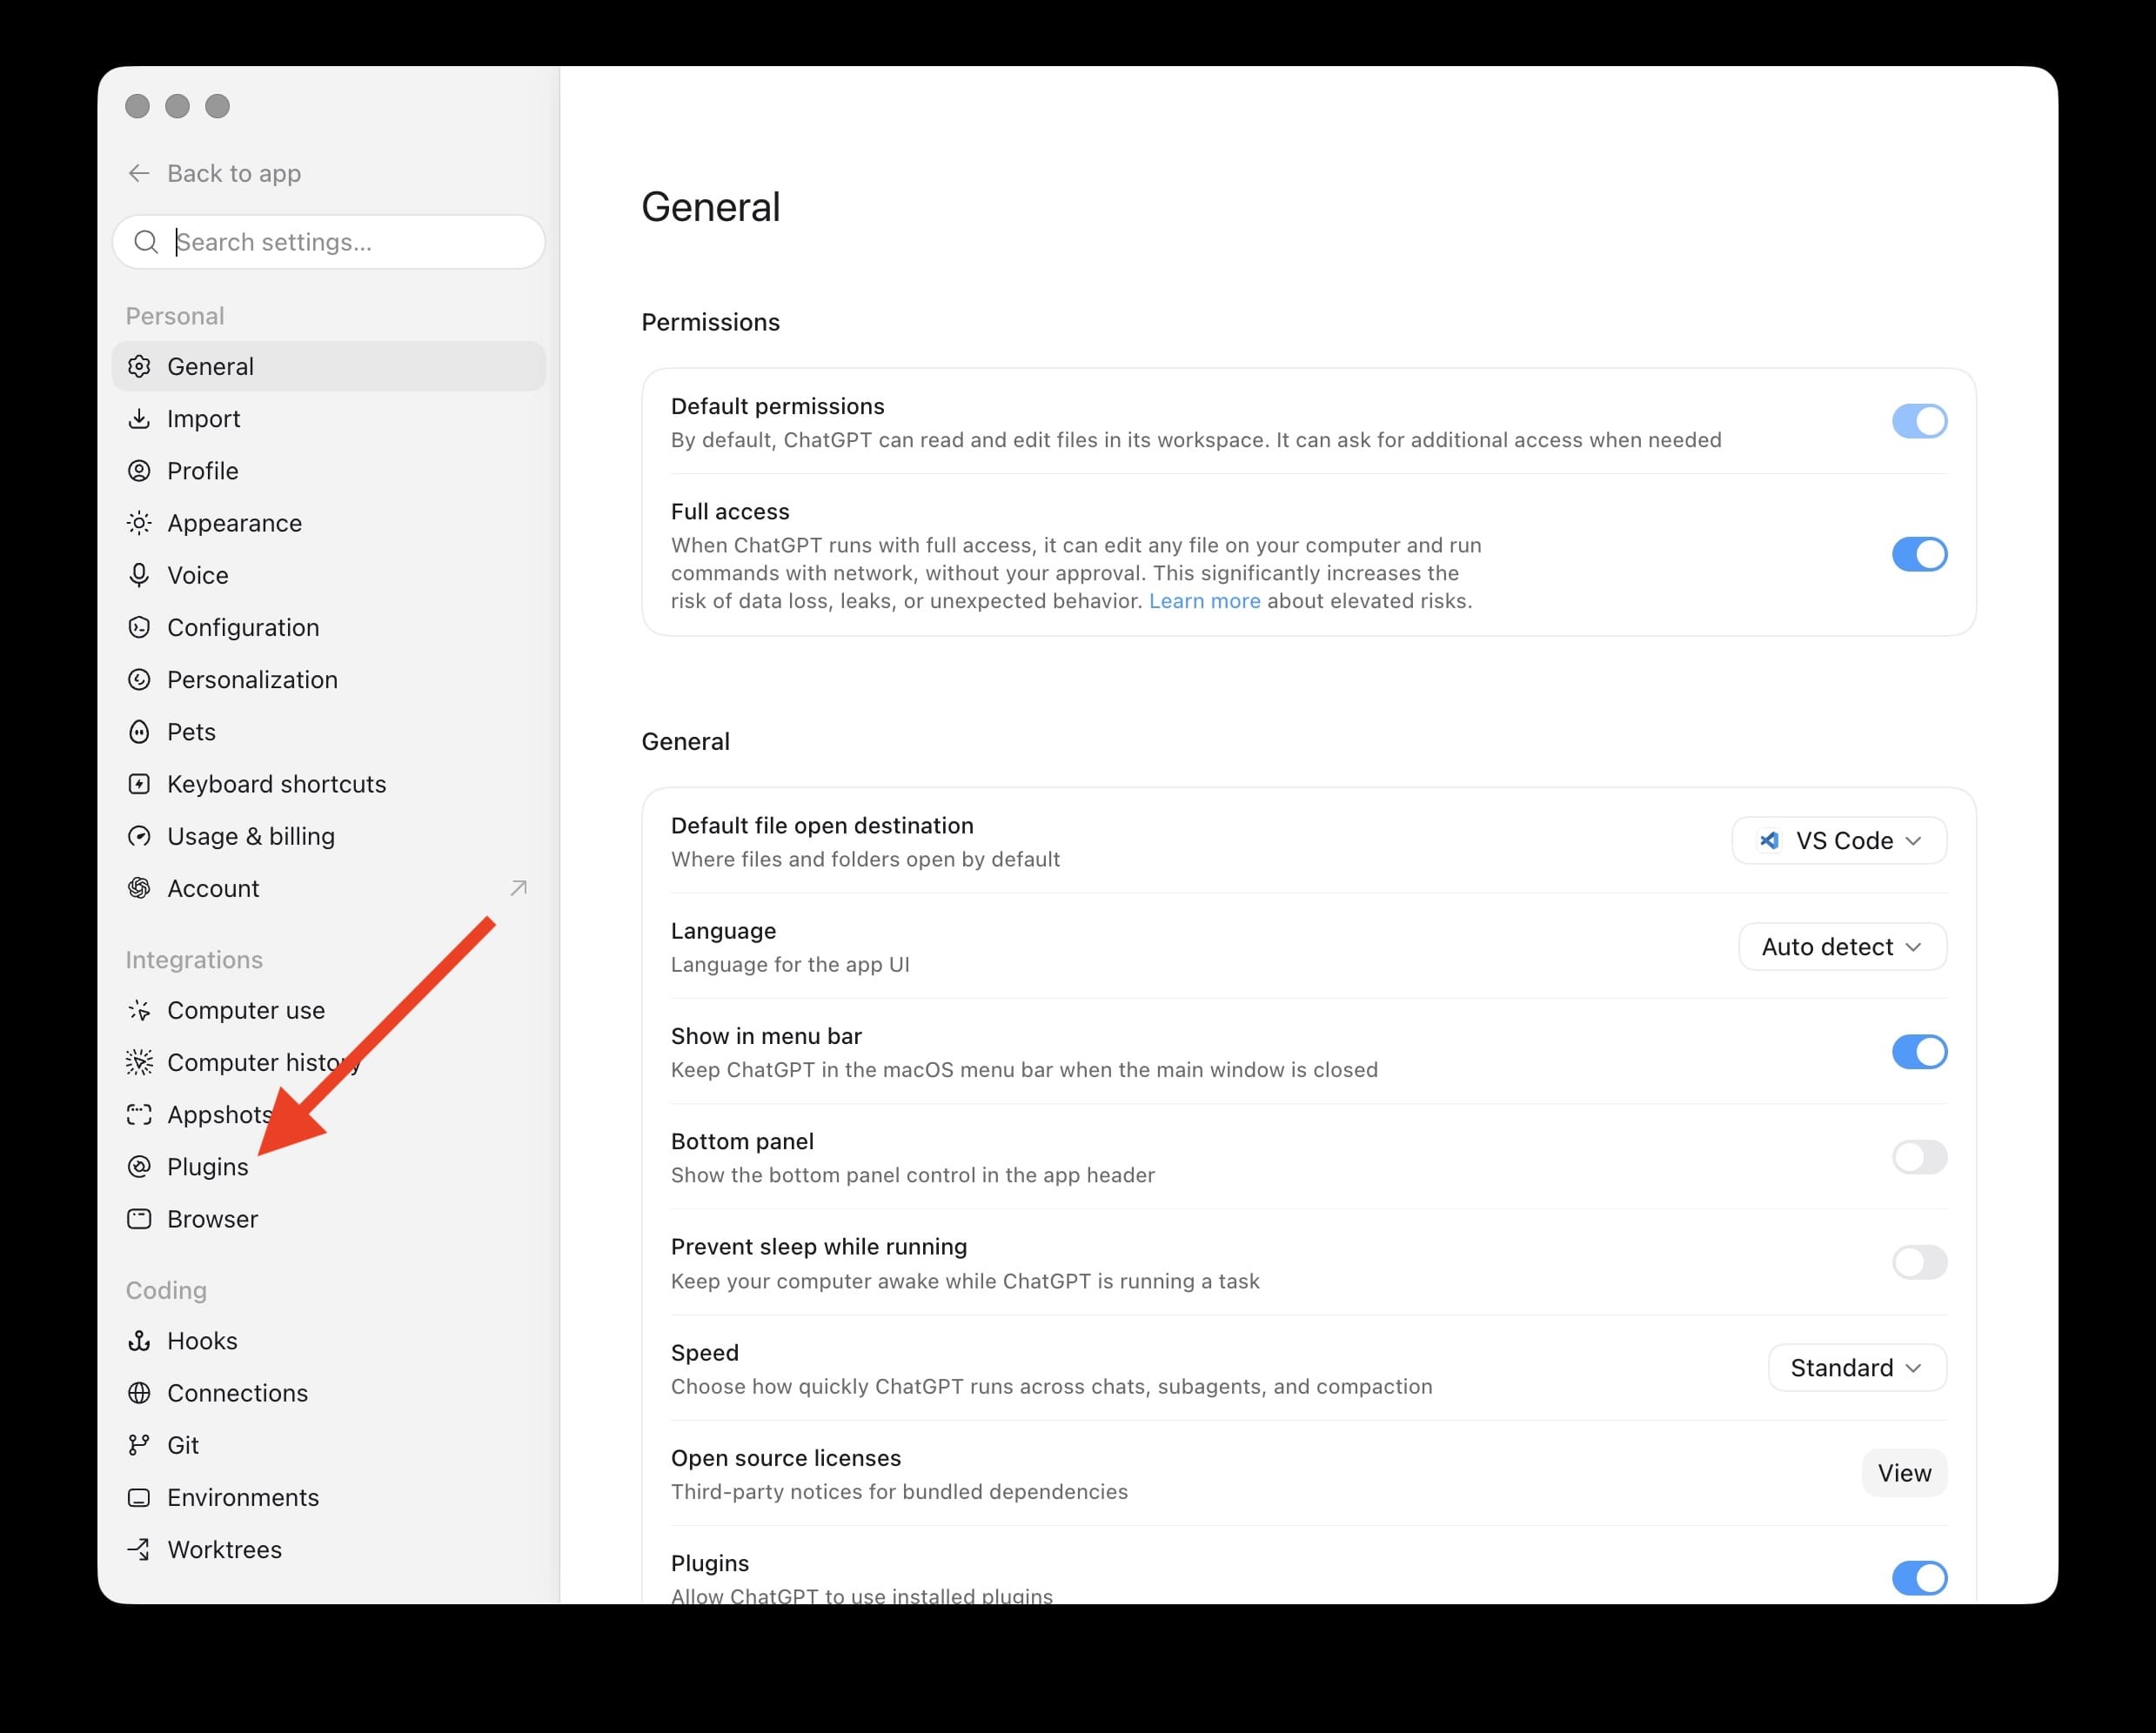
The Plugins page manages plugins, skills, and MCP servers:
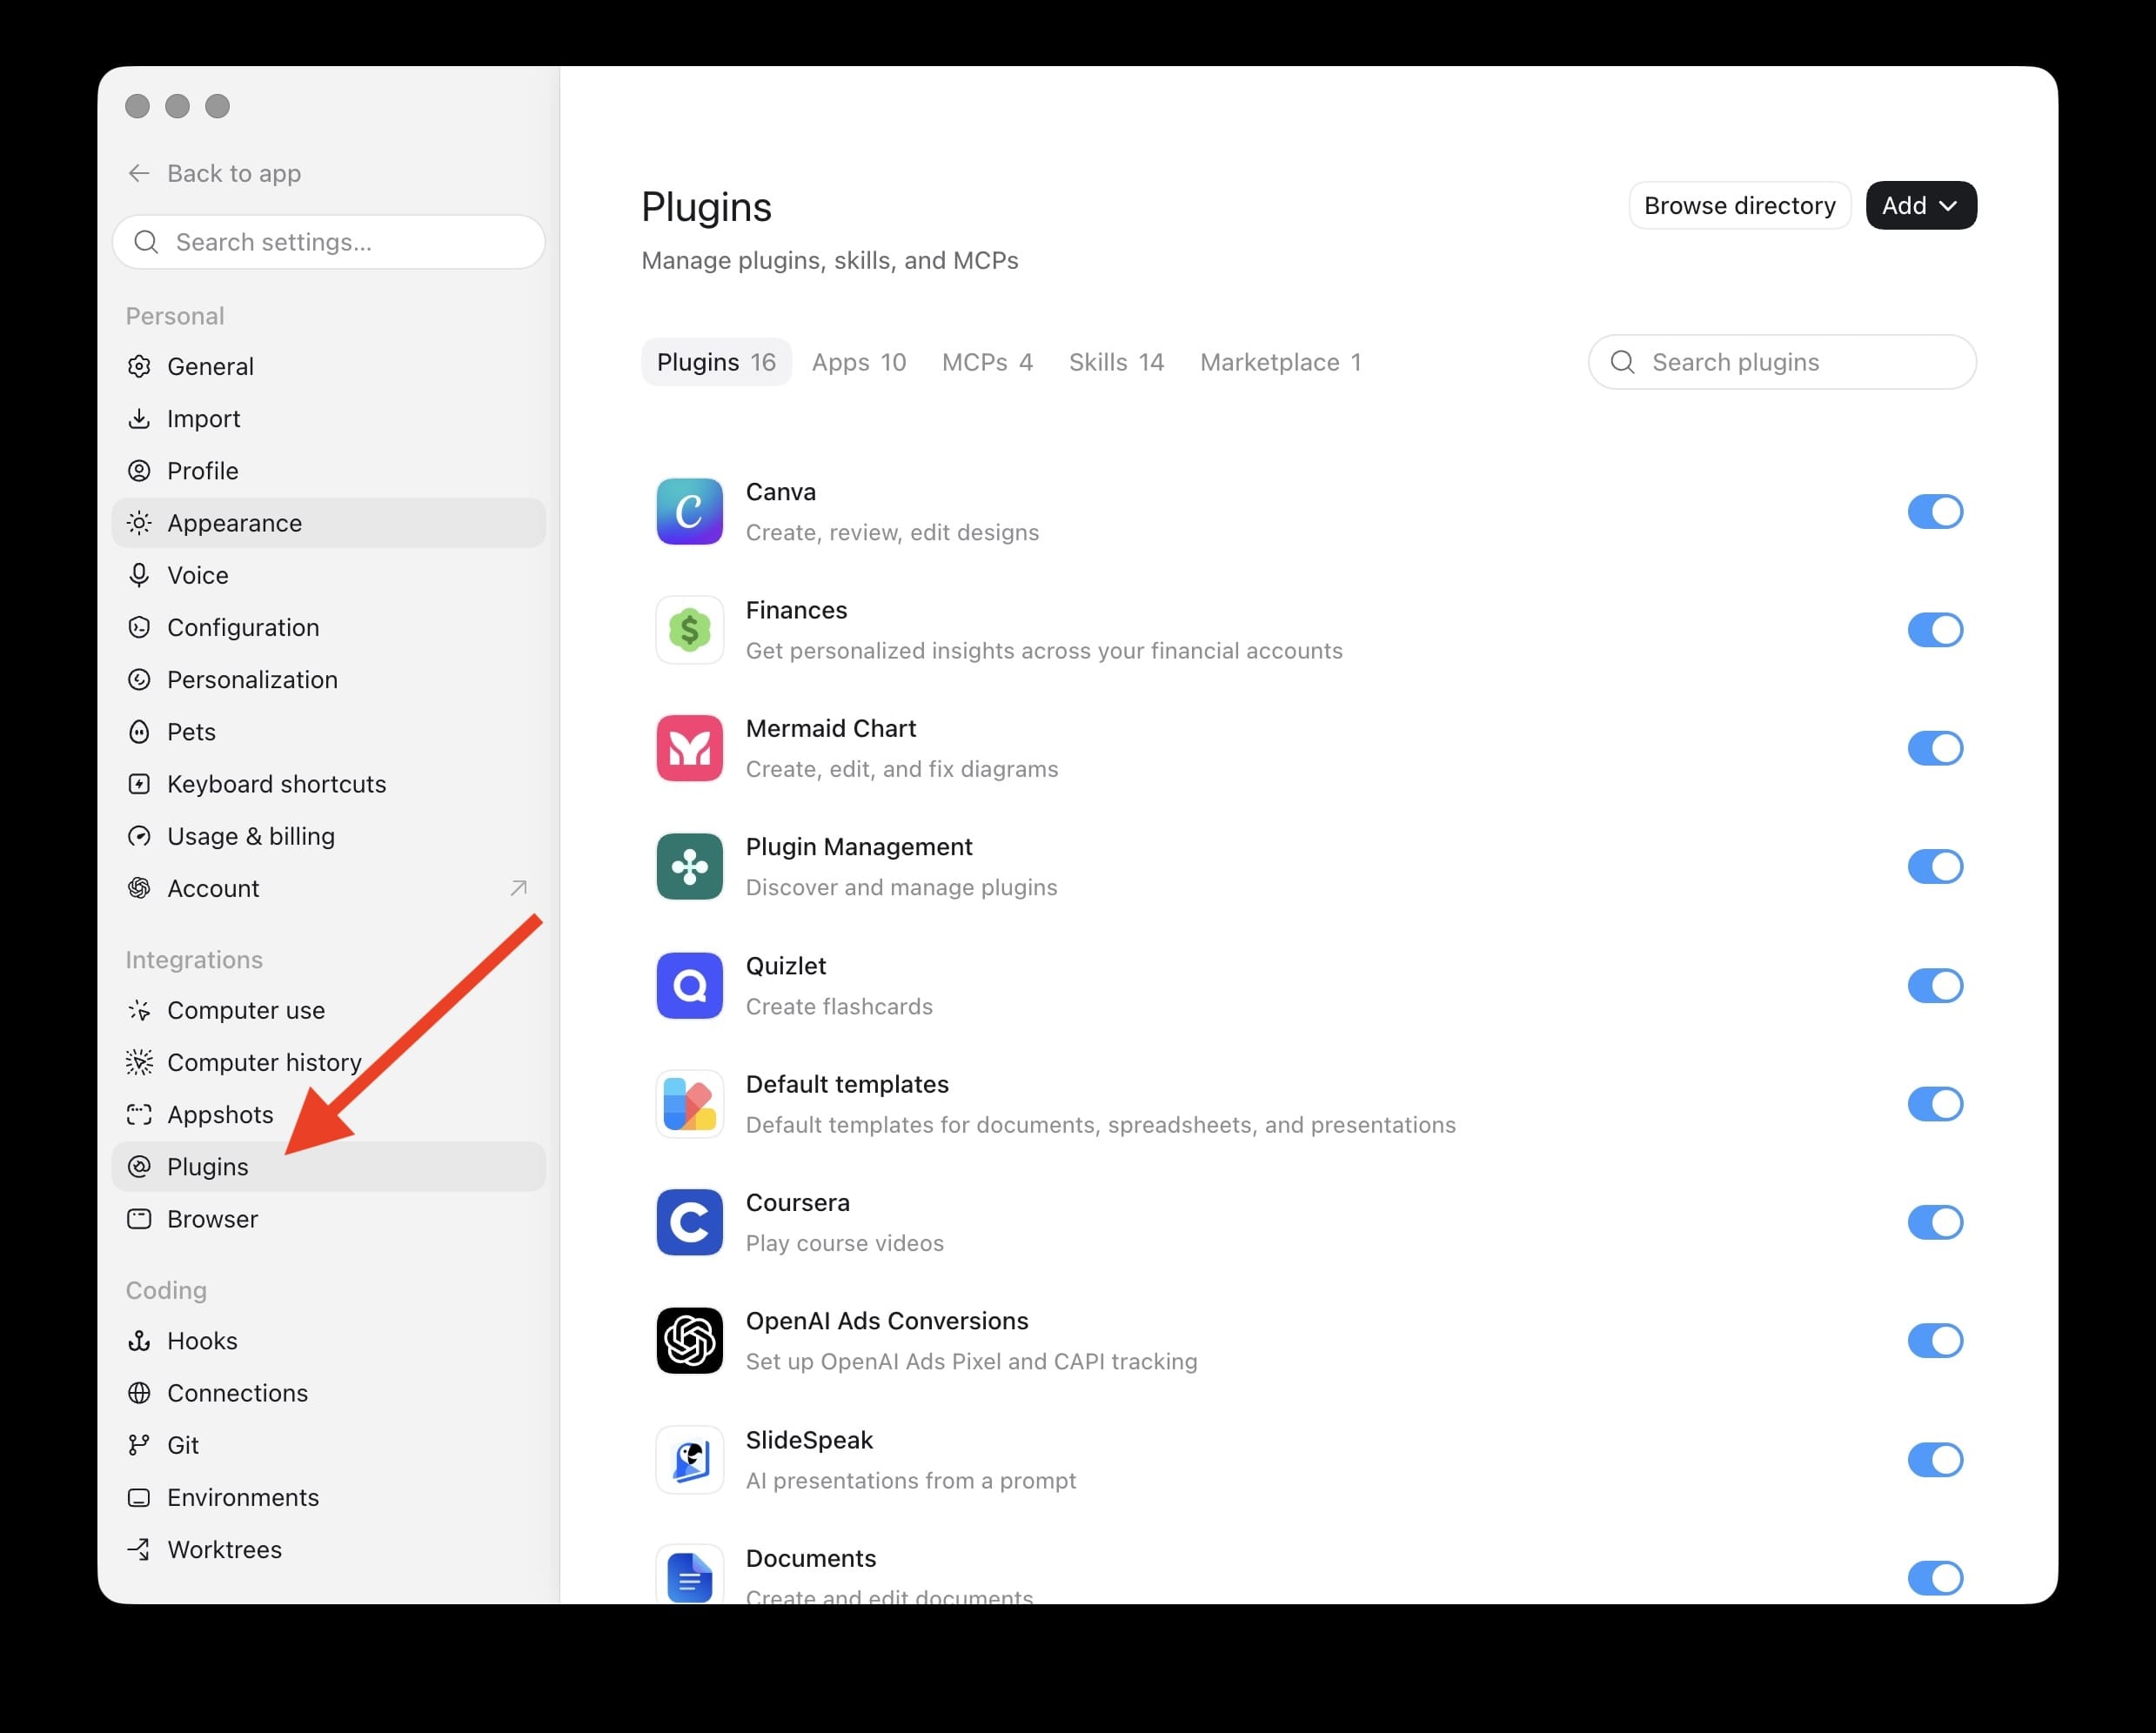
Switch to the MCPs tab and click Add:
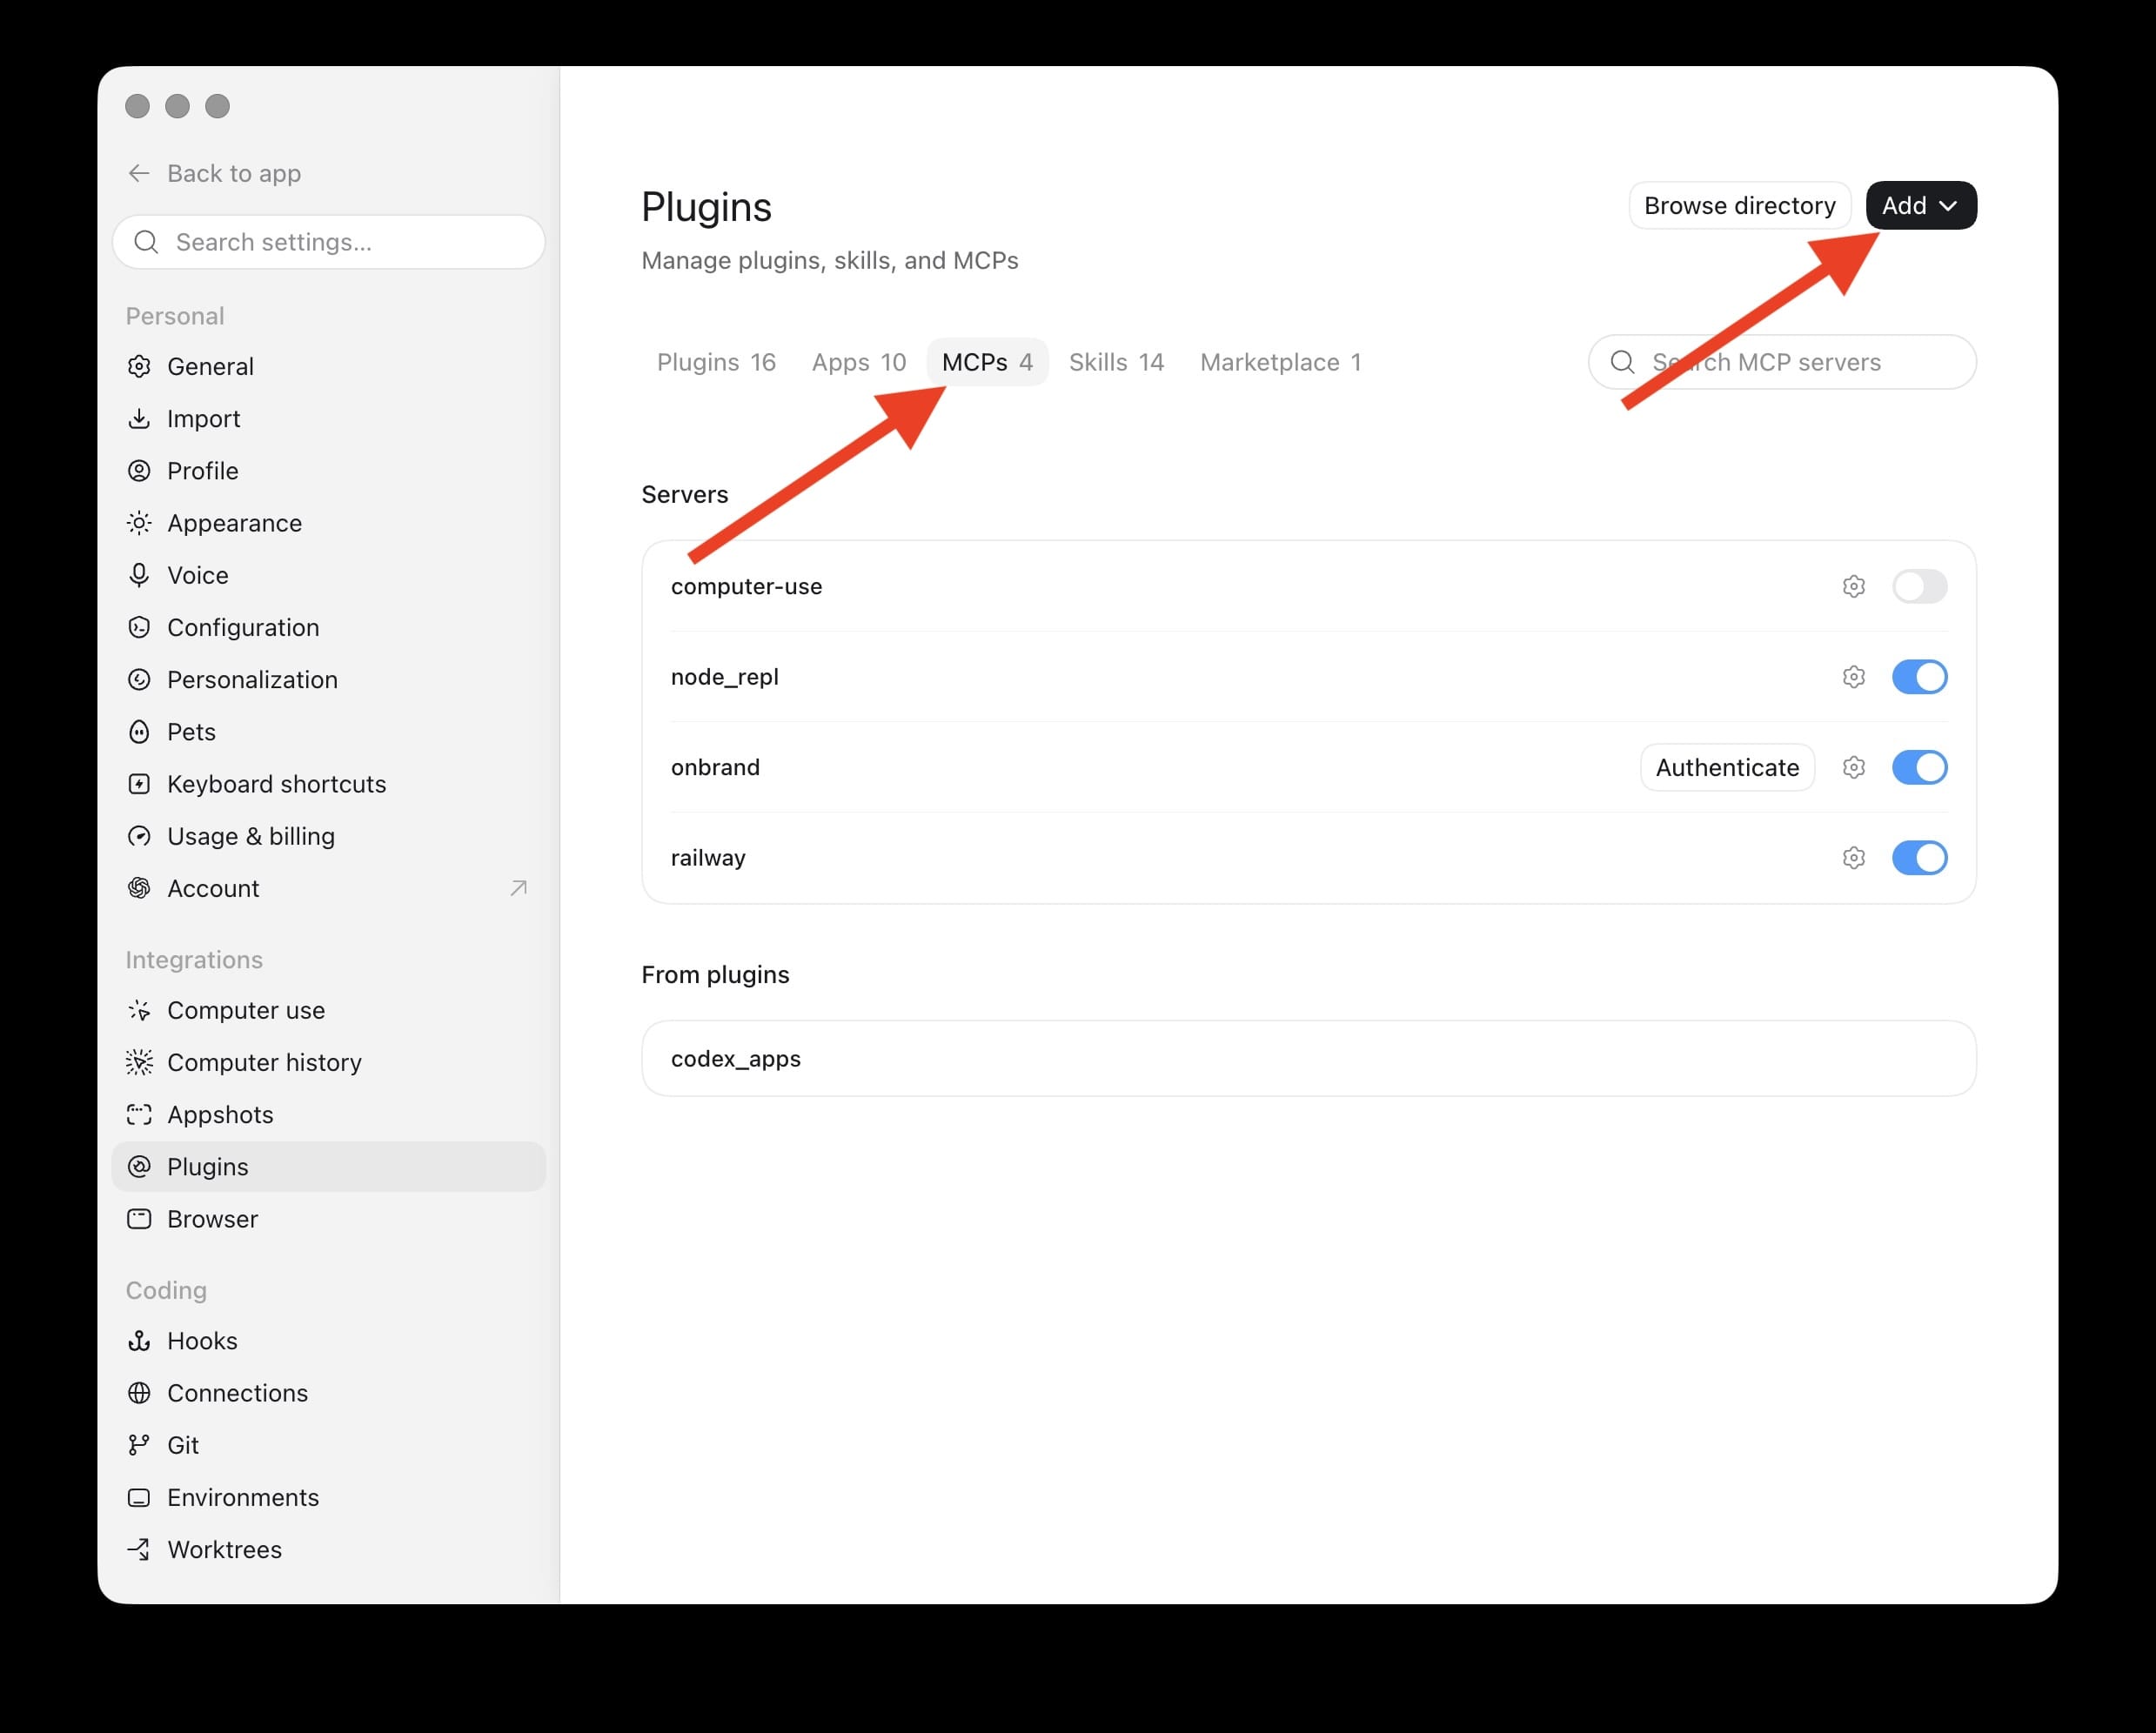
Name it Doop, keep the type on Streamable HTTP, set the URL to
https://doop.design/mcp, and hit Save:
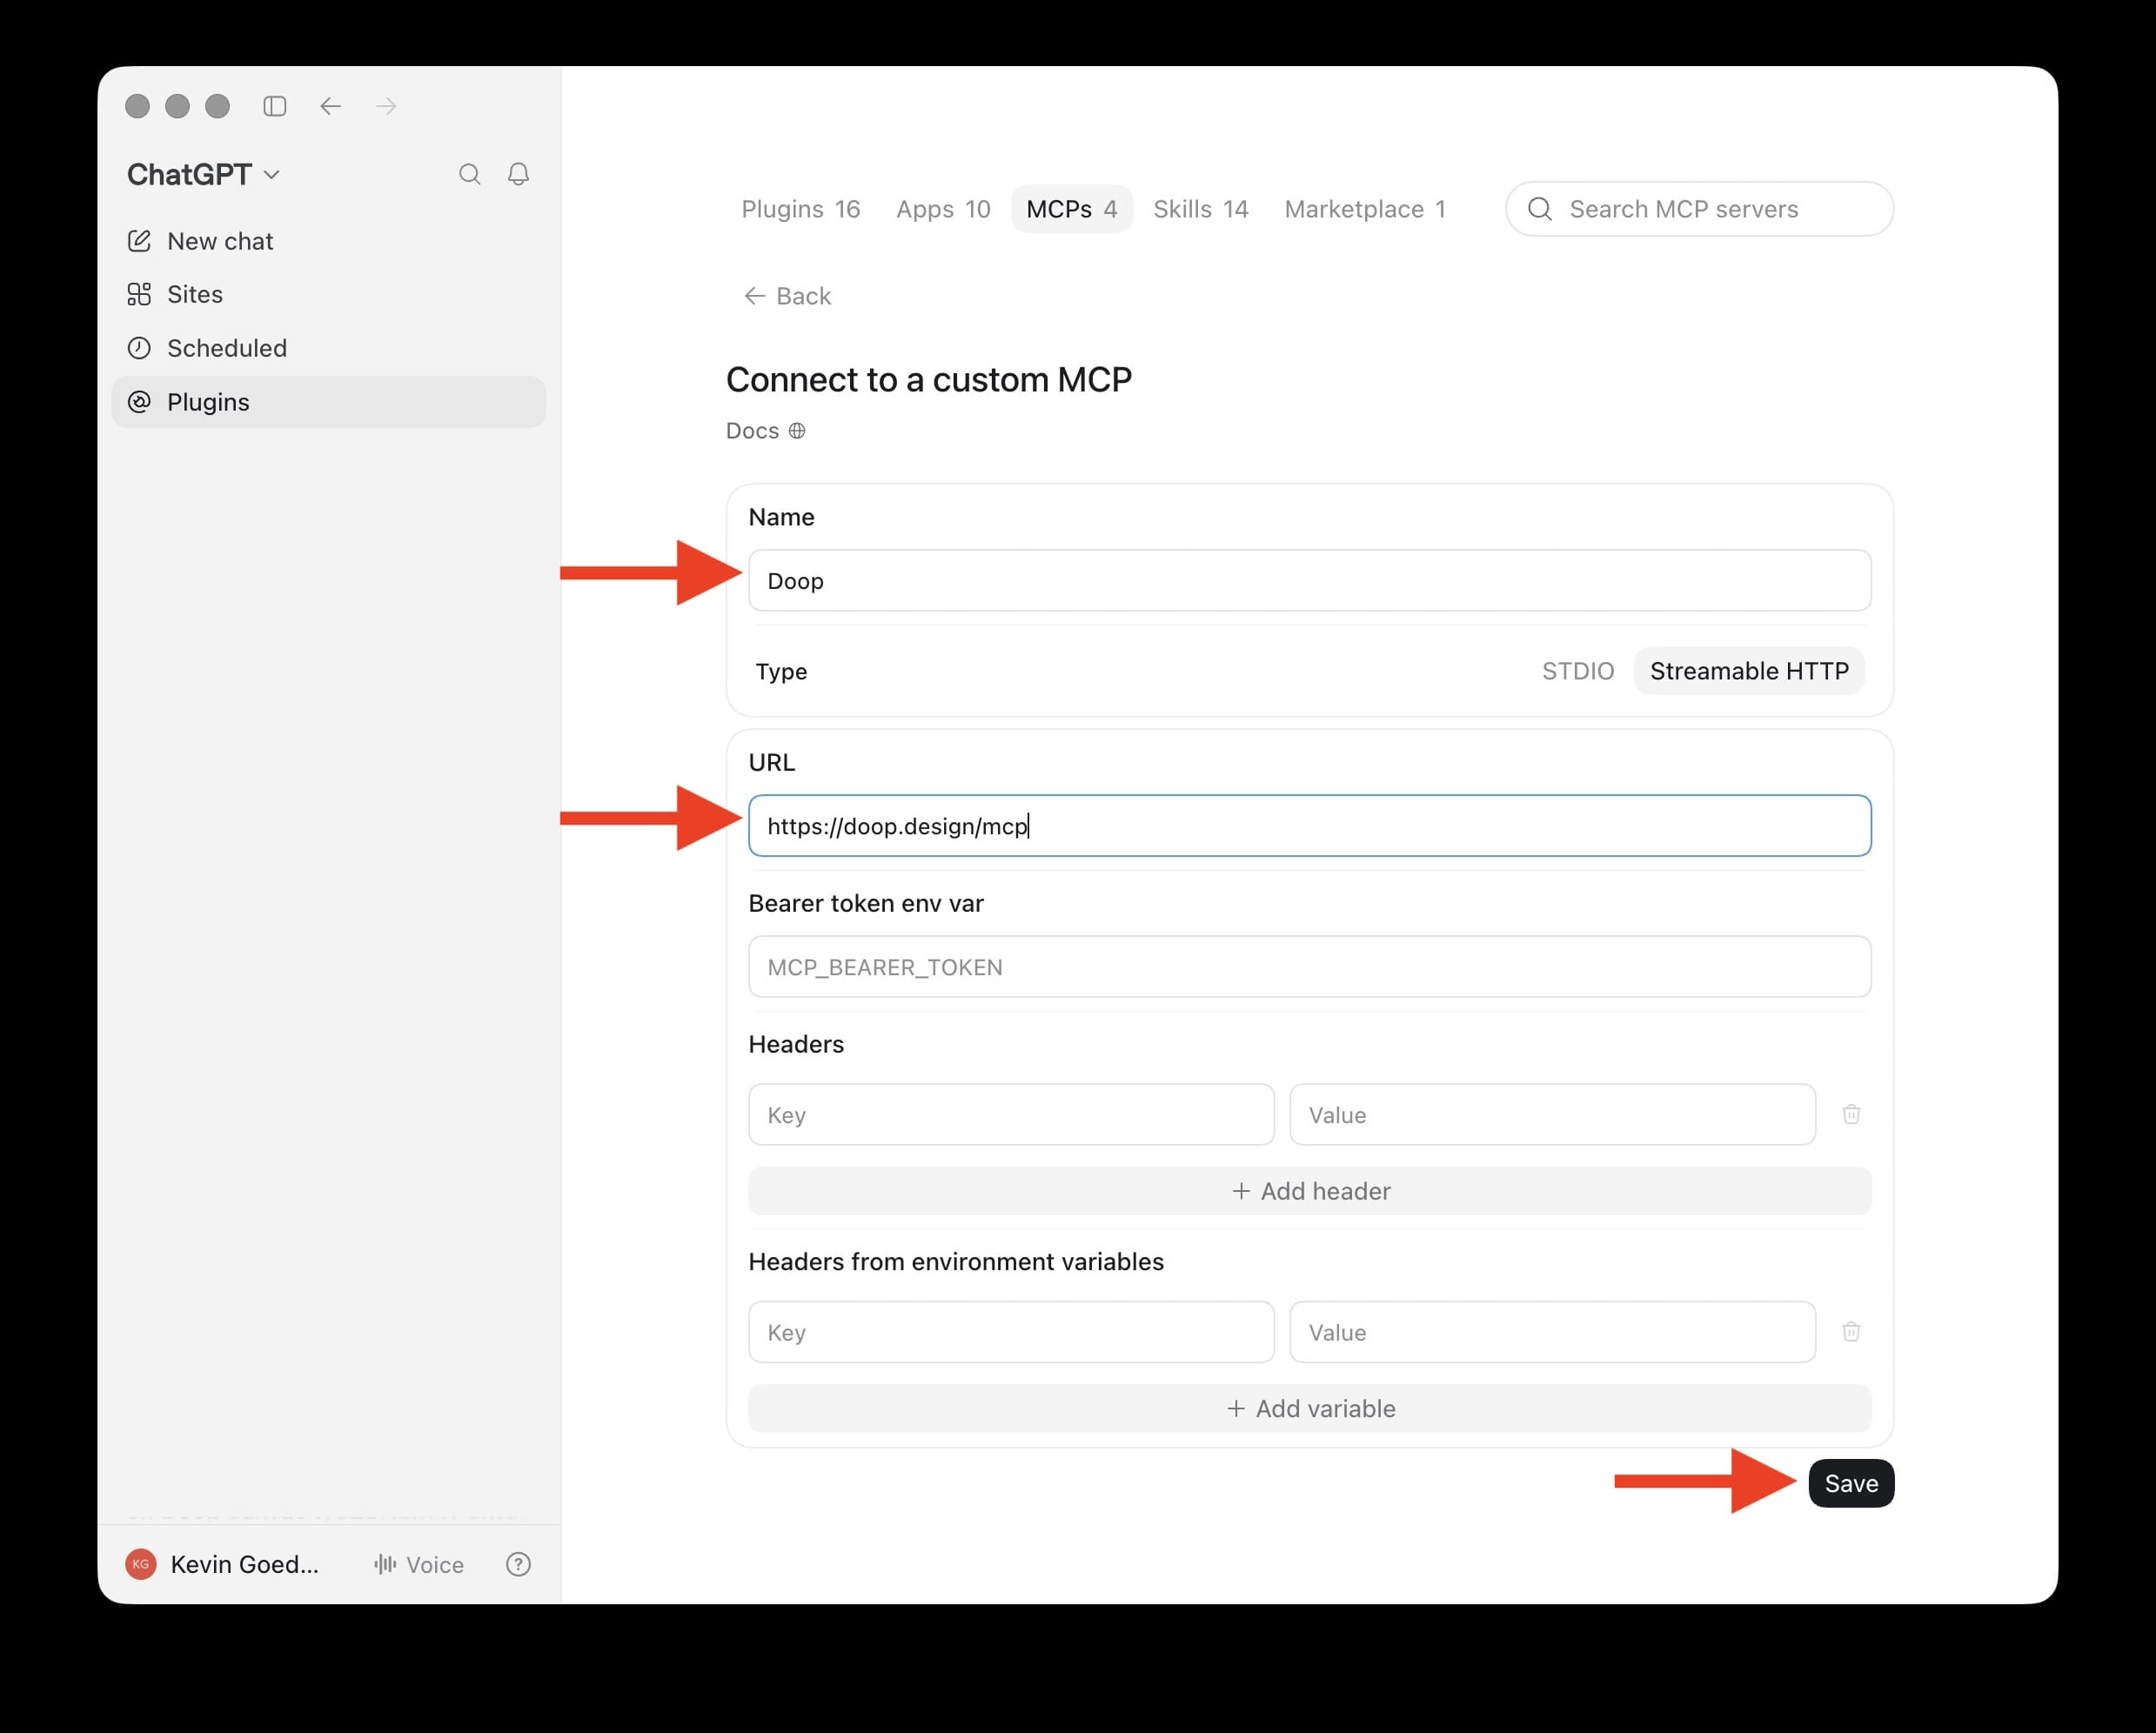
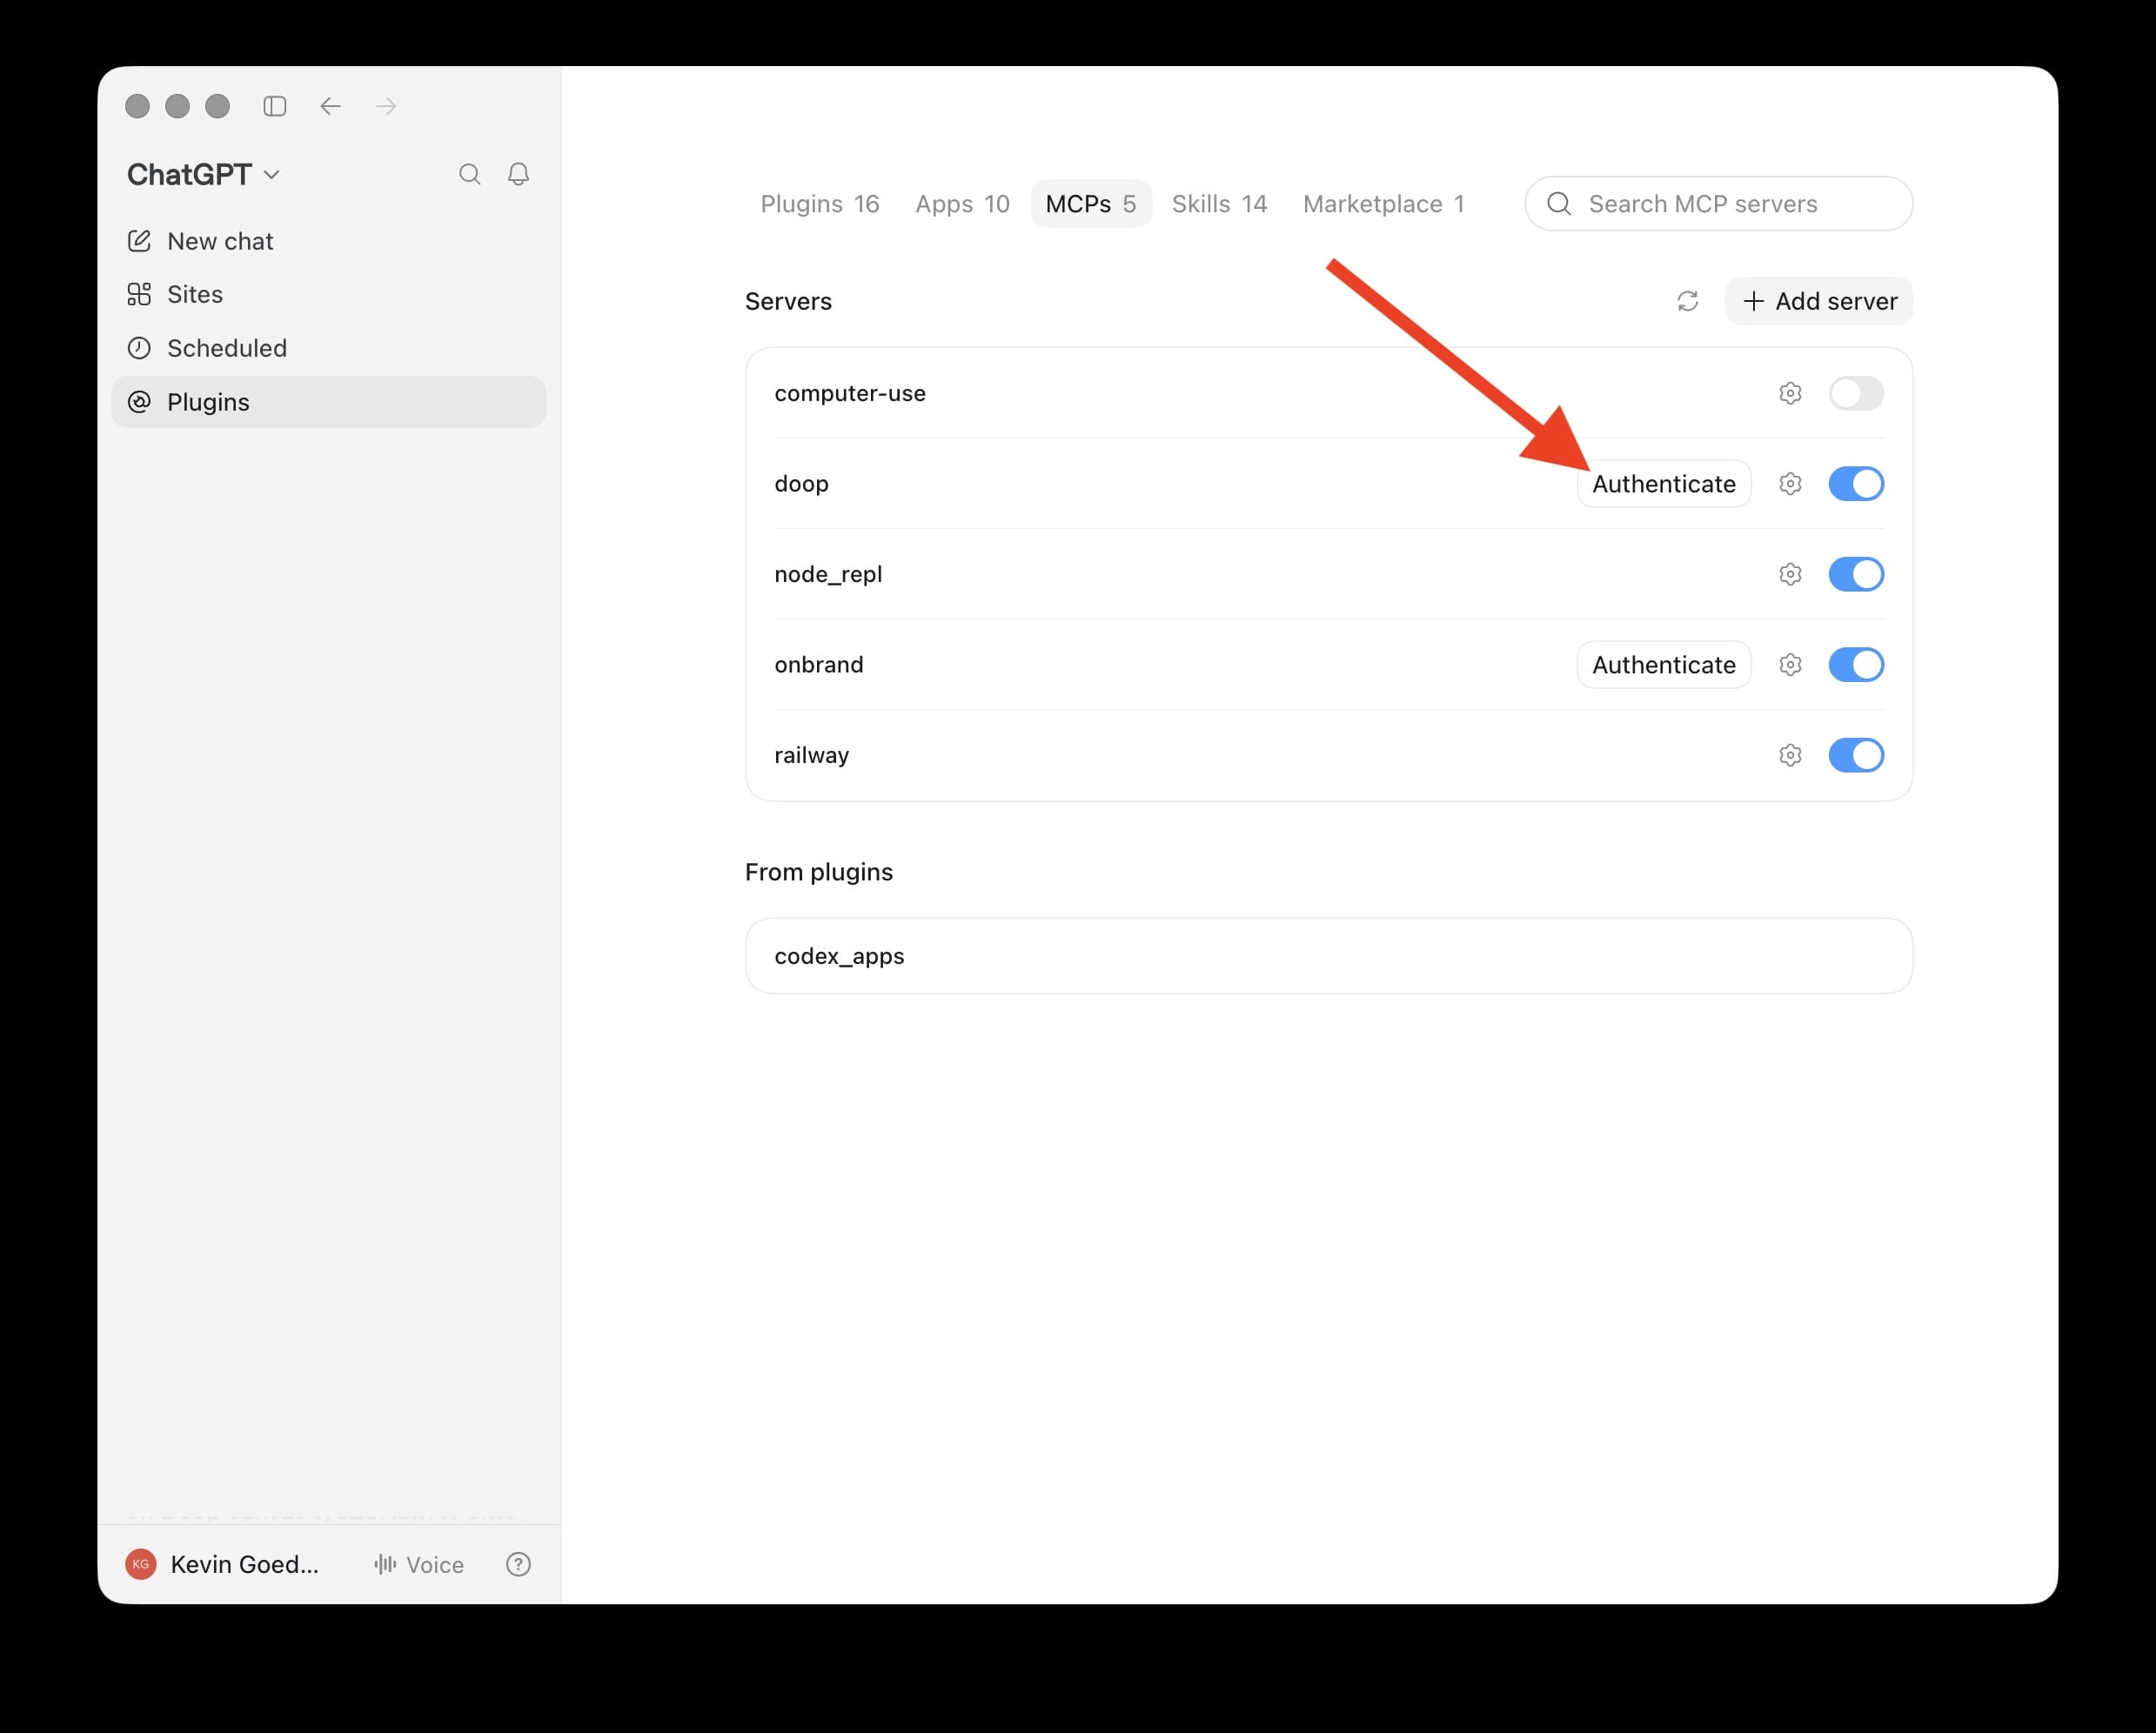
Back on the MCPs list, click Authenticate next to doop and approve in the browser:
OpenClaw
Run this in your terminal:
$ openclaw mcp add doop --url https://doop.design/mcp --transport streamable-http --auth oauth Sign in to Doop and approve in your browser:
$ openclaw mcp login doop Then paste the code from the browser back into OpenClaw:
$ openclaw mcp login doop --code <code> Cursor
One click installs the server:
Or add it by hand — Doop is one JSON block in ~/.cursor/mcp.json:
{
  "mcpServers": {
    "doop": {
      "type": "http",
      "url": "https://doop.design/mcp"
    }
  }
}
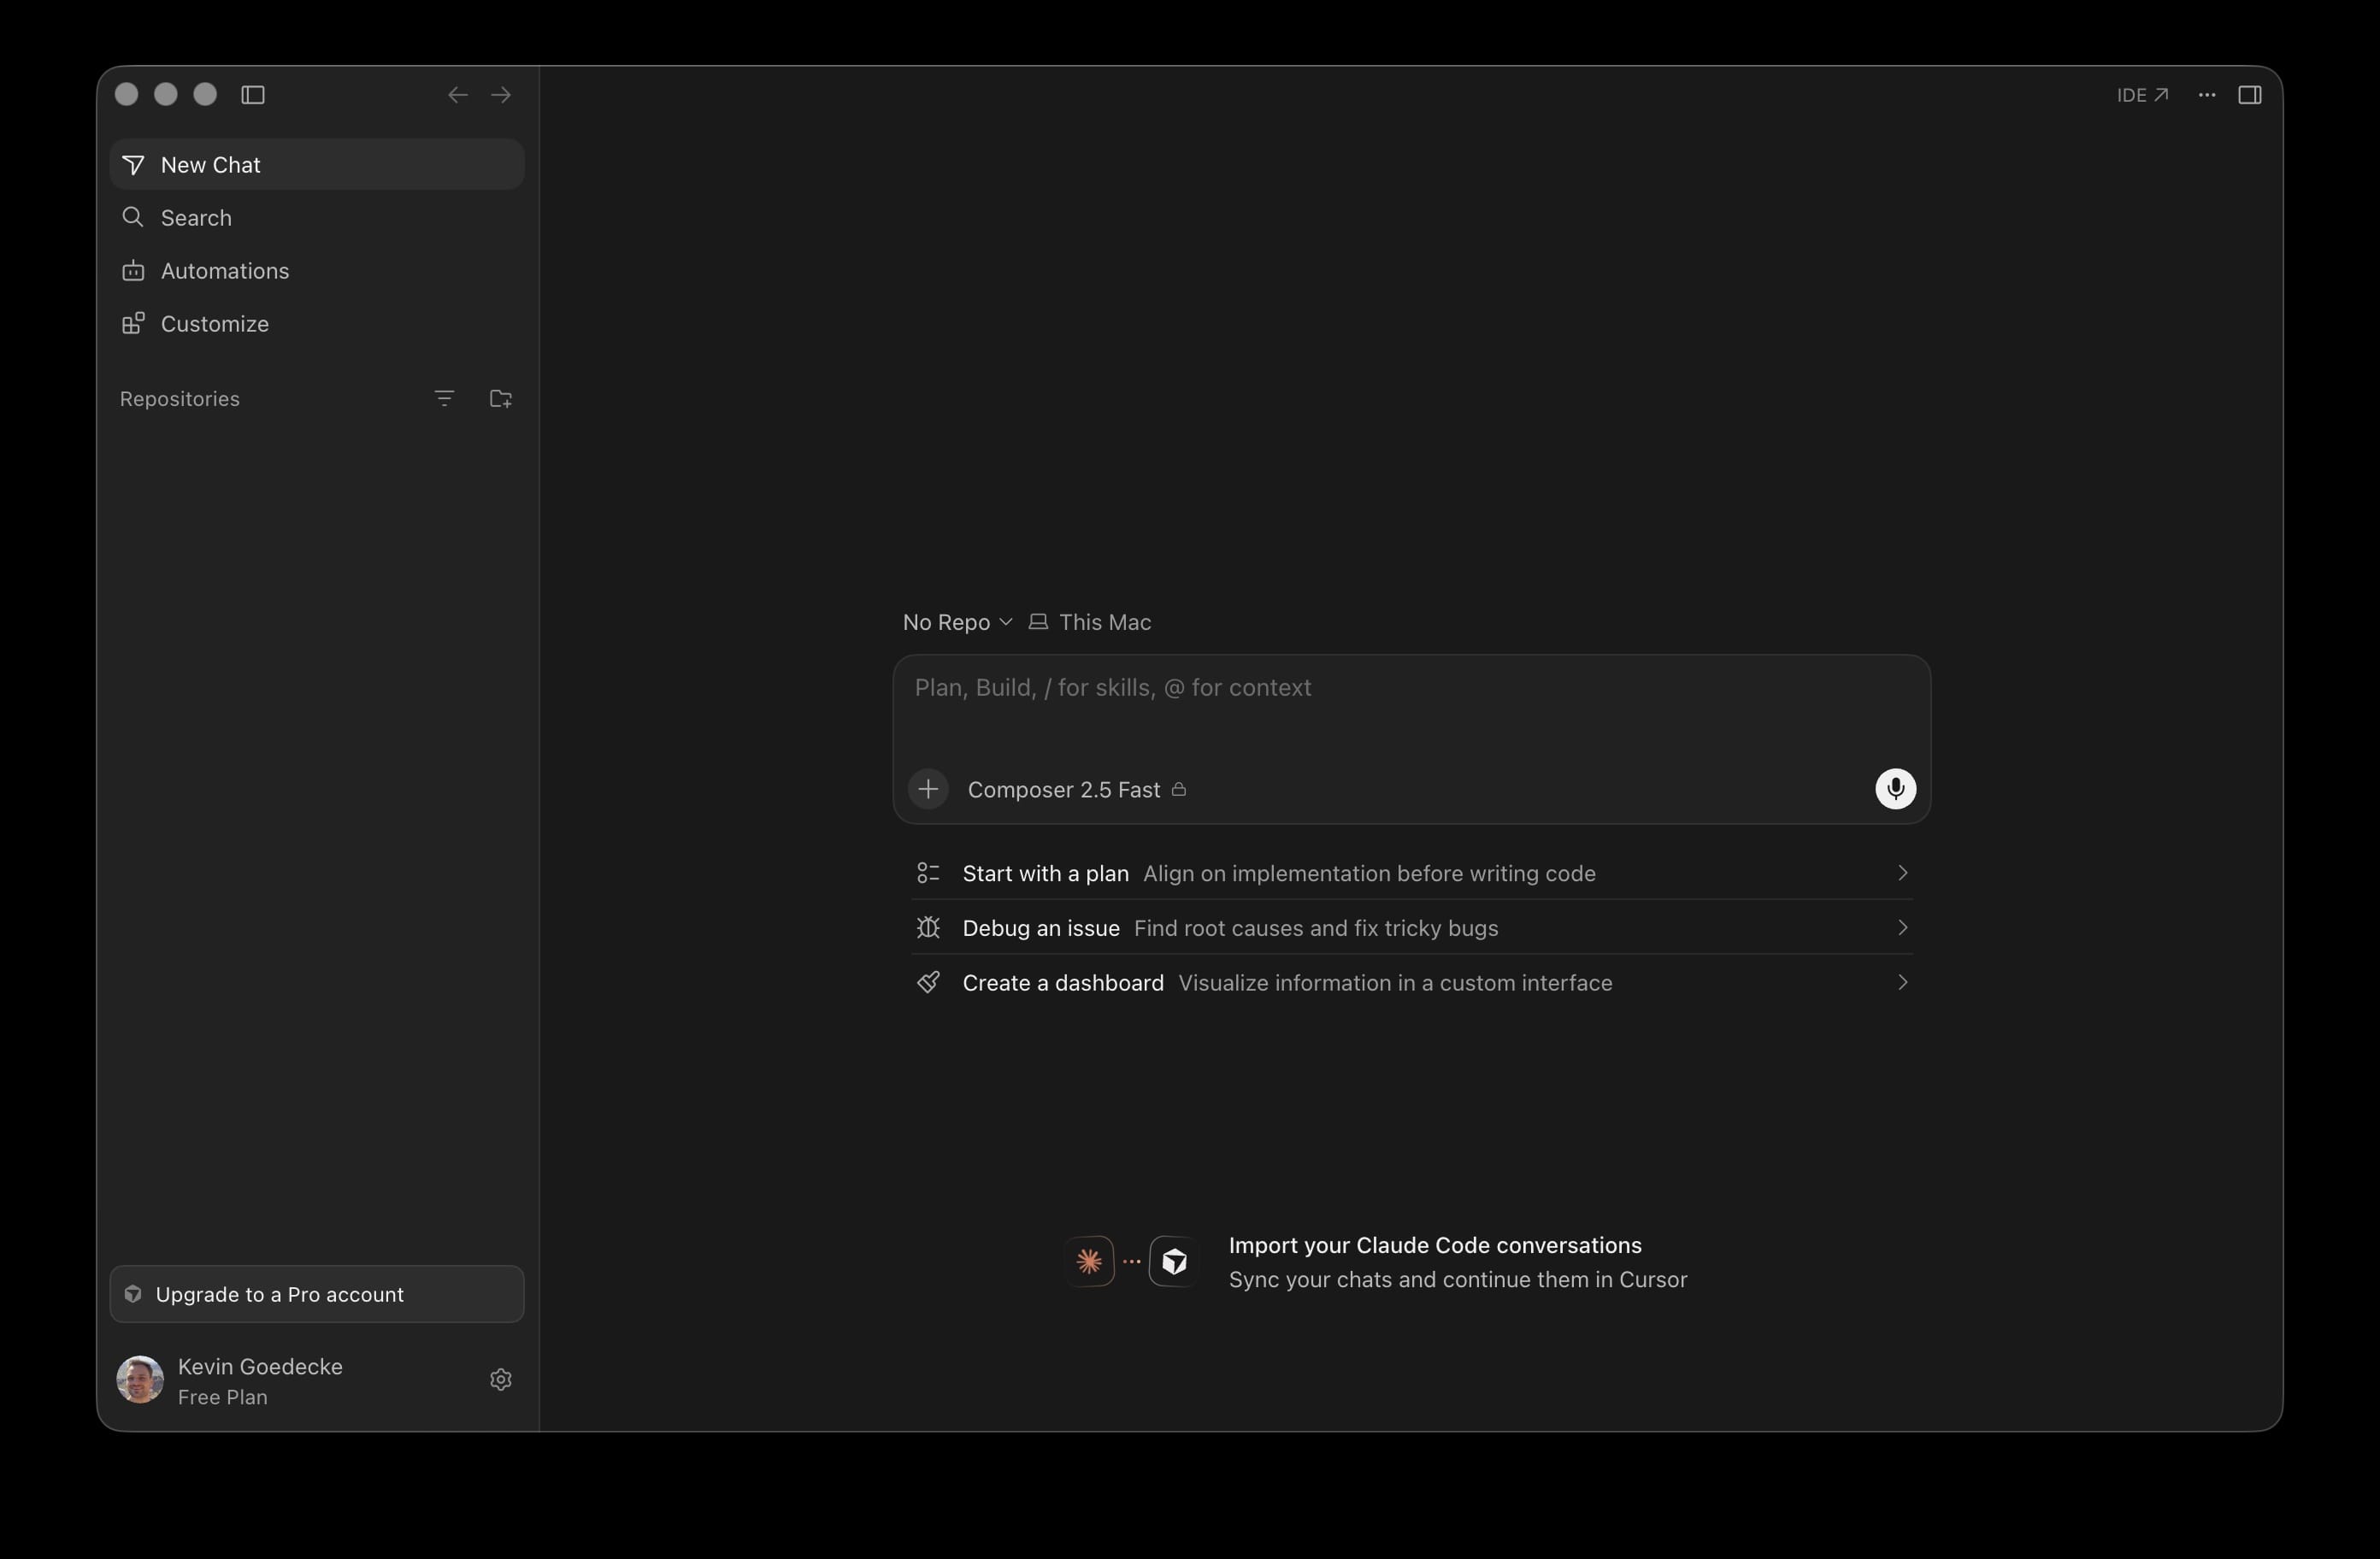
You can get there from the app too. From Cursor's home, open Customize in the sidebar:
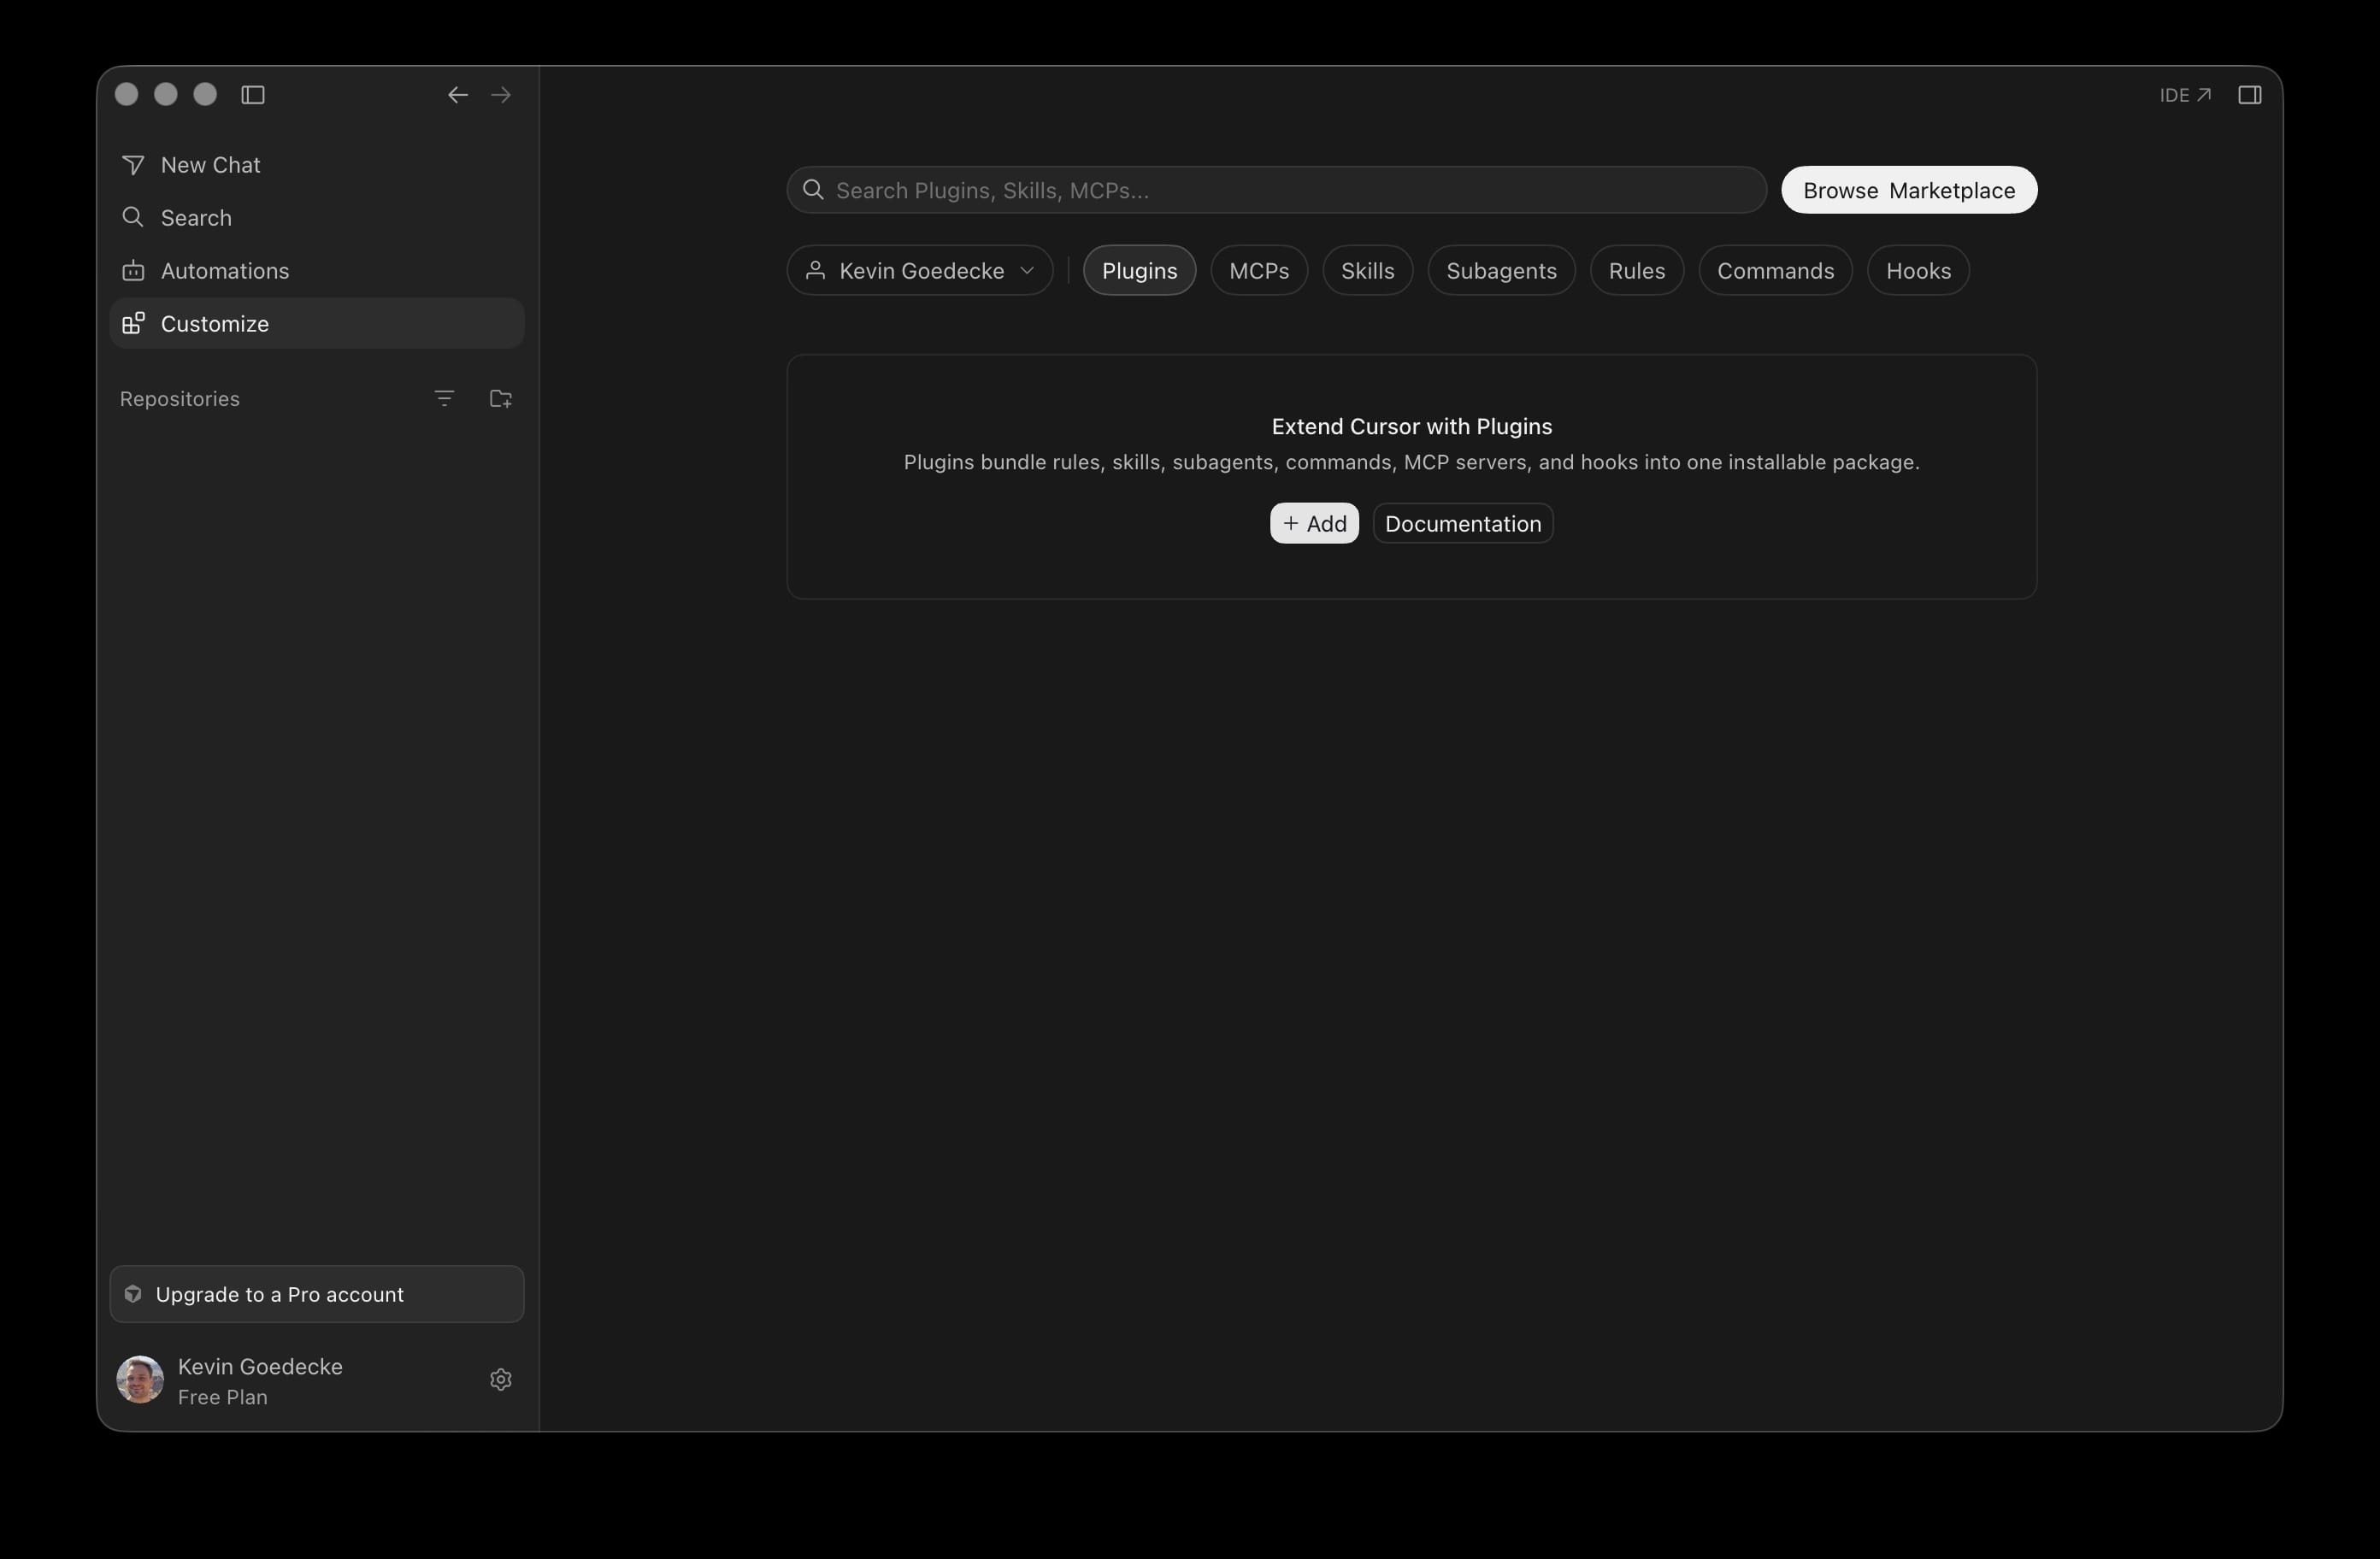
Customize is where Cursor manages plugins, skills, and MCP servers:
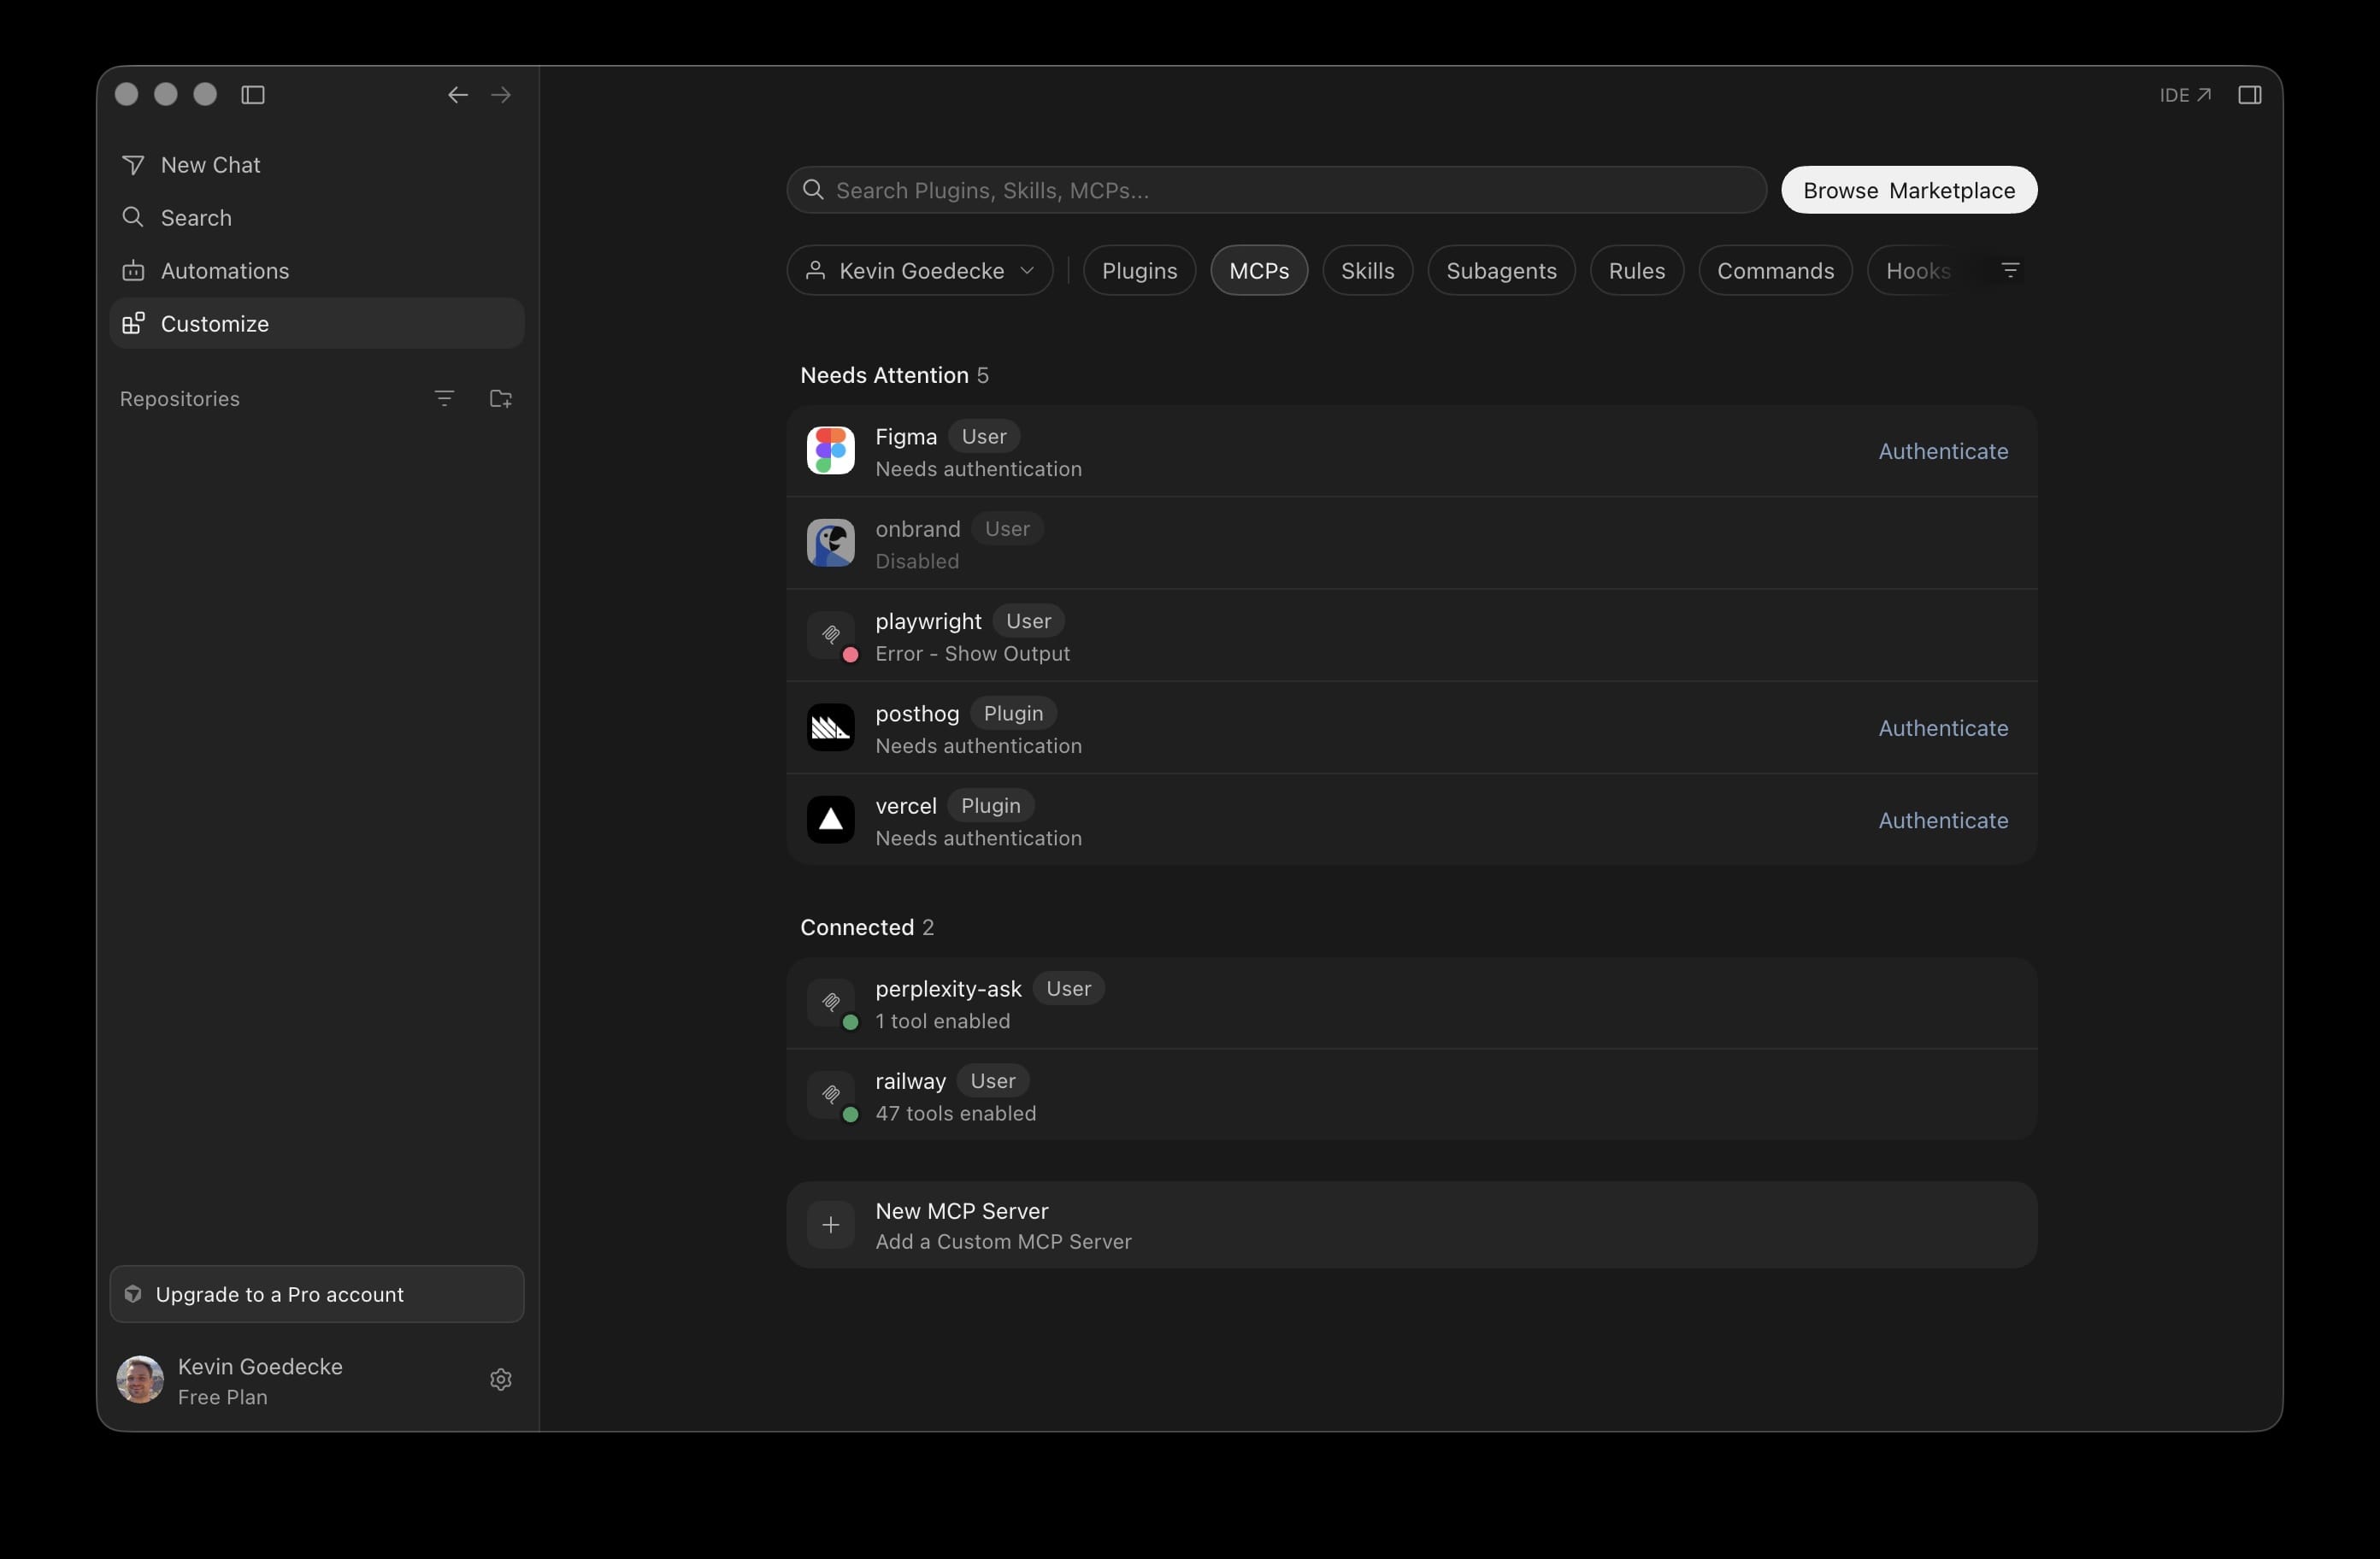
Switch to the MCPs tab and click New MCP Server at the bottom of the list:
That opens mcp.json — add the doop block from above and save:
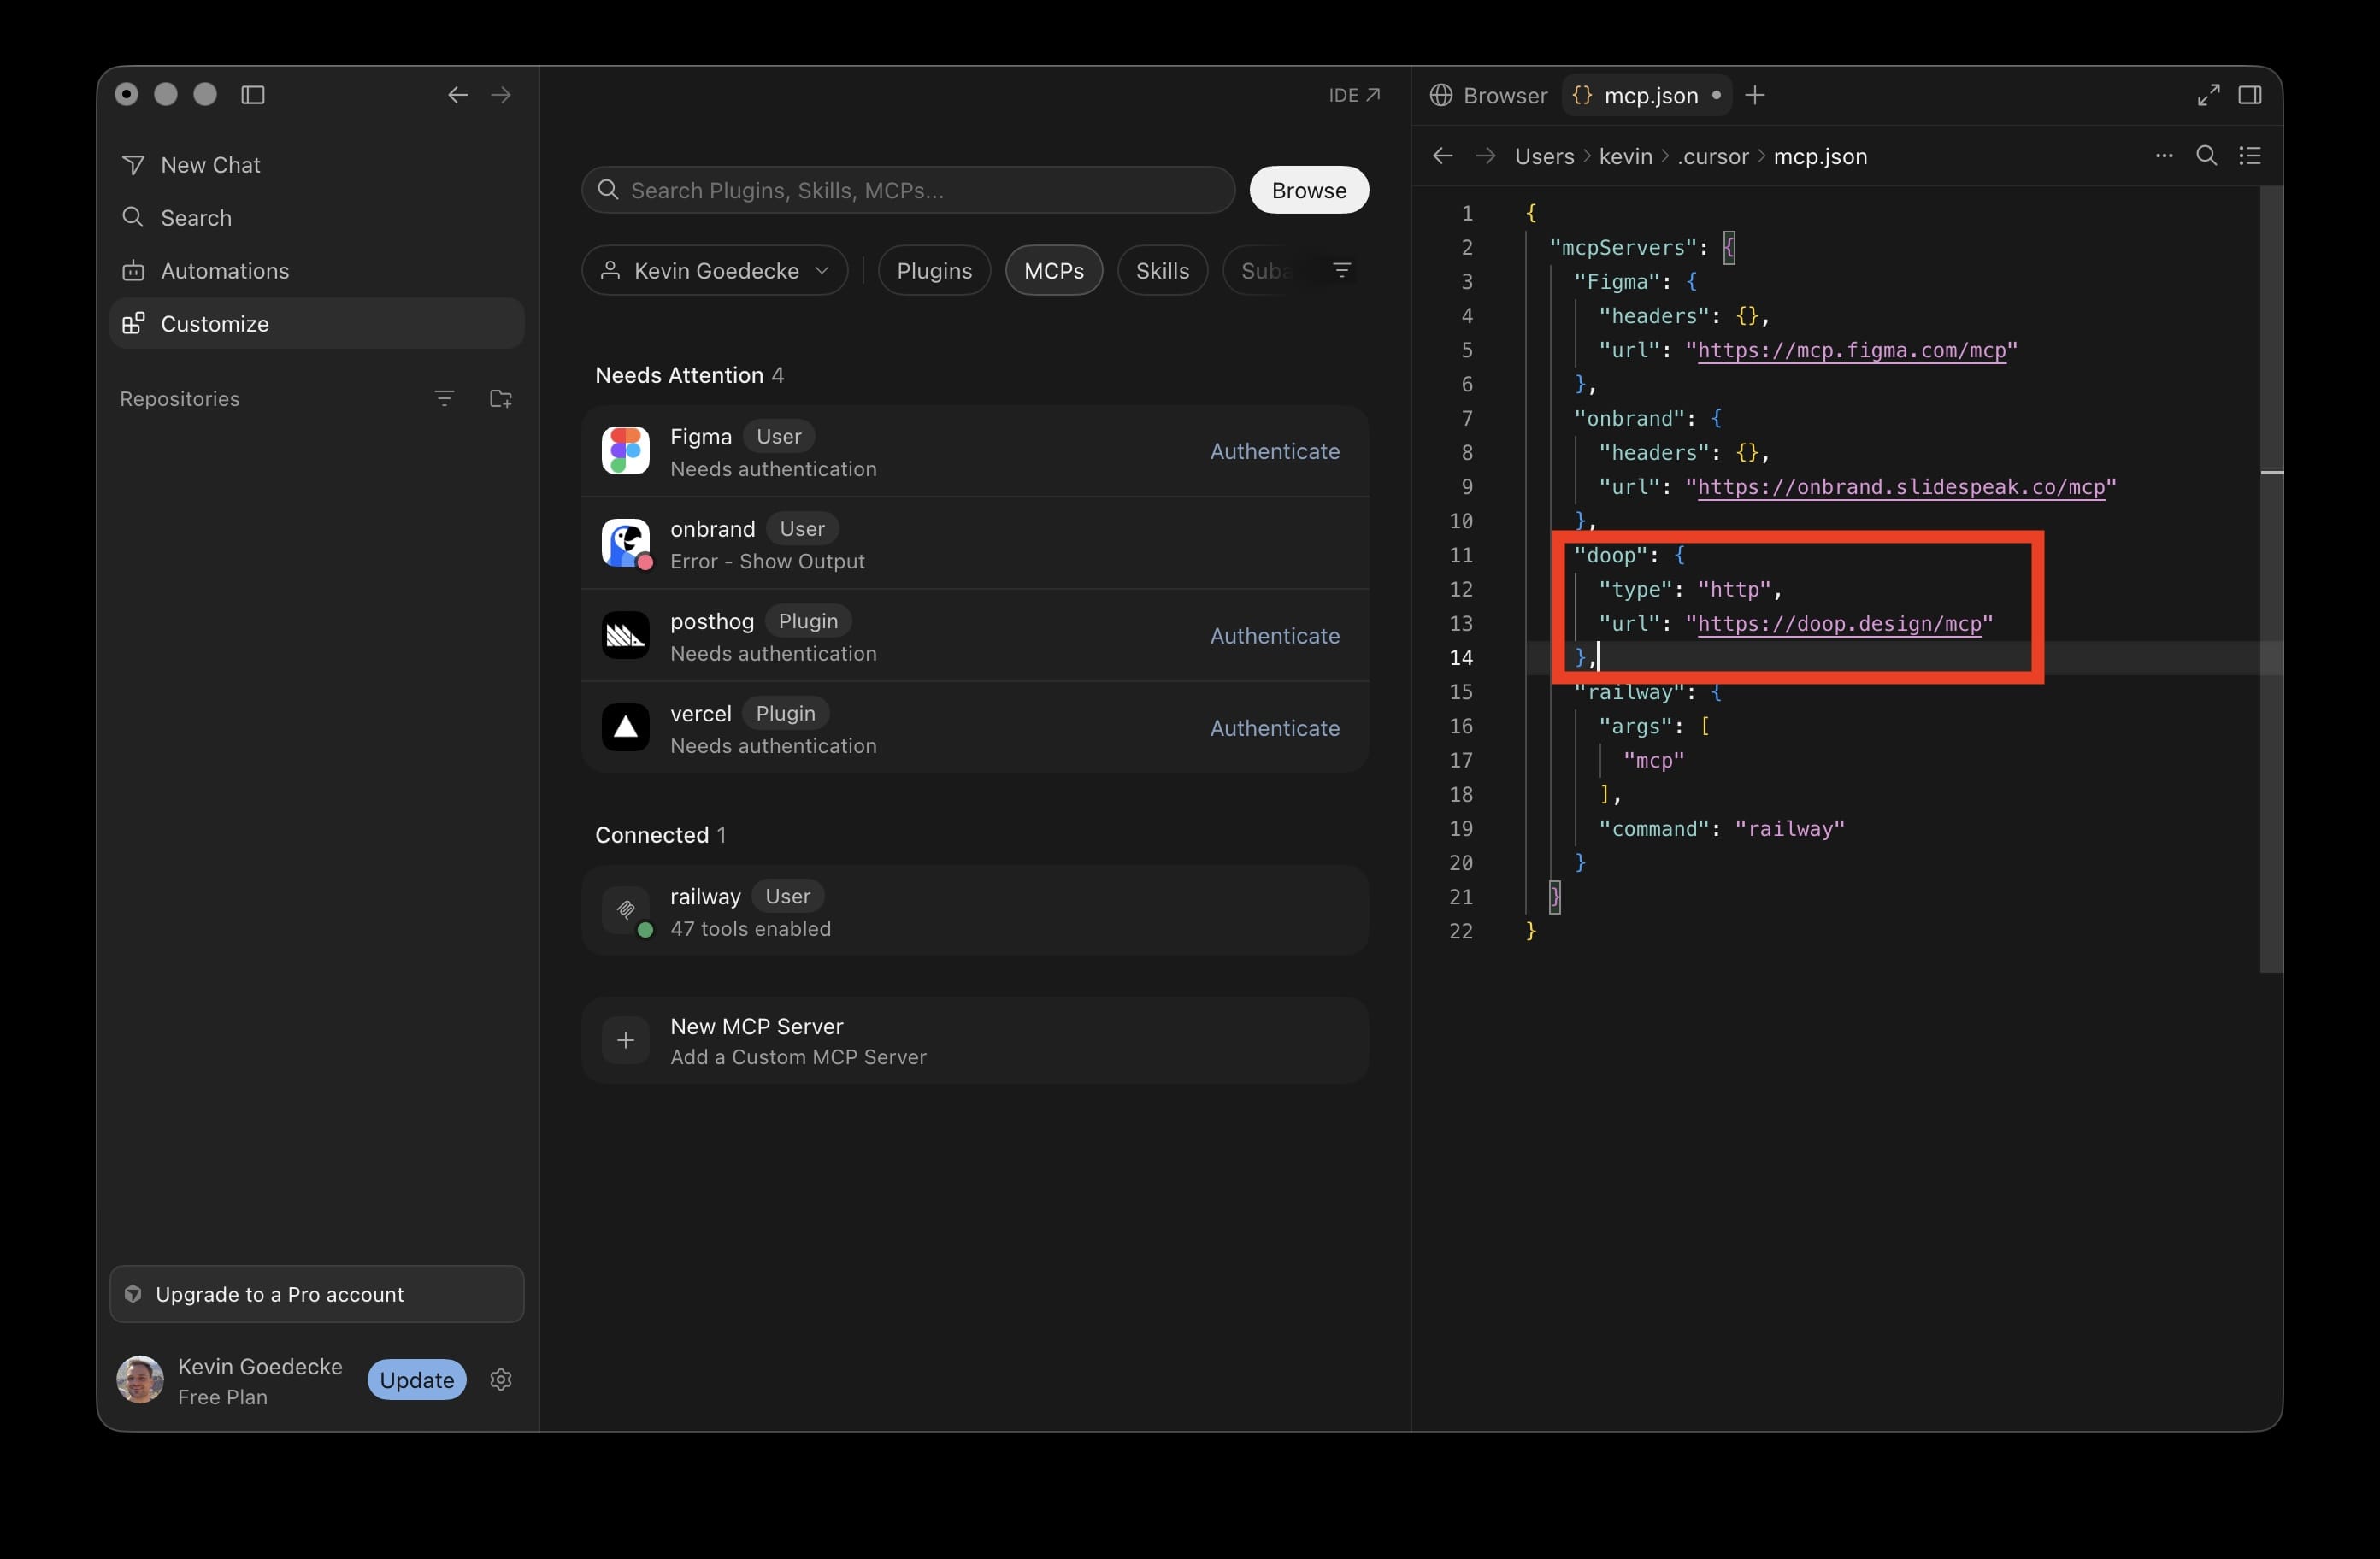
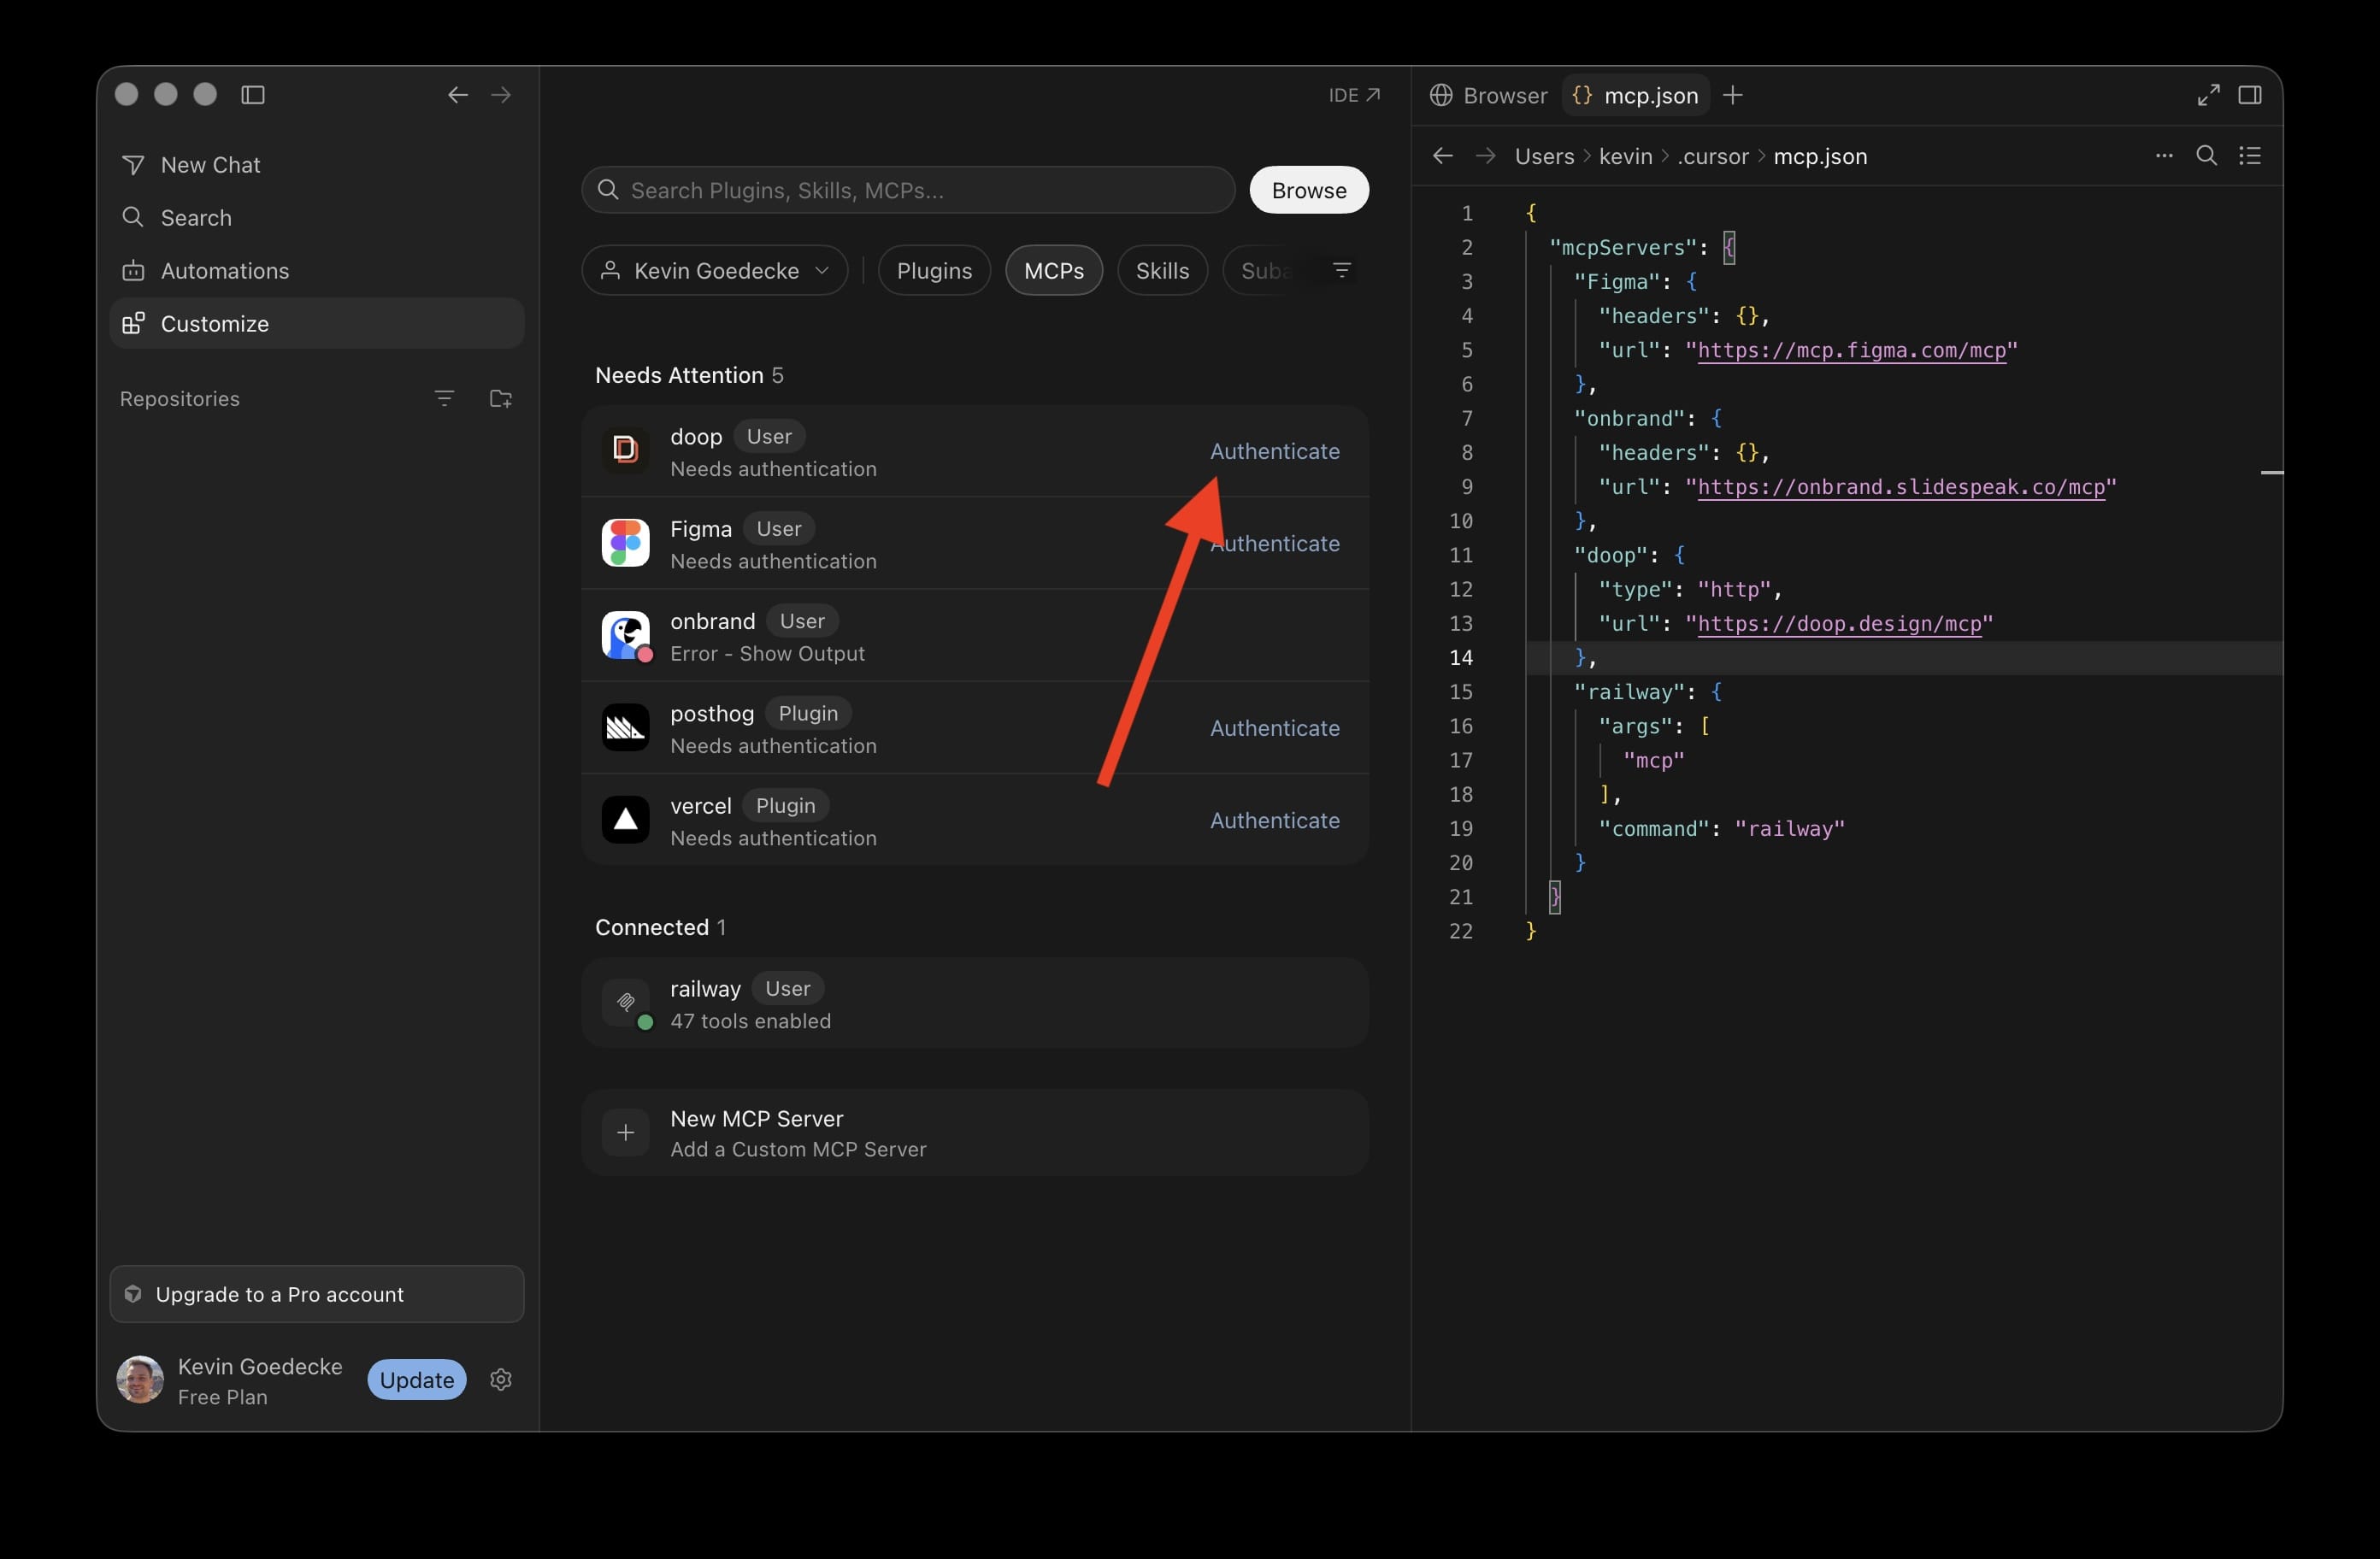
Doop appears under Needs Attention — click Authenticate and approve in the browser:
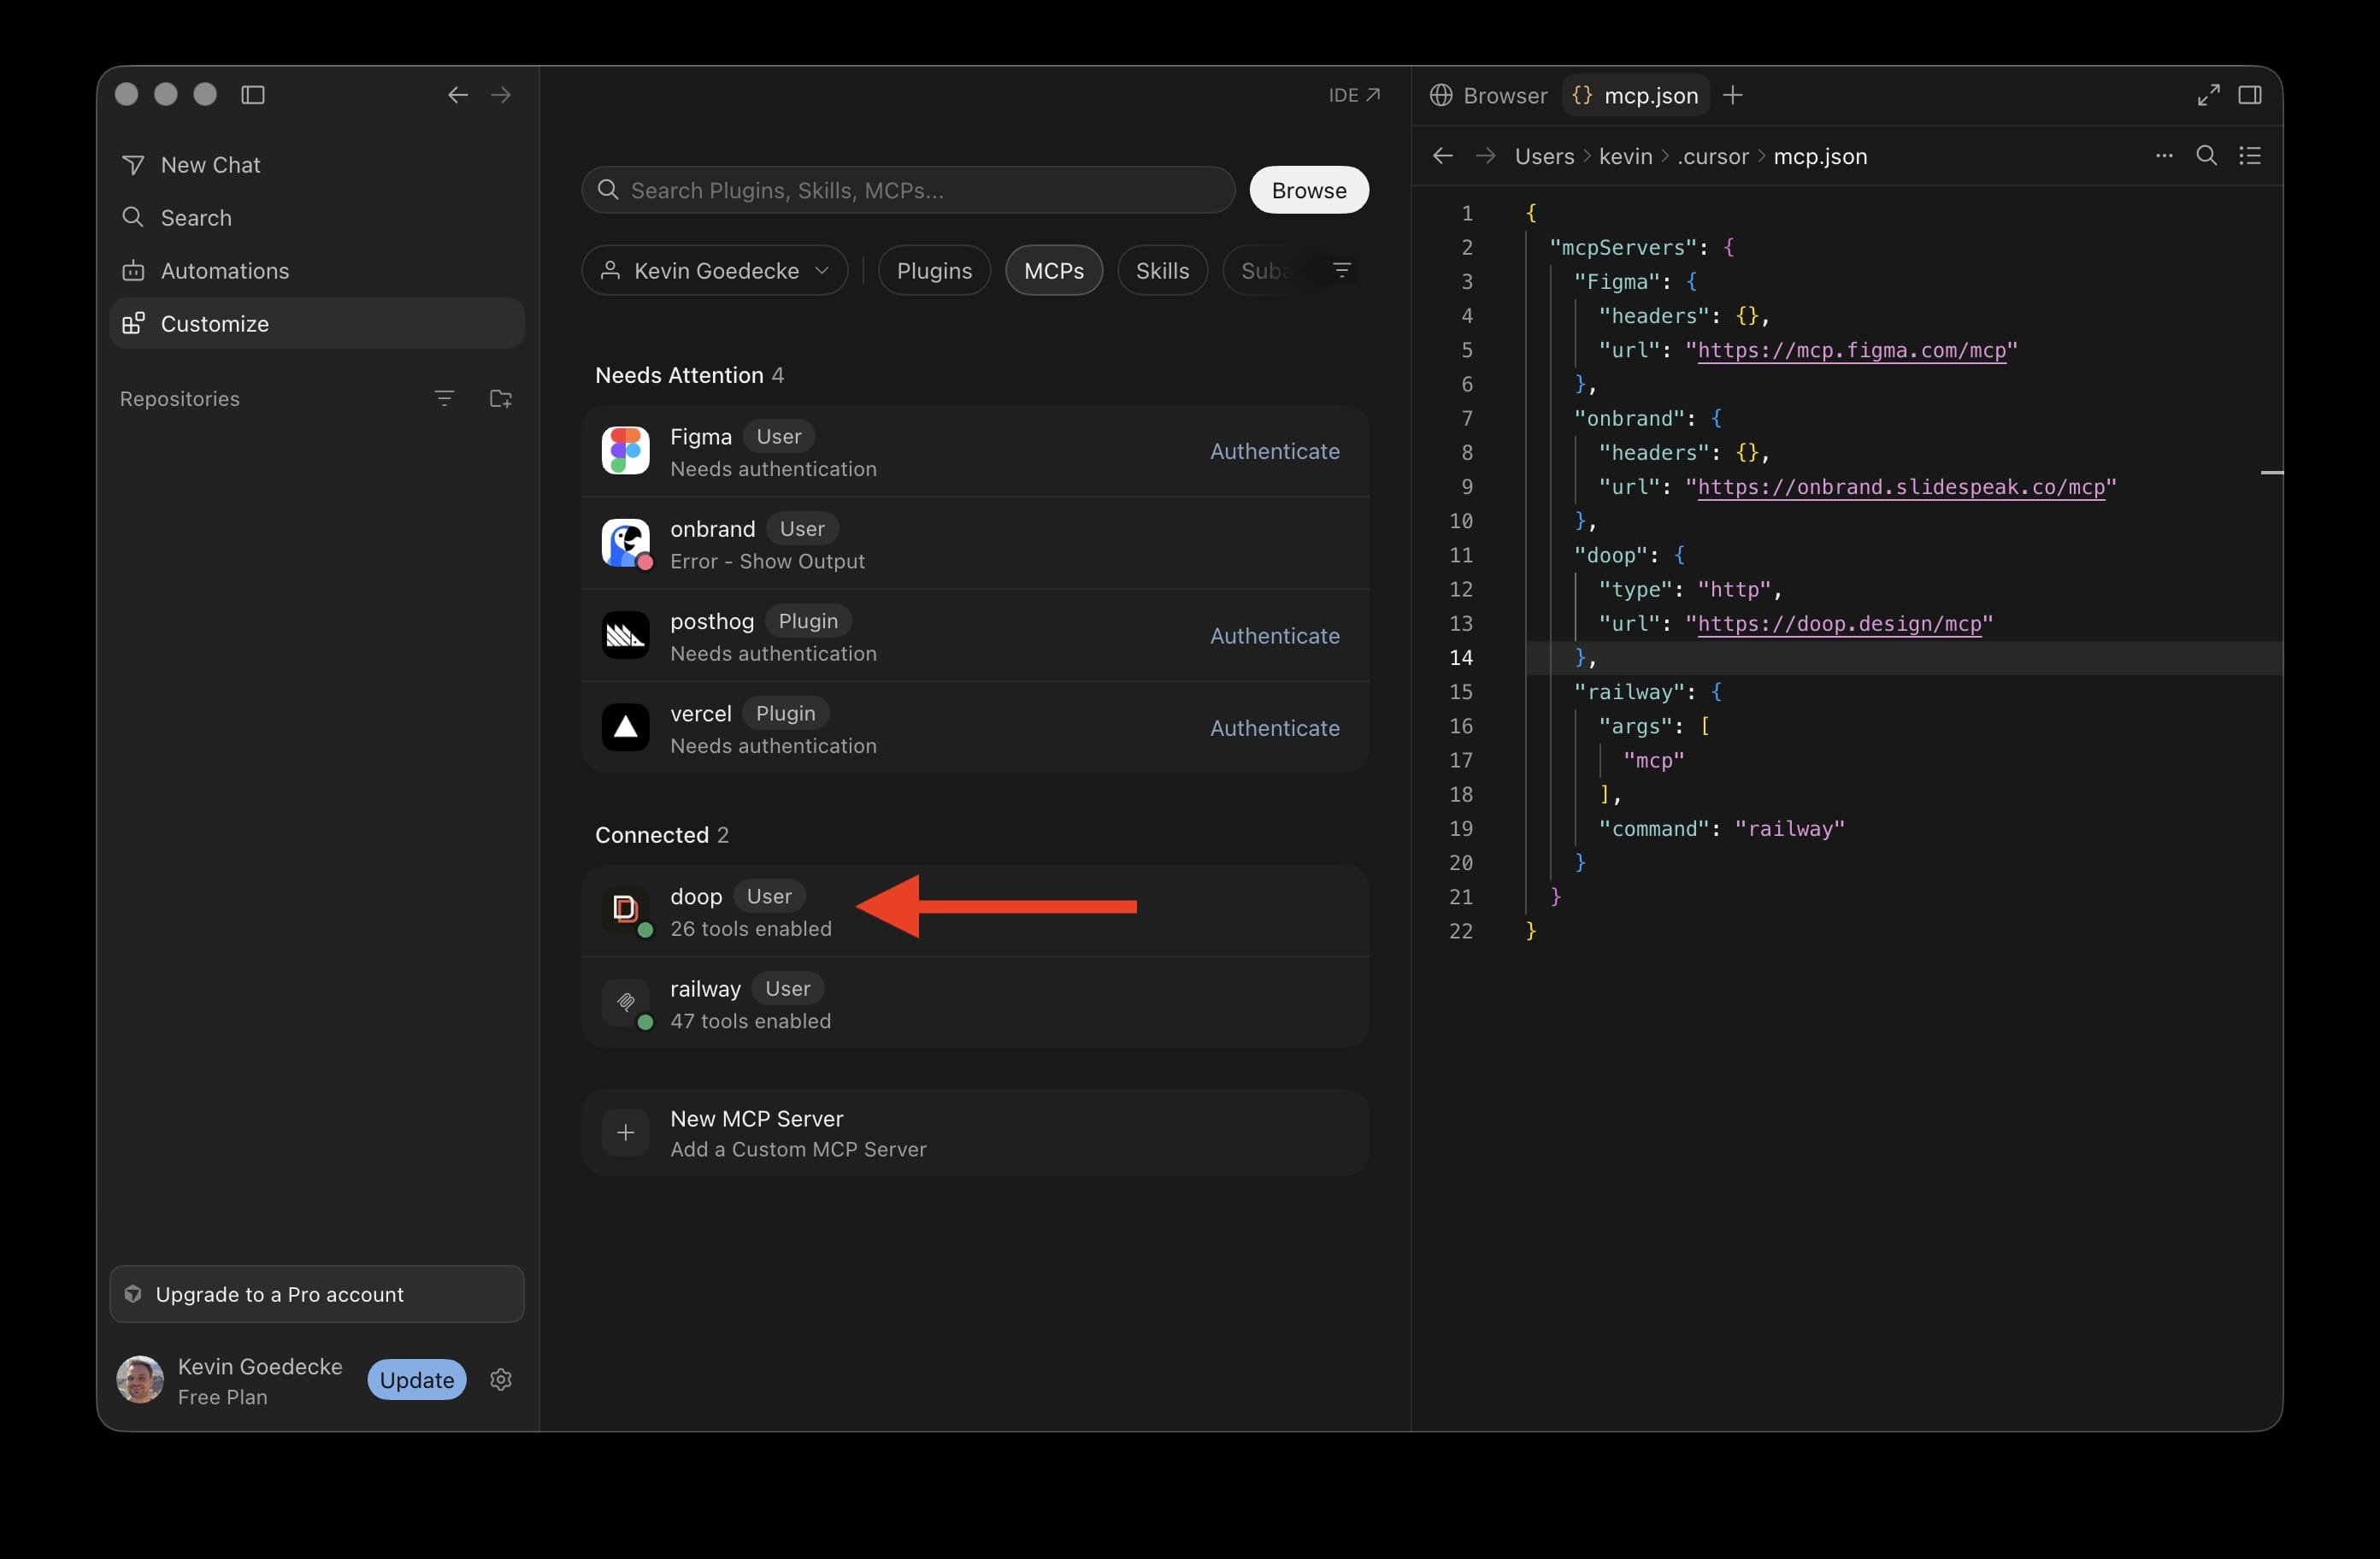
Once connected, doop shows up with its tools enabled:
Claude Desktop
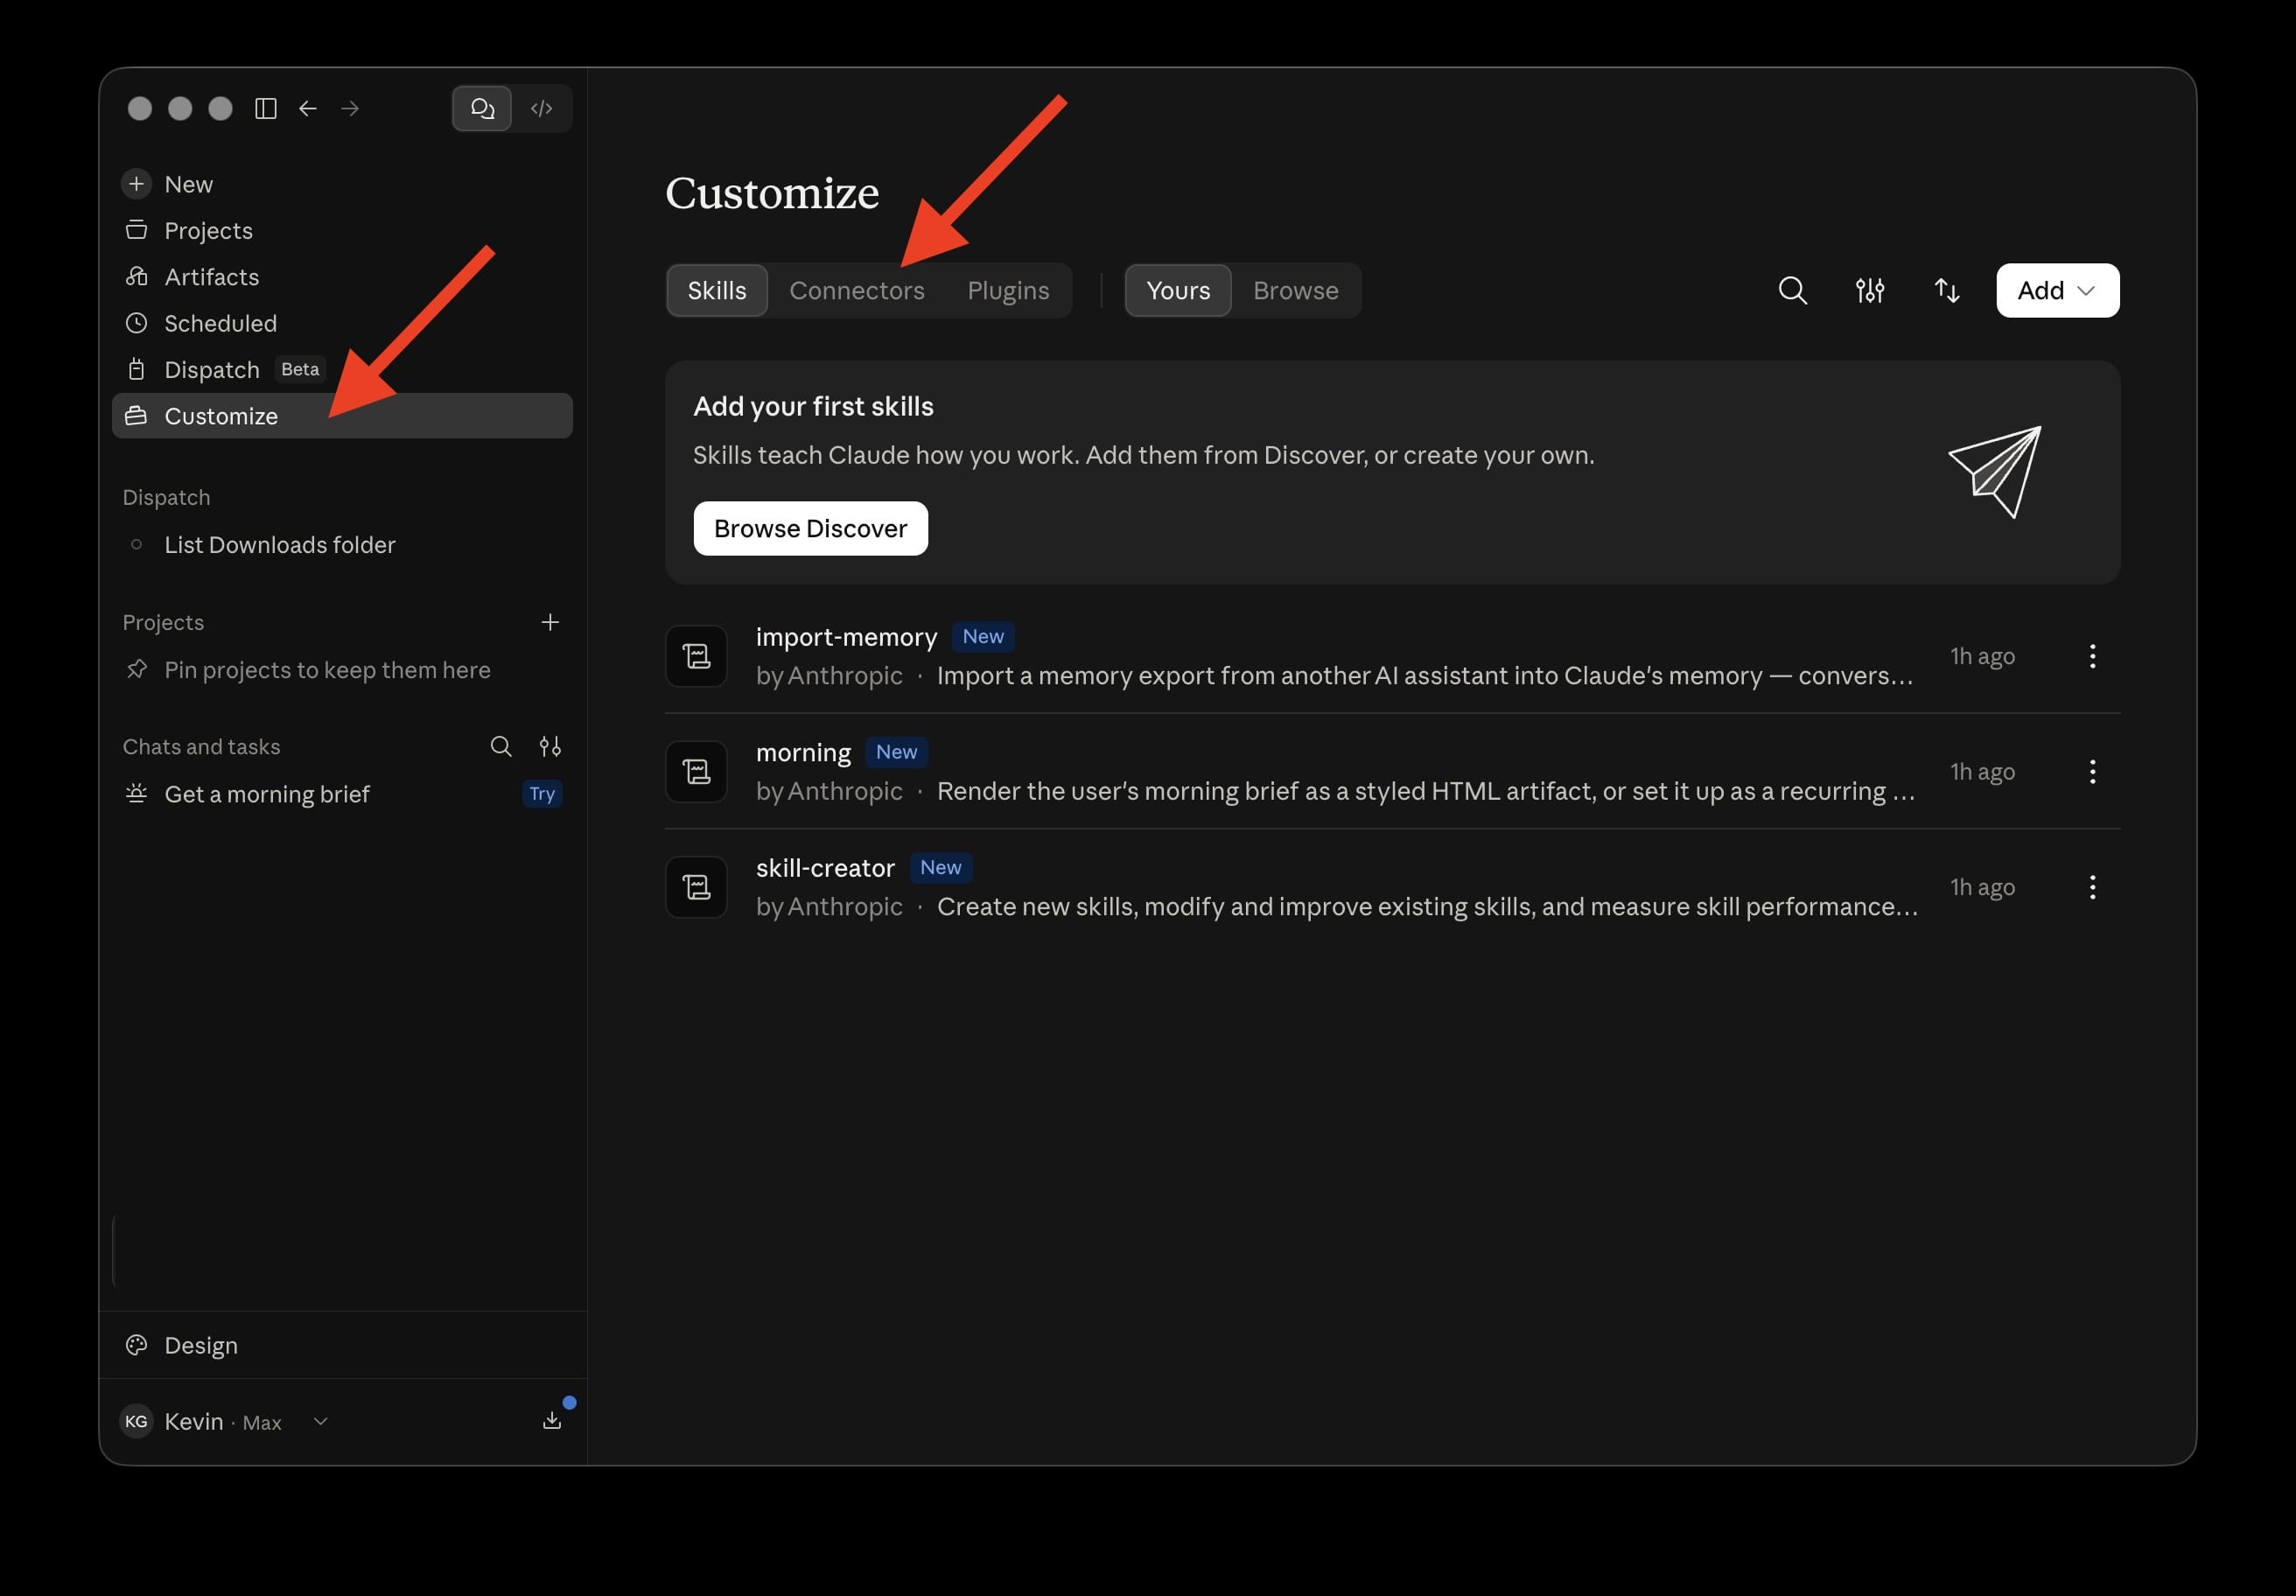
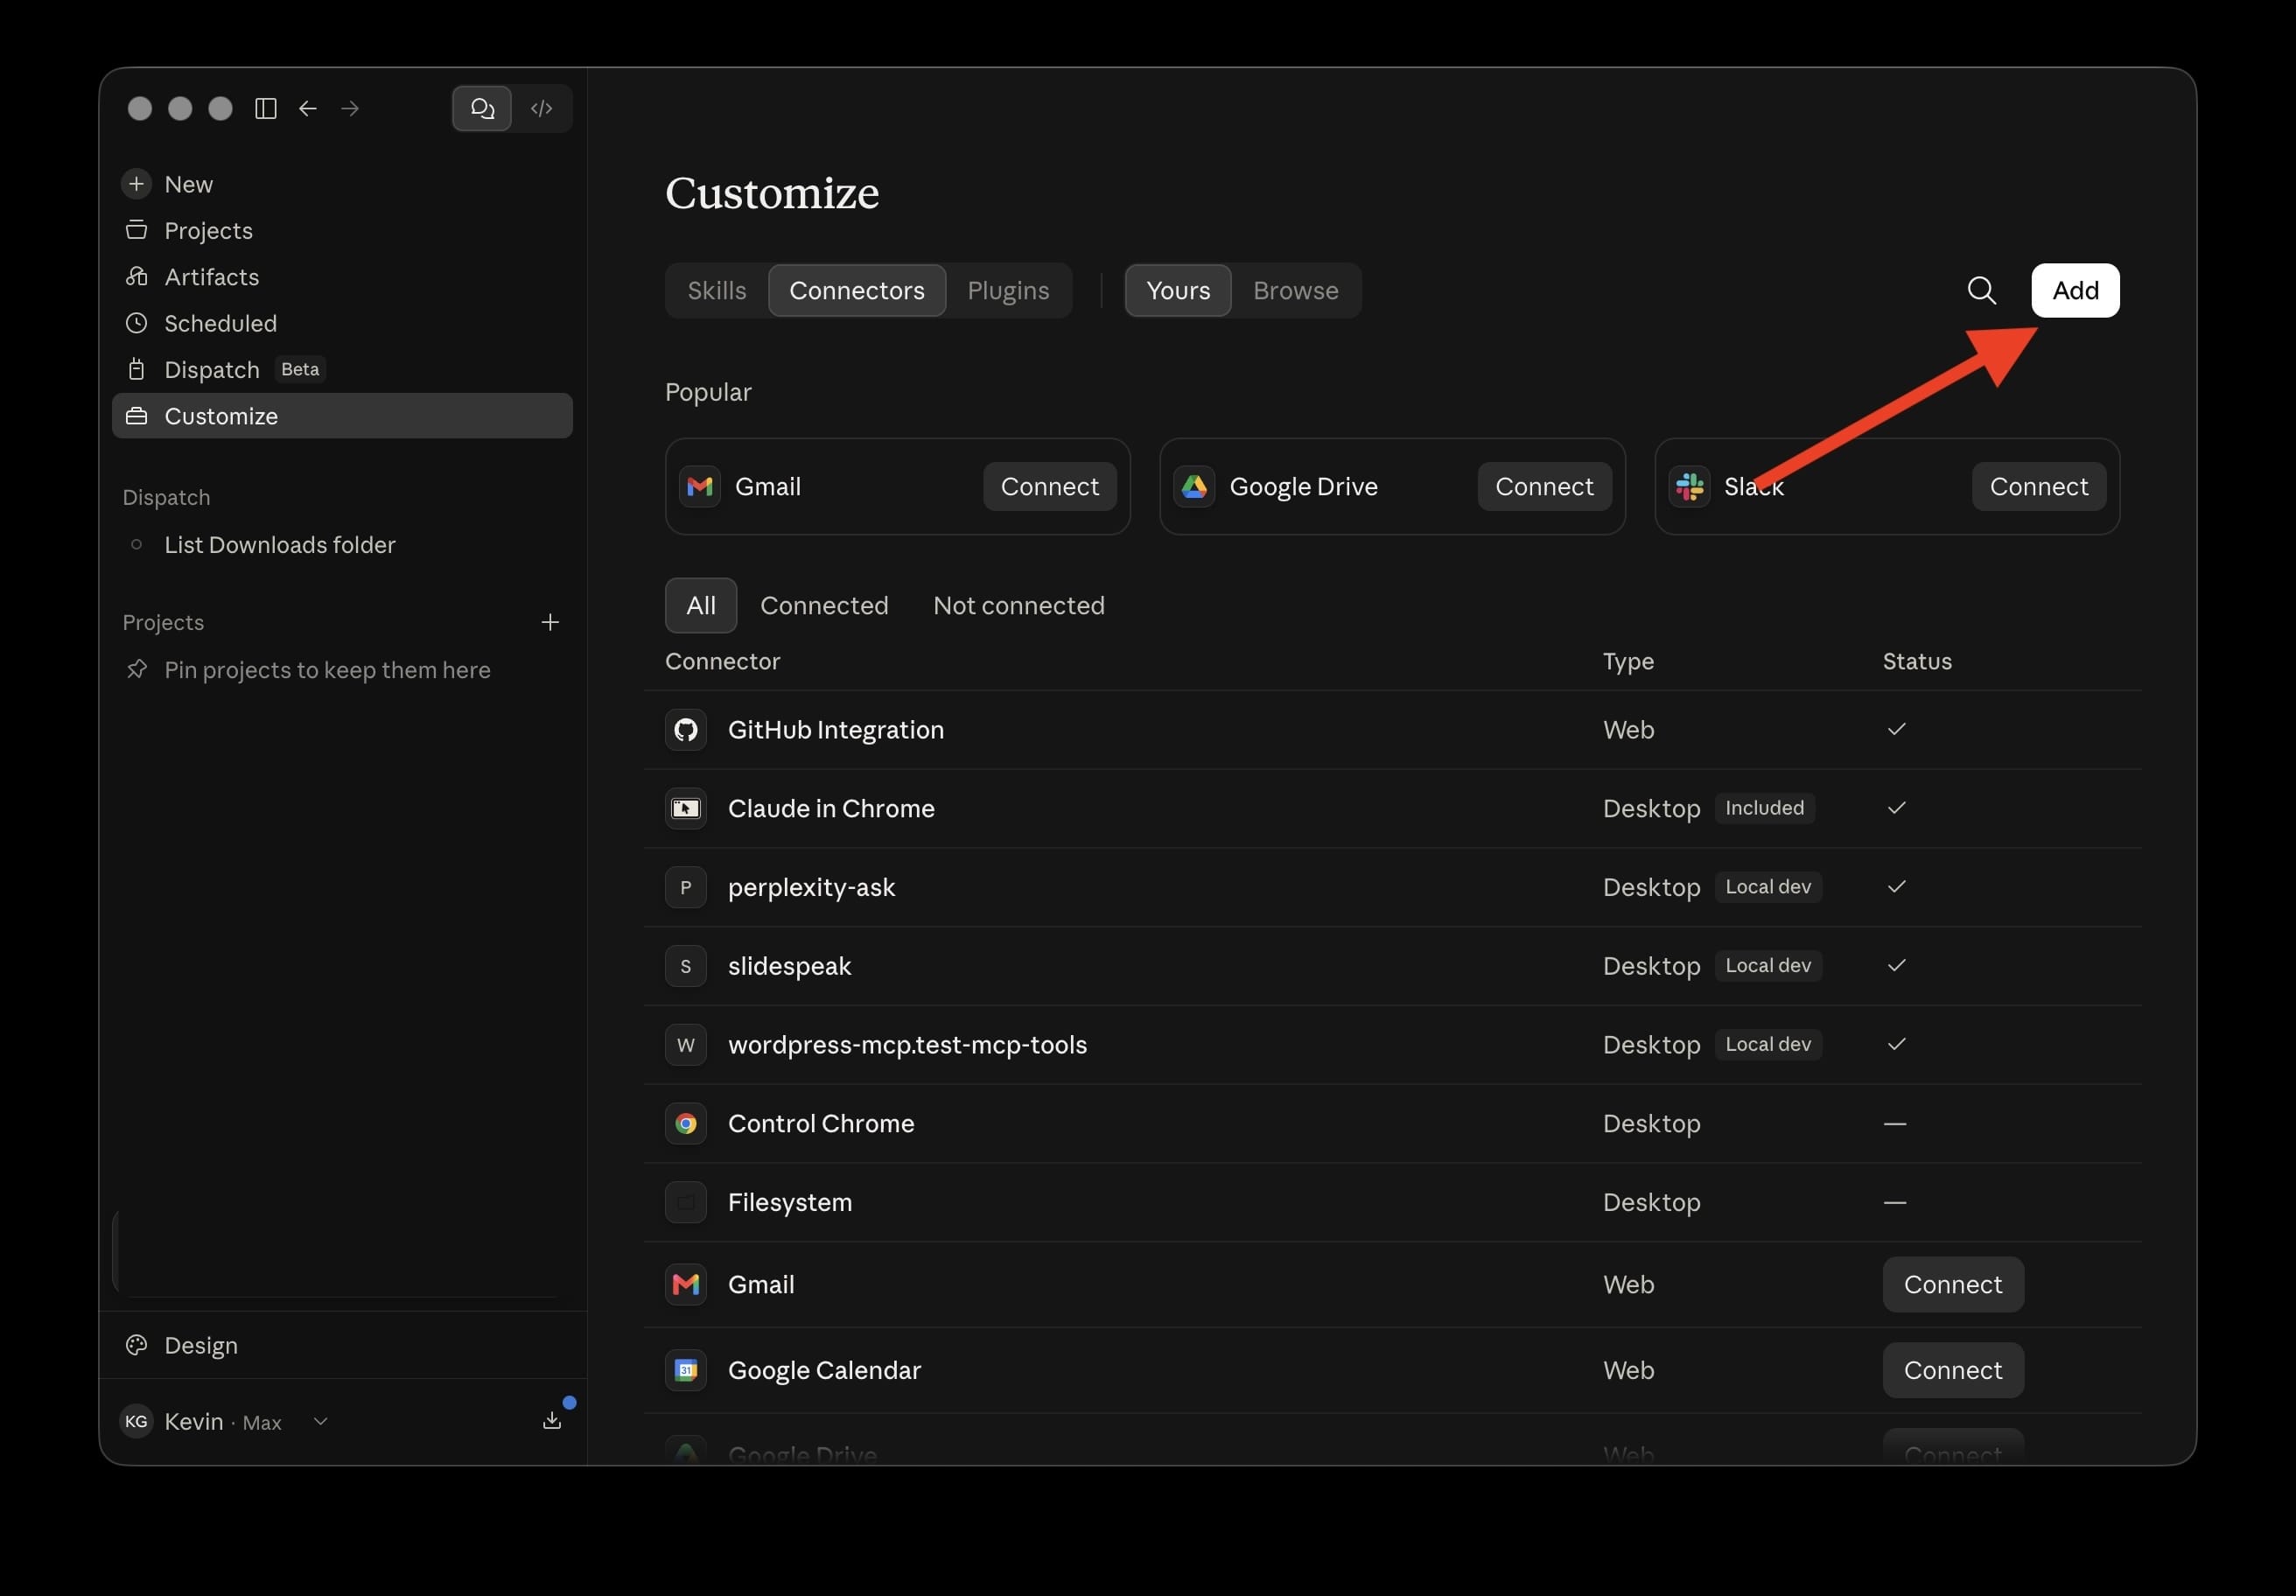
In the Claude desktop app, open Customize in the sidebar and switch to the Connectors tab:
Click Add:
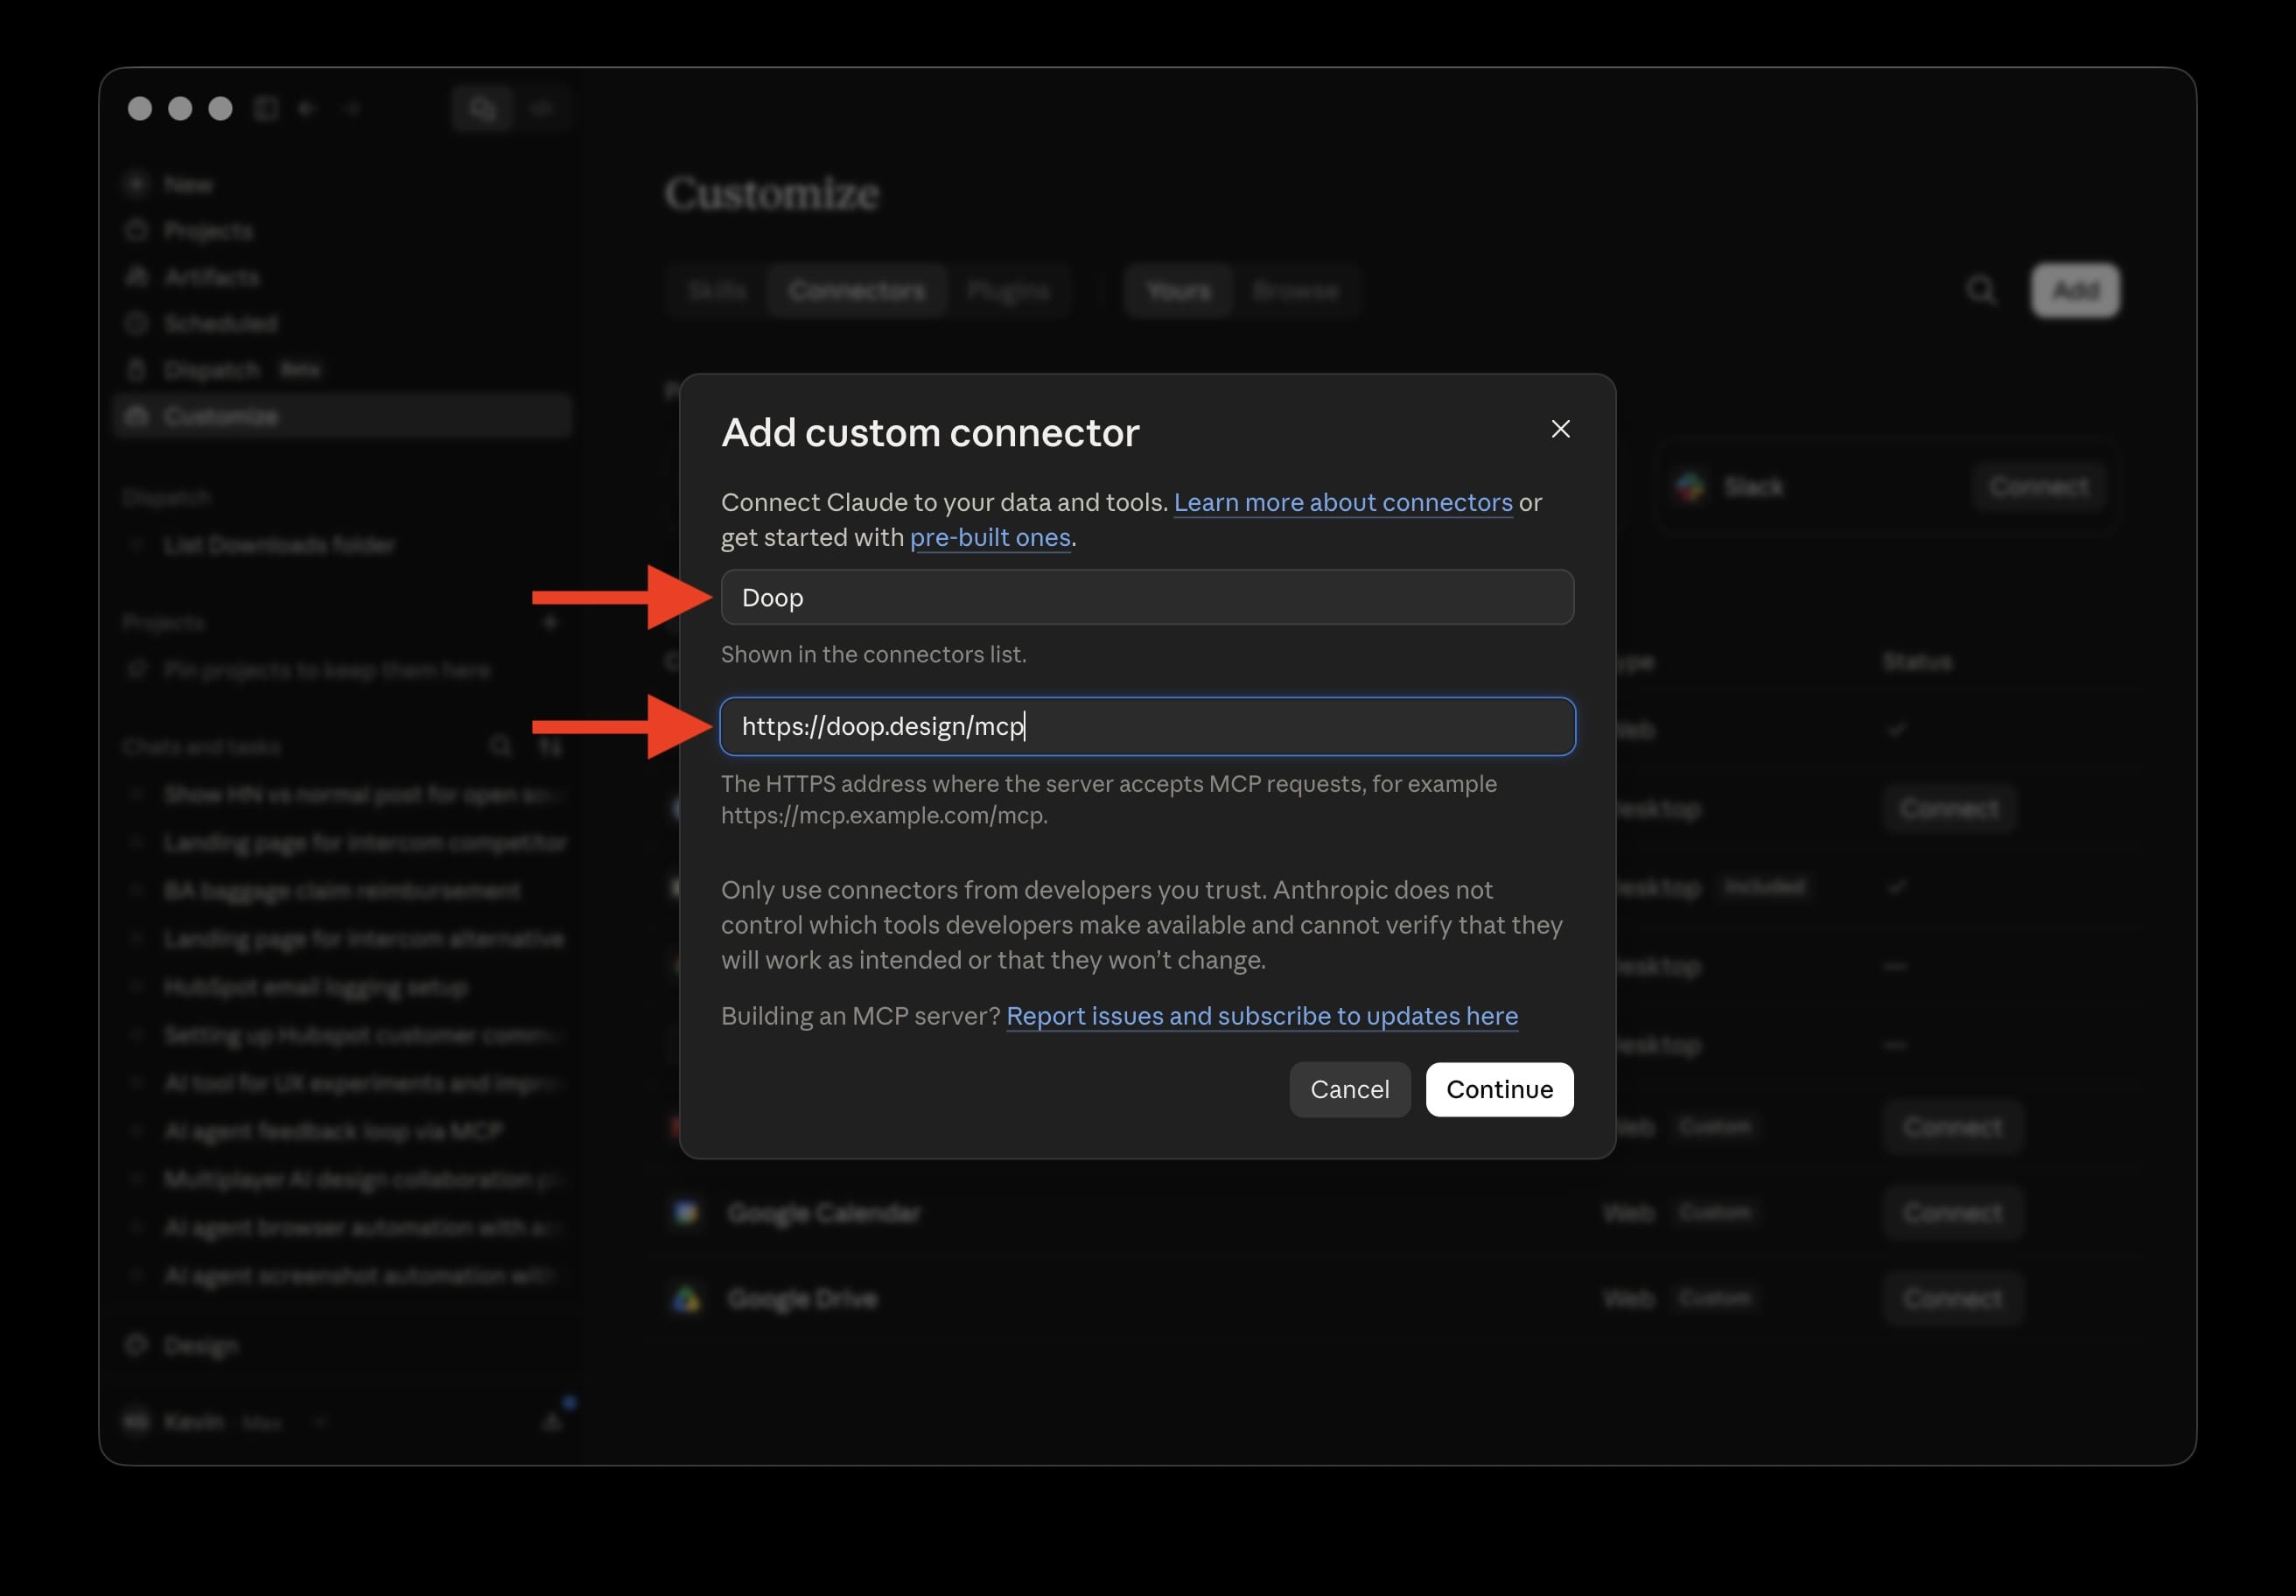
Name the connector Doop, set the URL to https://doop.design/mcp, and hit
Continue:
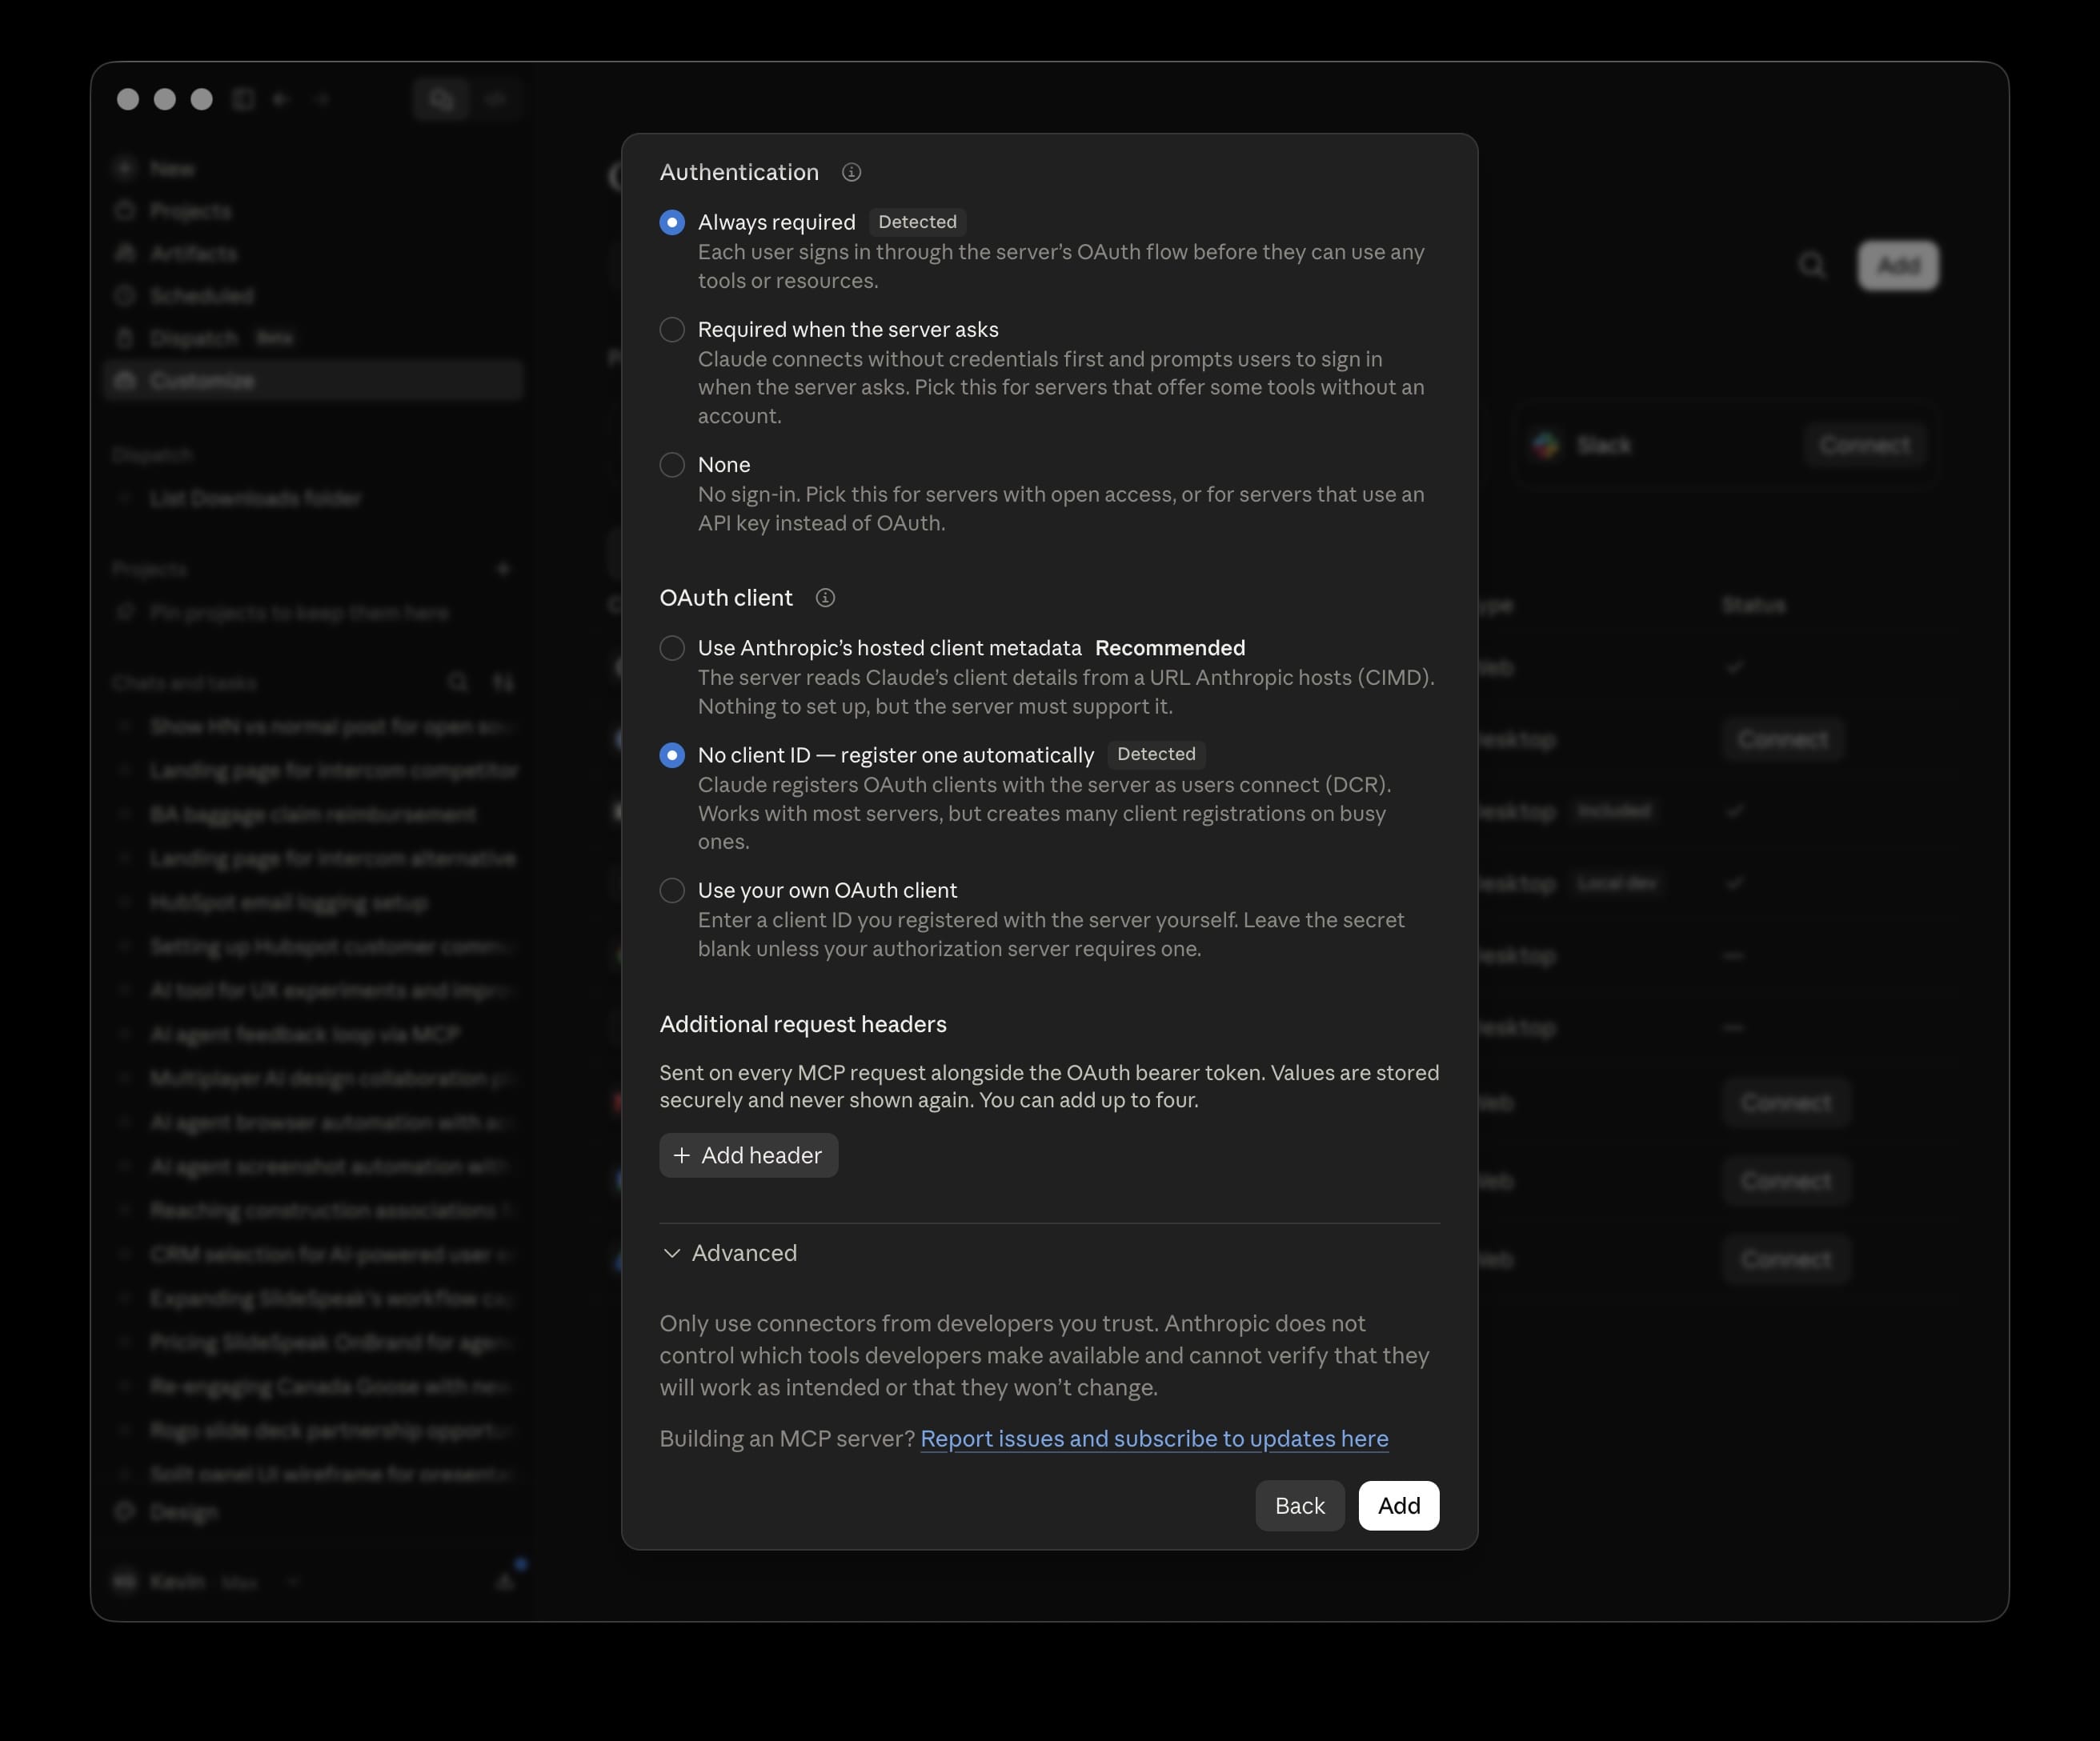
Claude detects the right authentication settings automatically — leave the defaults and click Add:
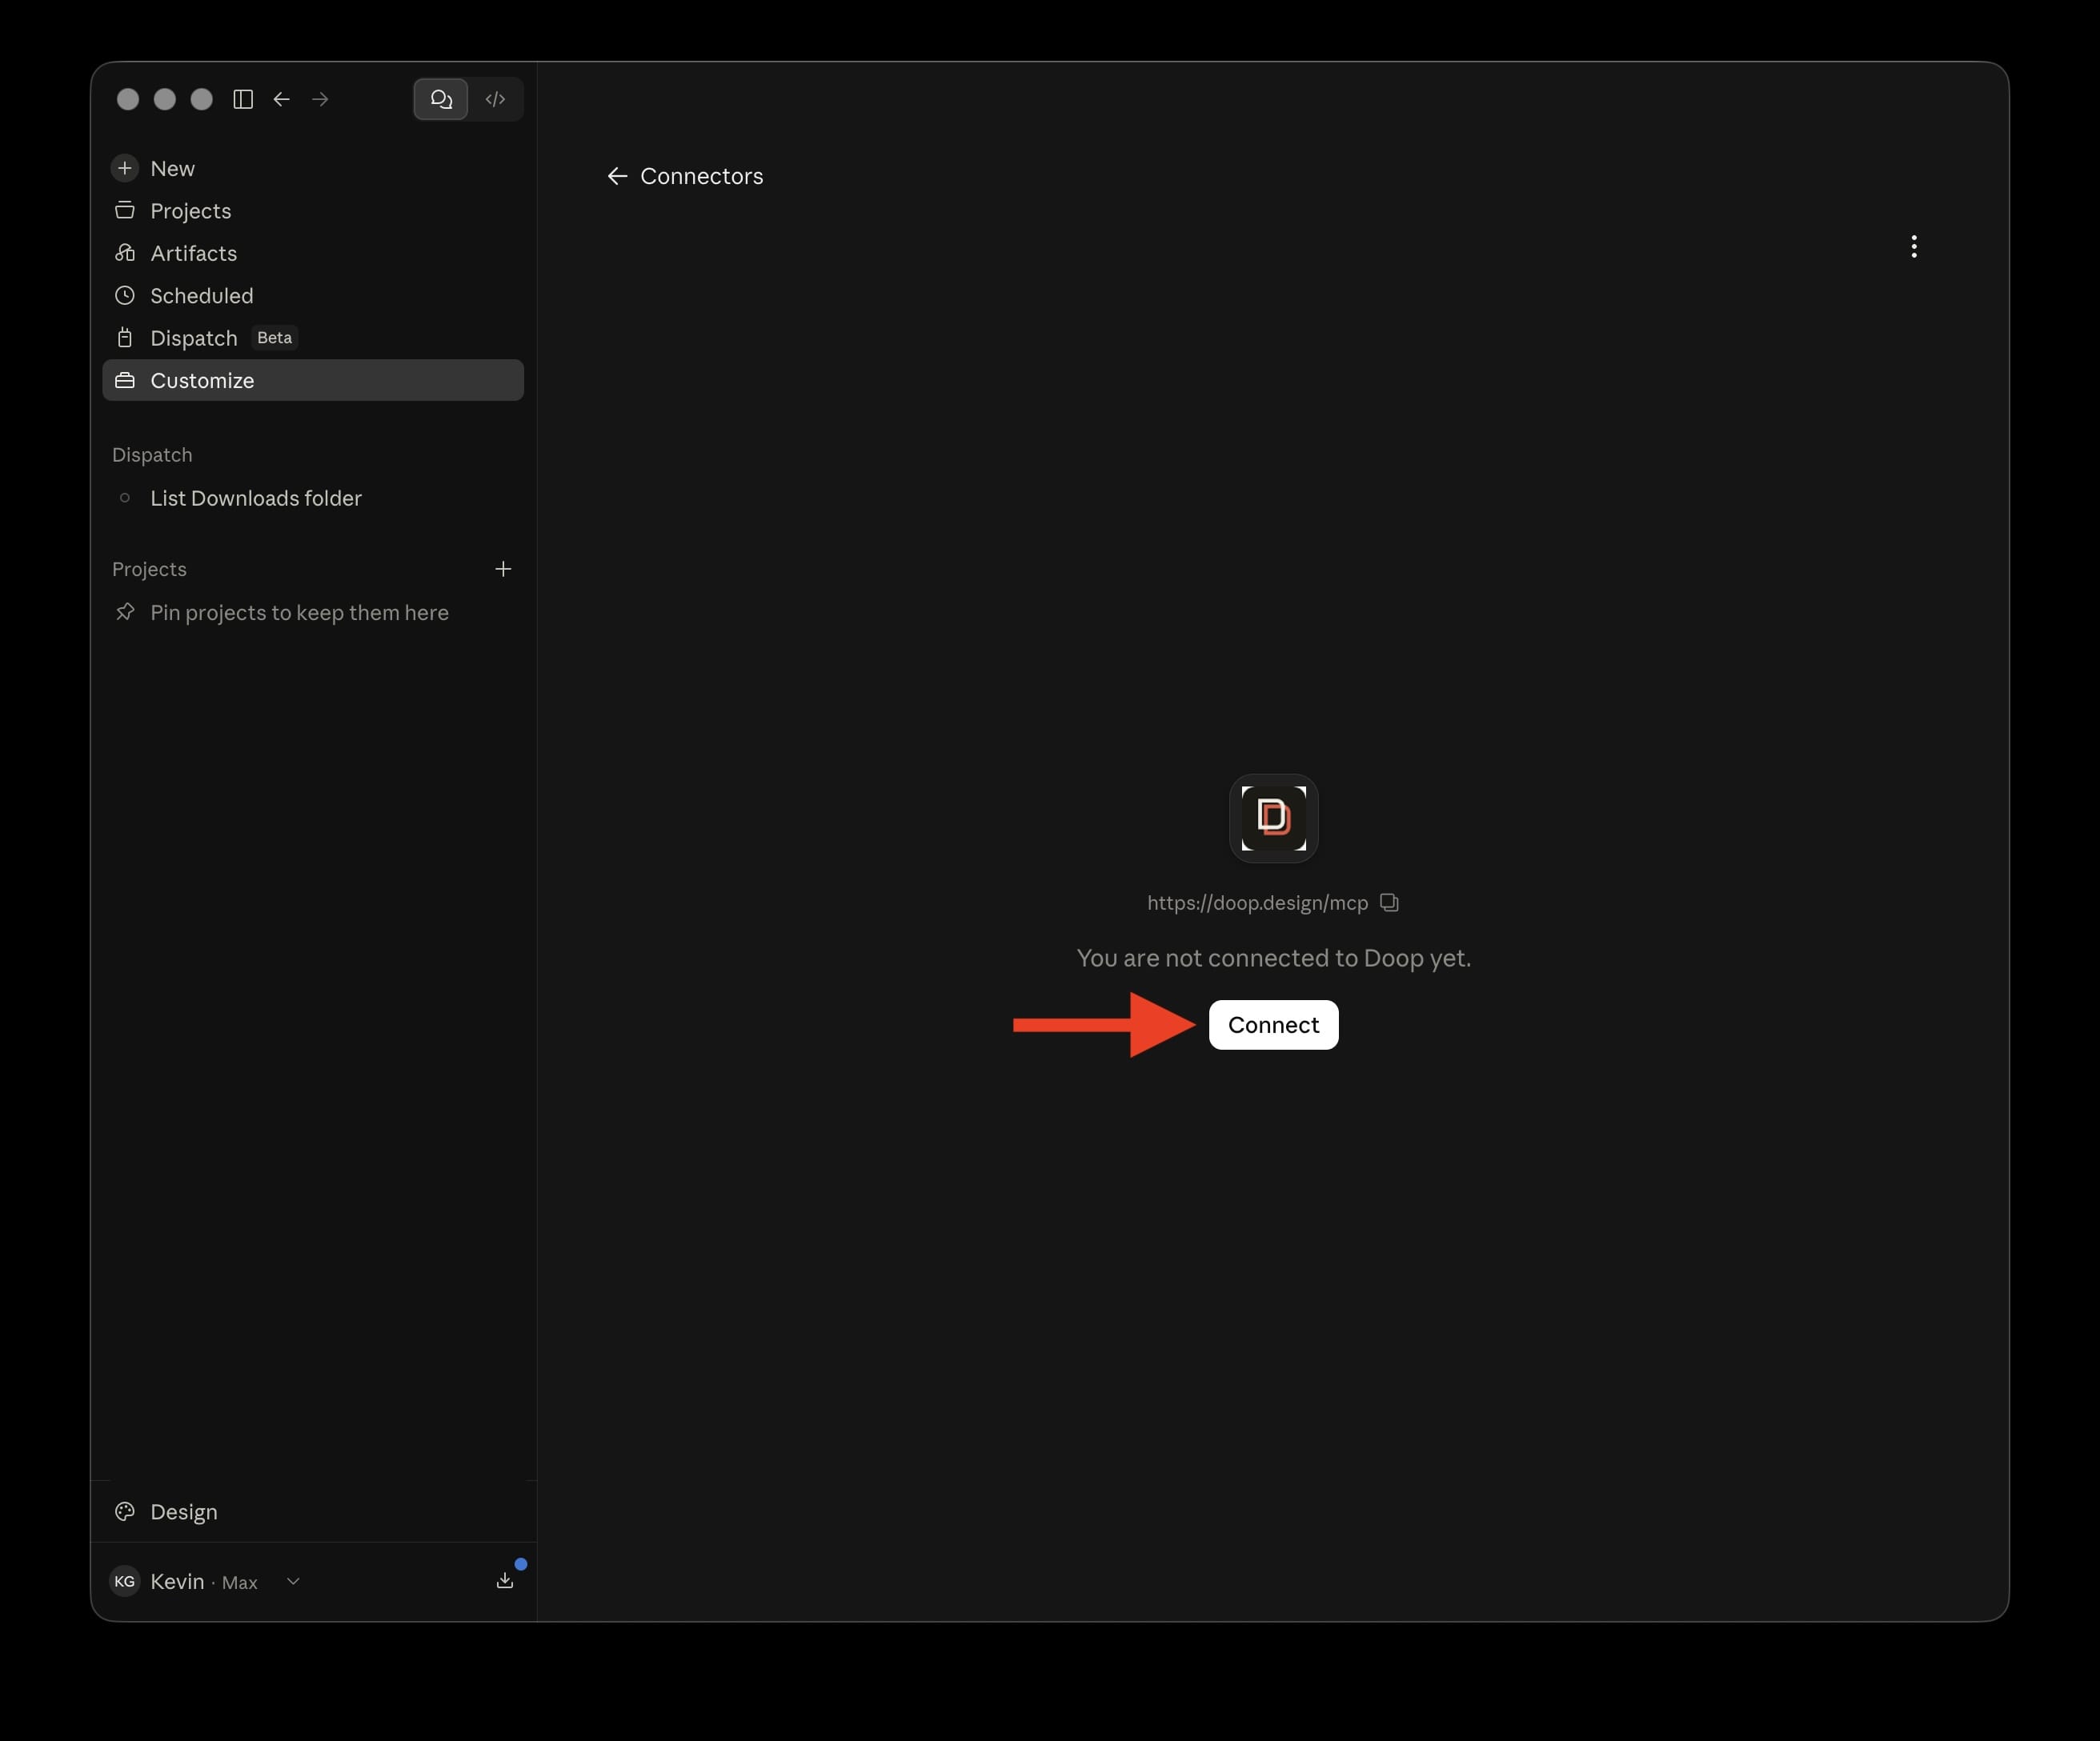
Open the new connector and click Connect to run the sign-in in your browser:
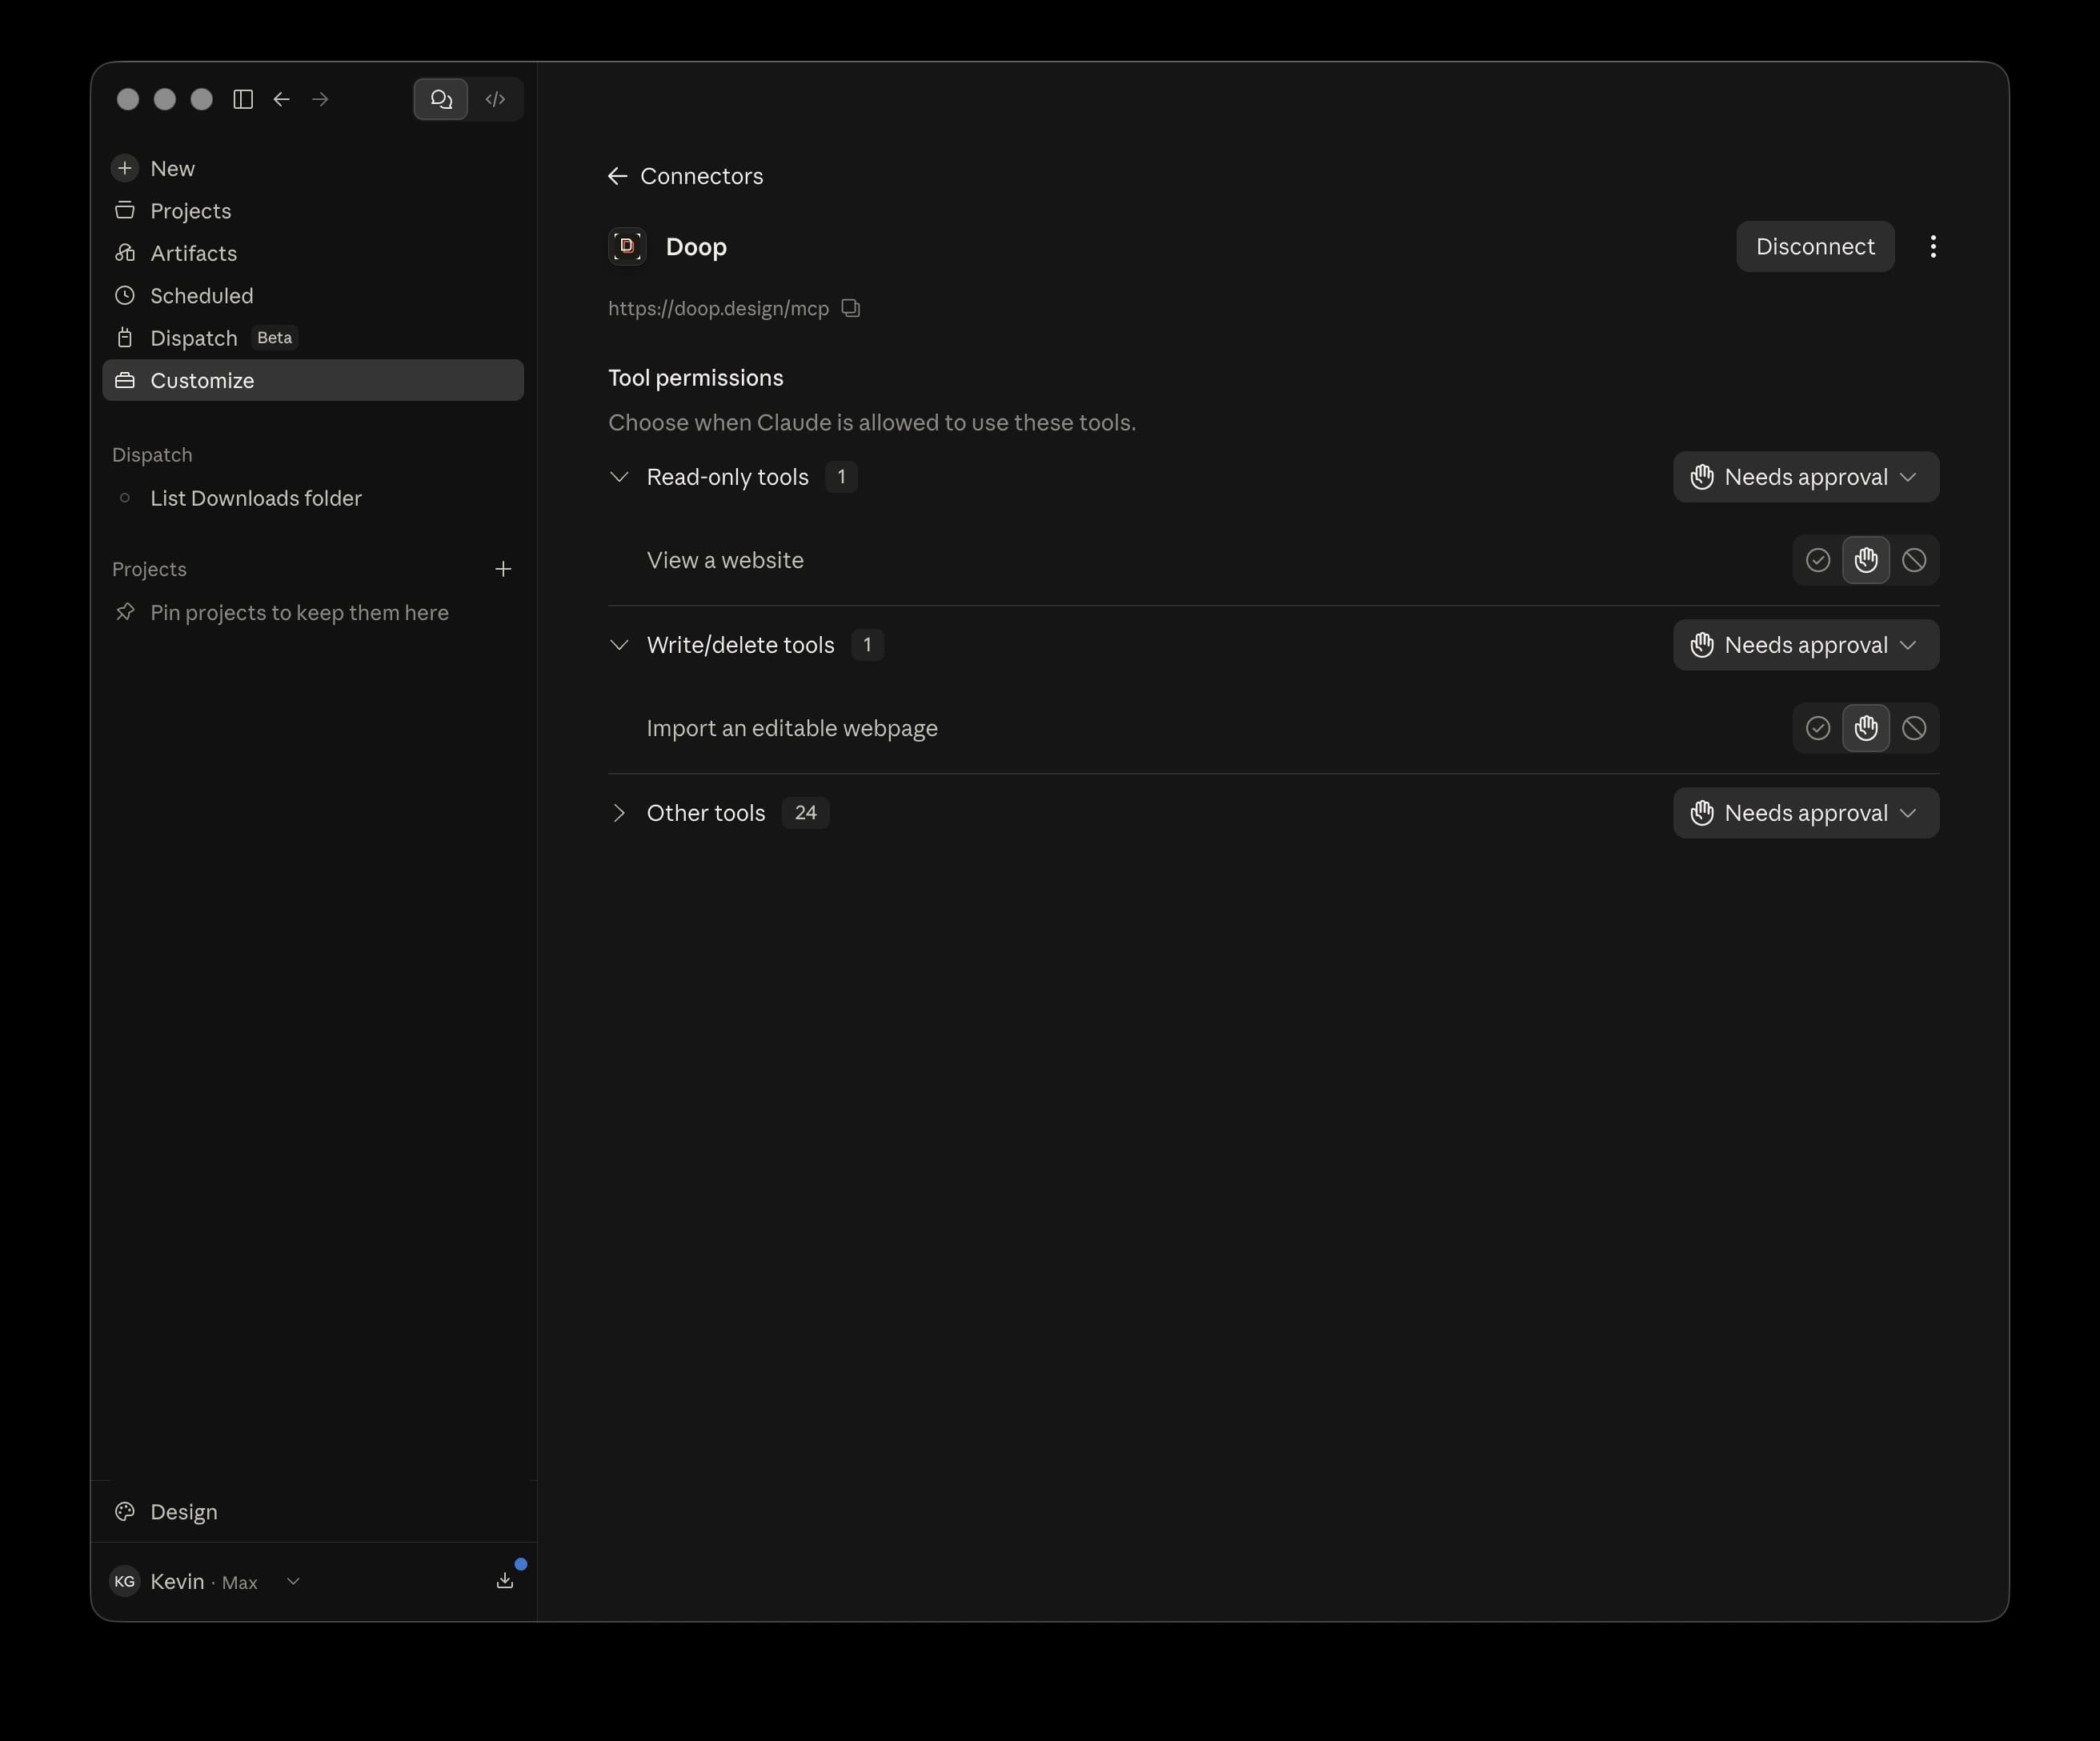
Once connected, you can fine-tune which Doop tools run freely and which need your approval:
Copilot (VS Code)
Create .vscode/mcp.json in your workspace:
{
  "servers": {
    "doop": {
      "type": "http",
      "url": "https://doop.design/mcp"
    }
  }
}
Any other MCP client
Point it at https://doop.design/mcp as a streamable HTTP server. The generic config shape most clients
accept:
{
  "mcpServers": {
    "doop": { "type": "http", "url": "https://doop.design/mcp" }
  }
}
3. Approve the connection
The first time your agent calls Doop, a browser window opens. Sign in (if you aren't already) and approve the connection. From then on the agent's token carries your identity: its presence, cursors, and tasks are attributed to you — no anonymous edits, its work literally reads "for you".
4. Say hello
Give your agent a canvas URL and a brief, for example:
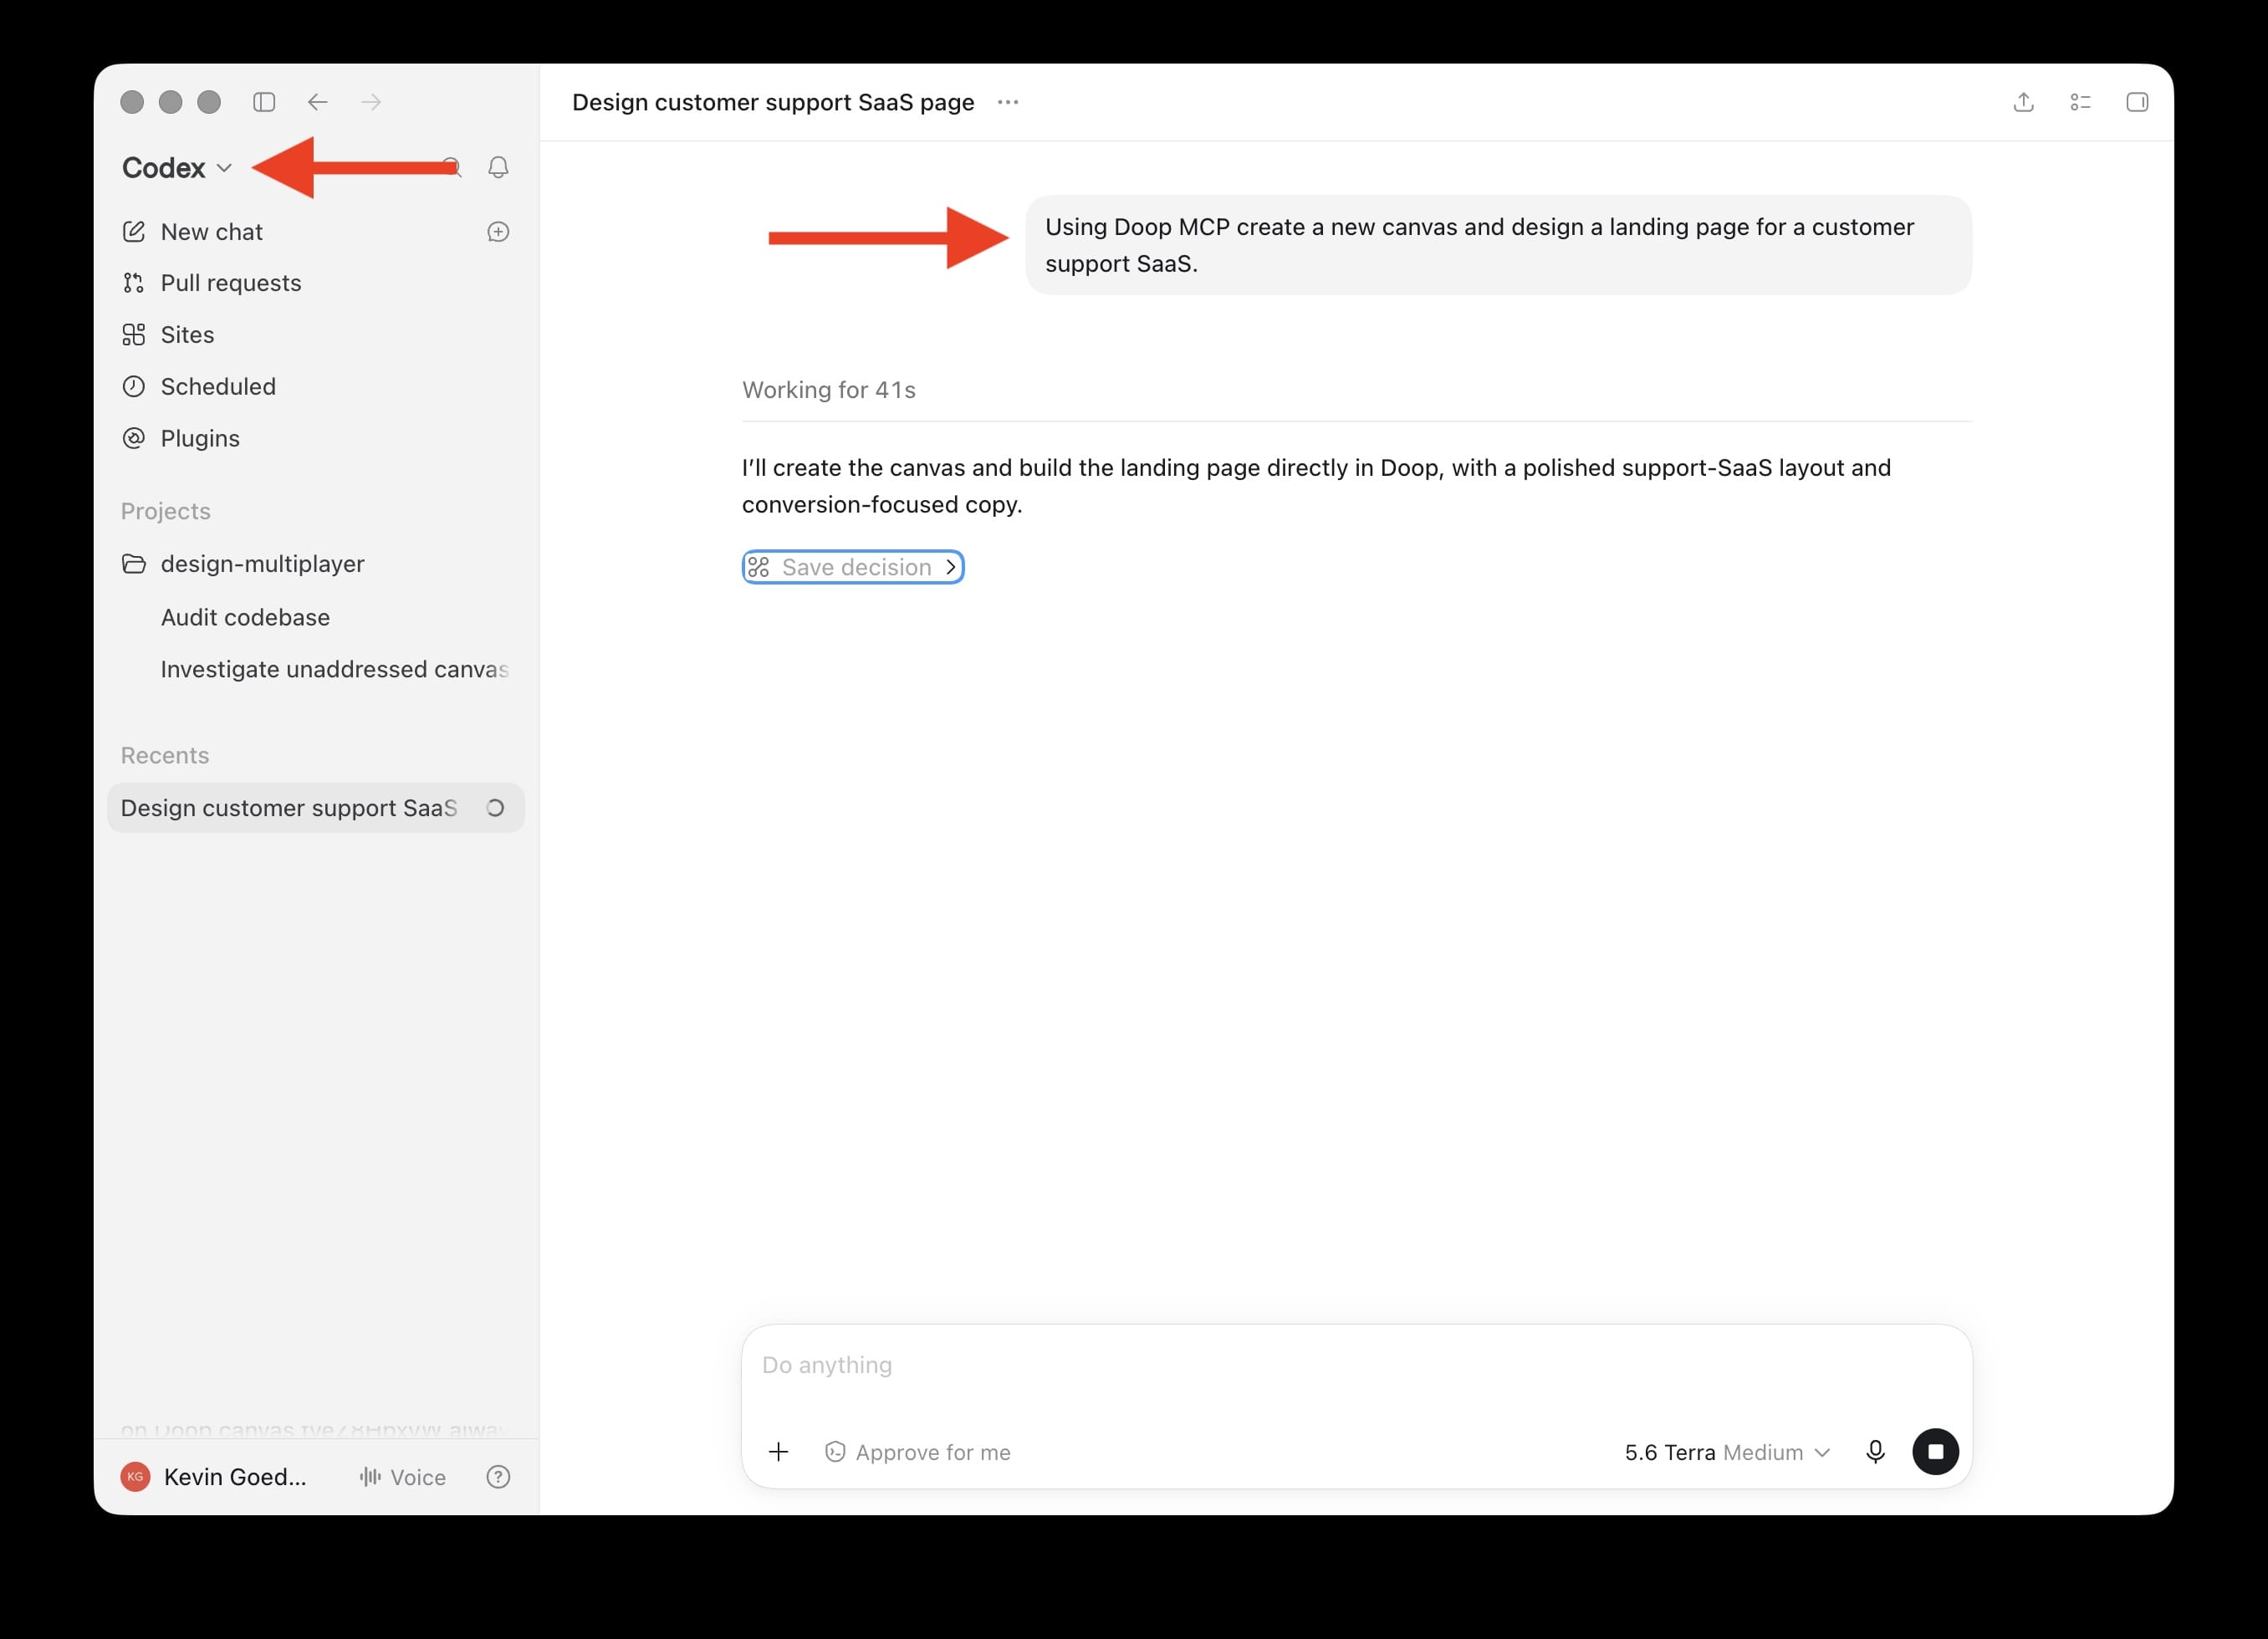
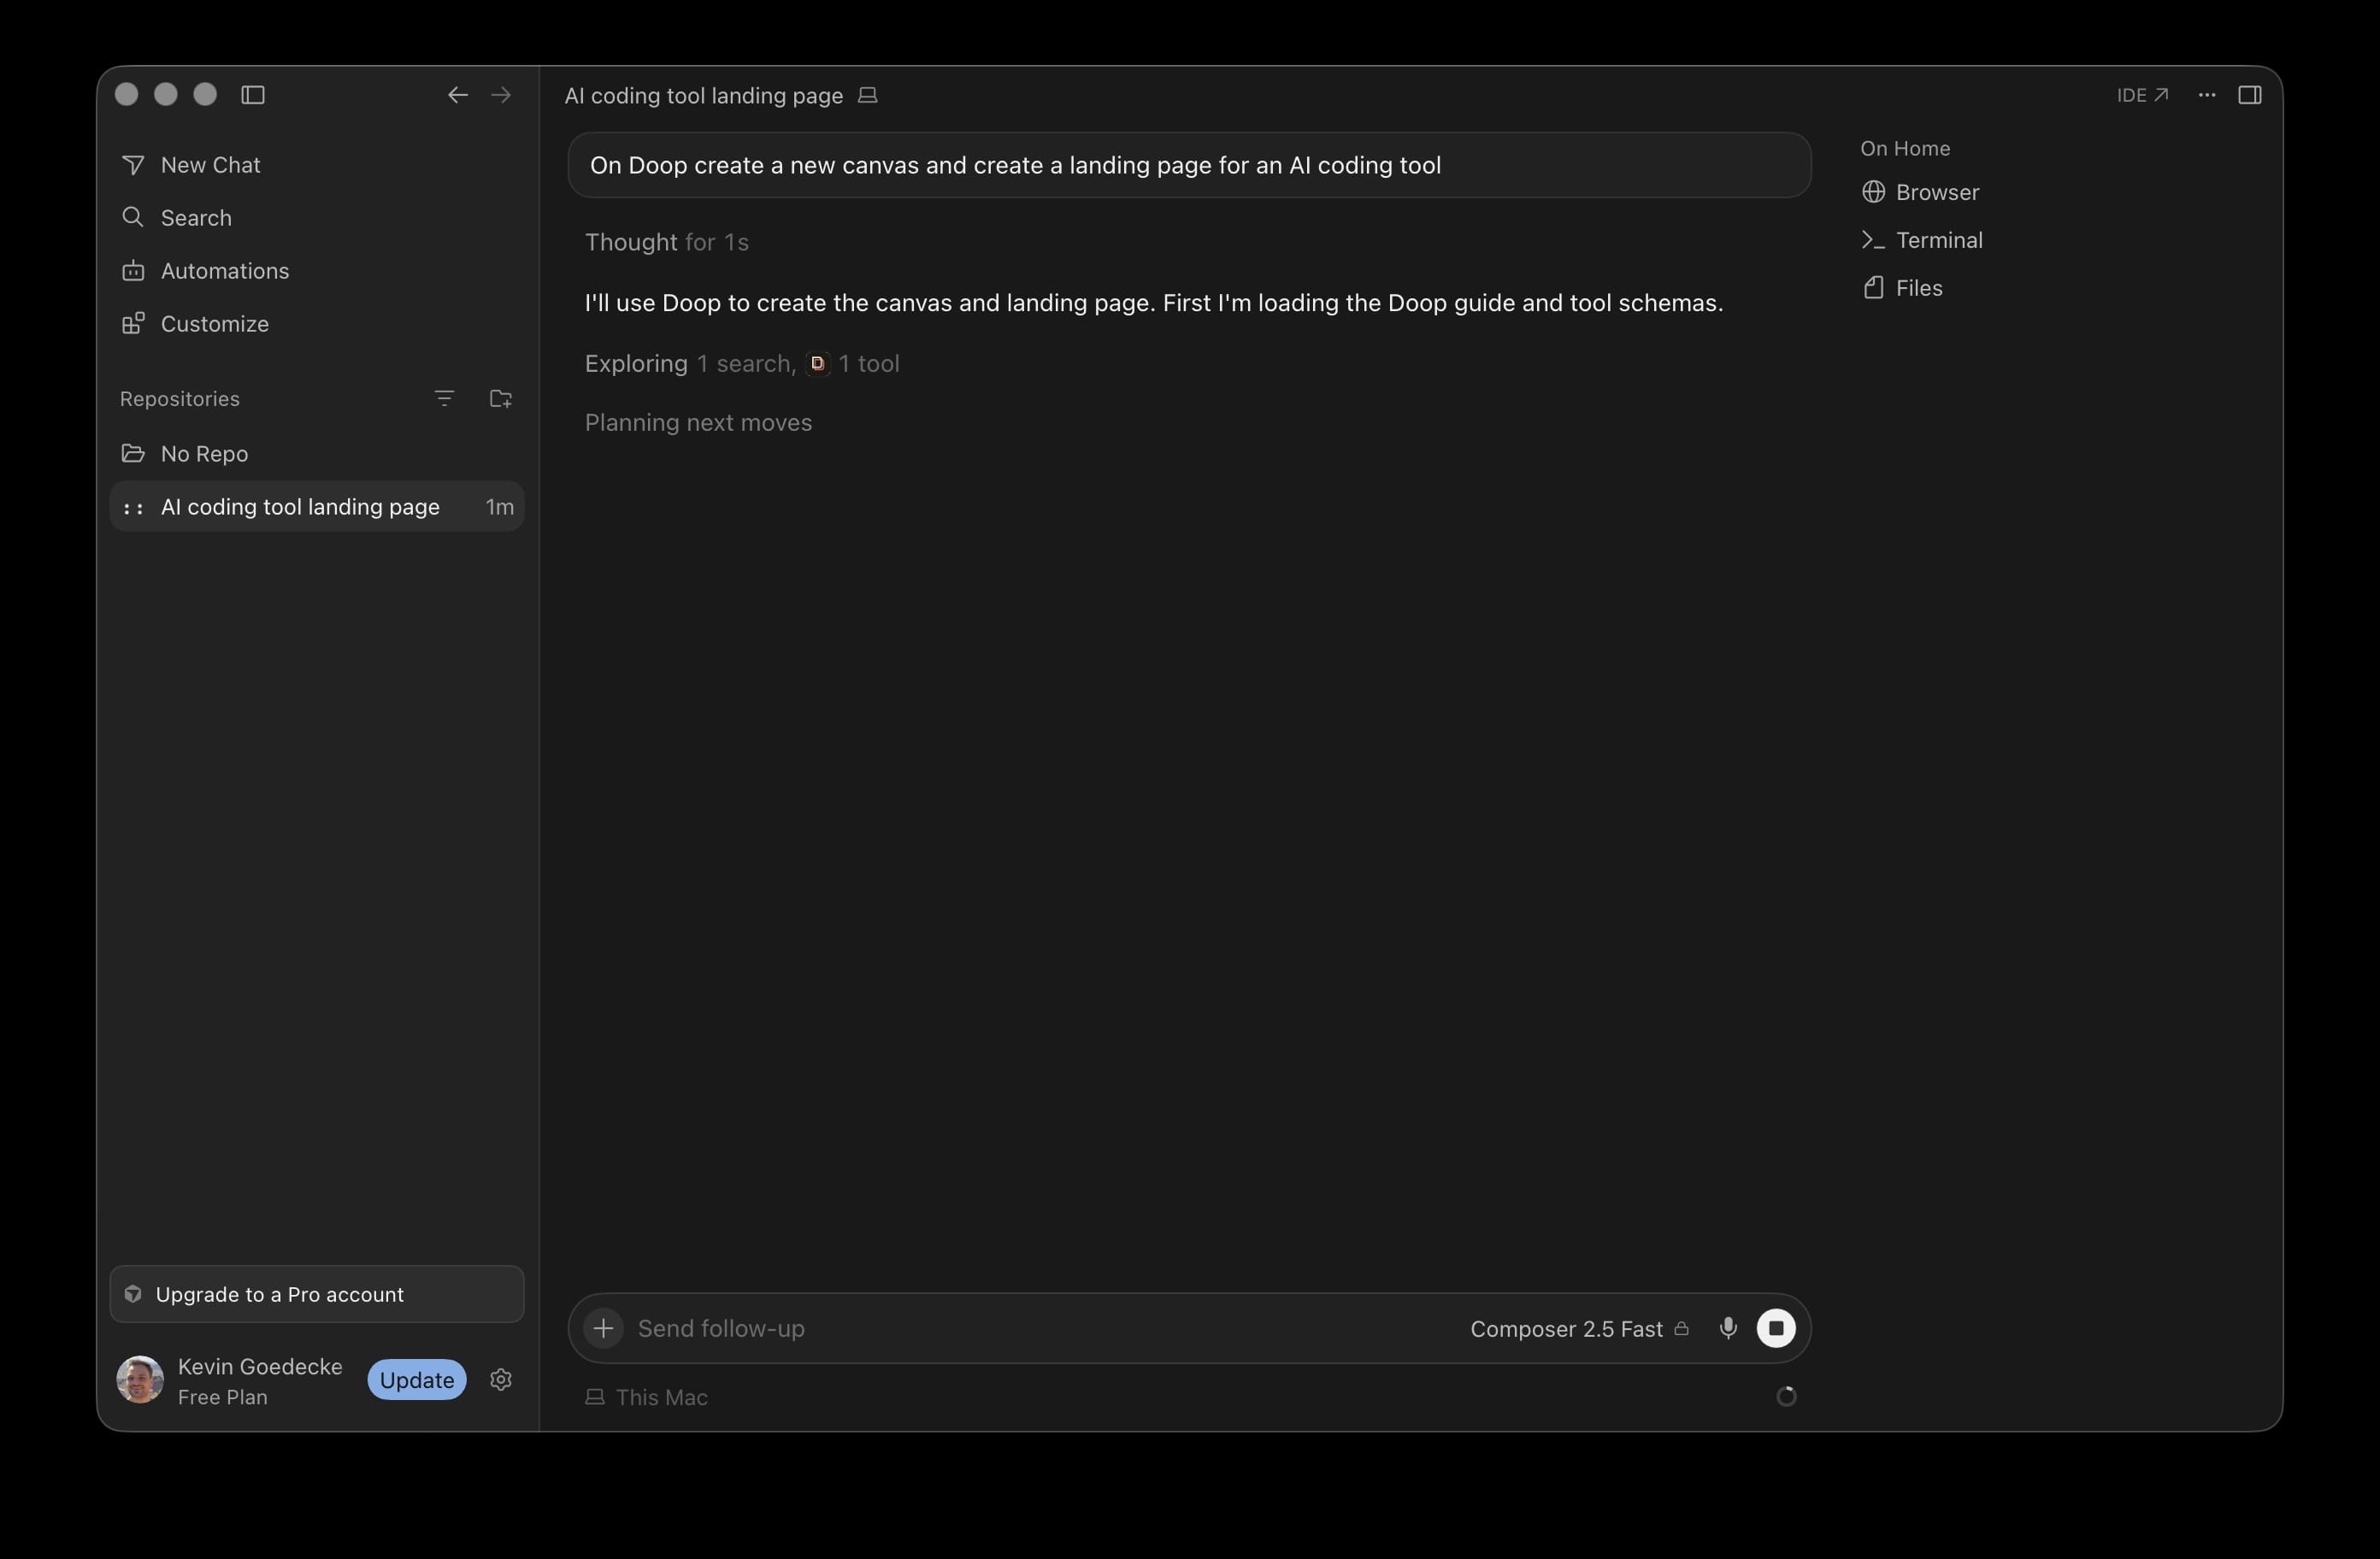
Open my Doop canvas https://doop.design/c/<id> and design a landing page hero
for a coffee subscription. Dark, editorial, one bold display face.
Watch the canvas: the design streams in keystroke by keystroke, the agent announces what it's working on in the Tasks panel, and it reviews its own work with screenshots before calling it done. Reply to any of its tasks and your note becomes an open feedback request the agent picks up on its next tool call.
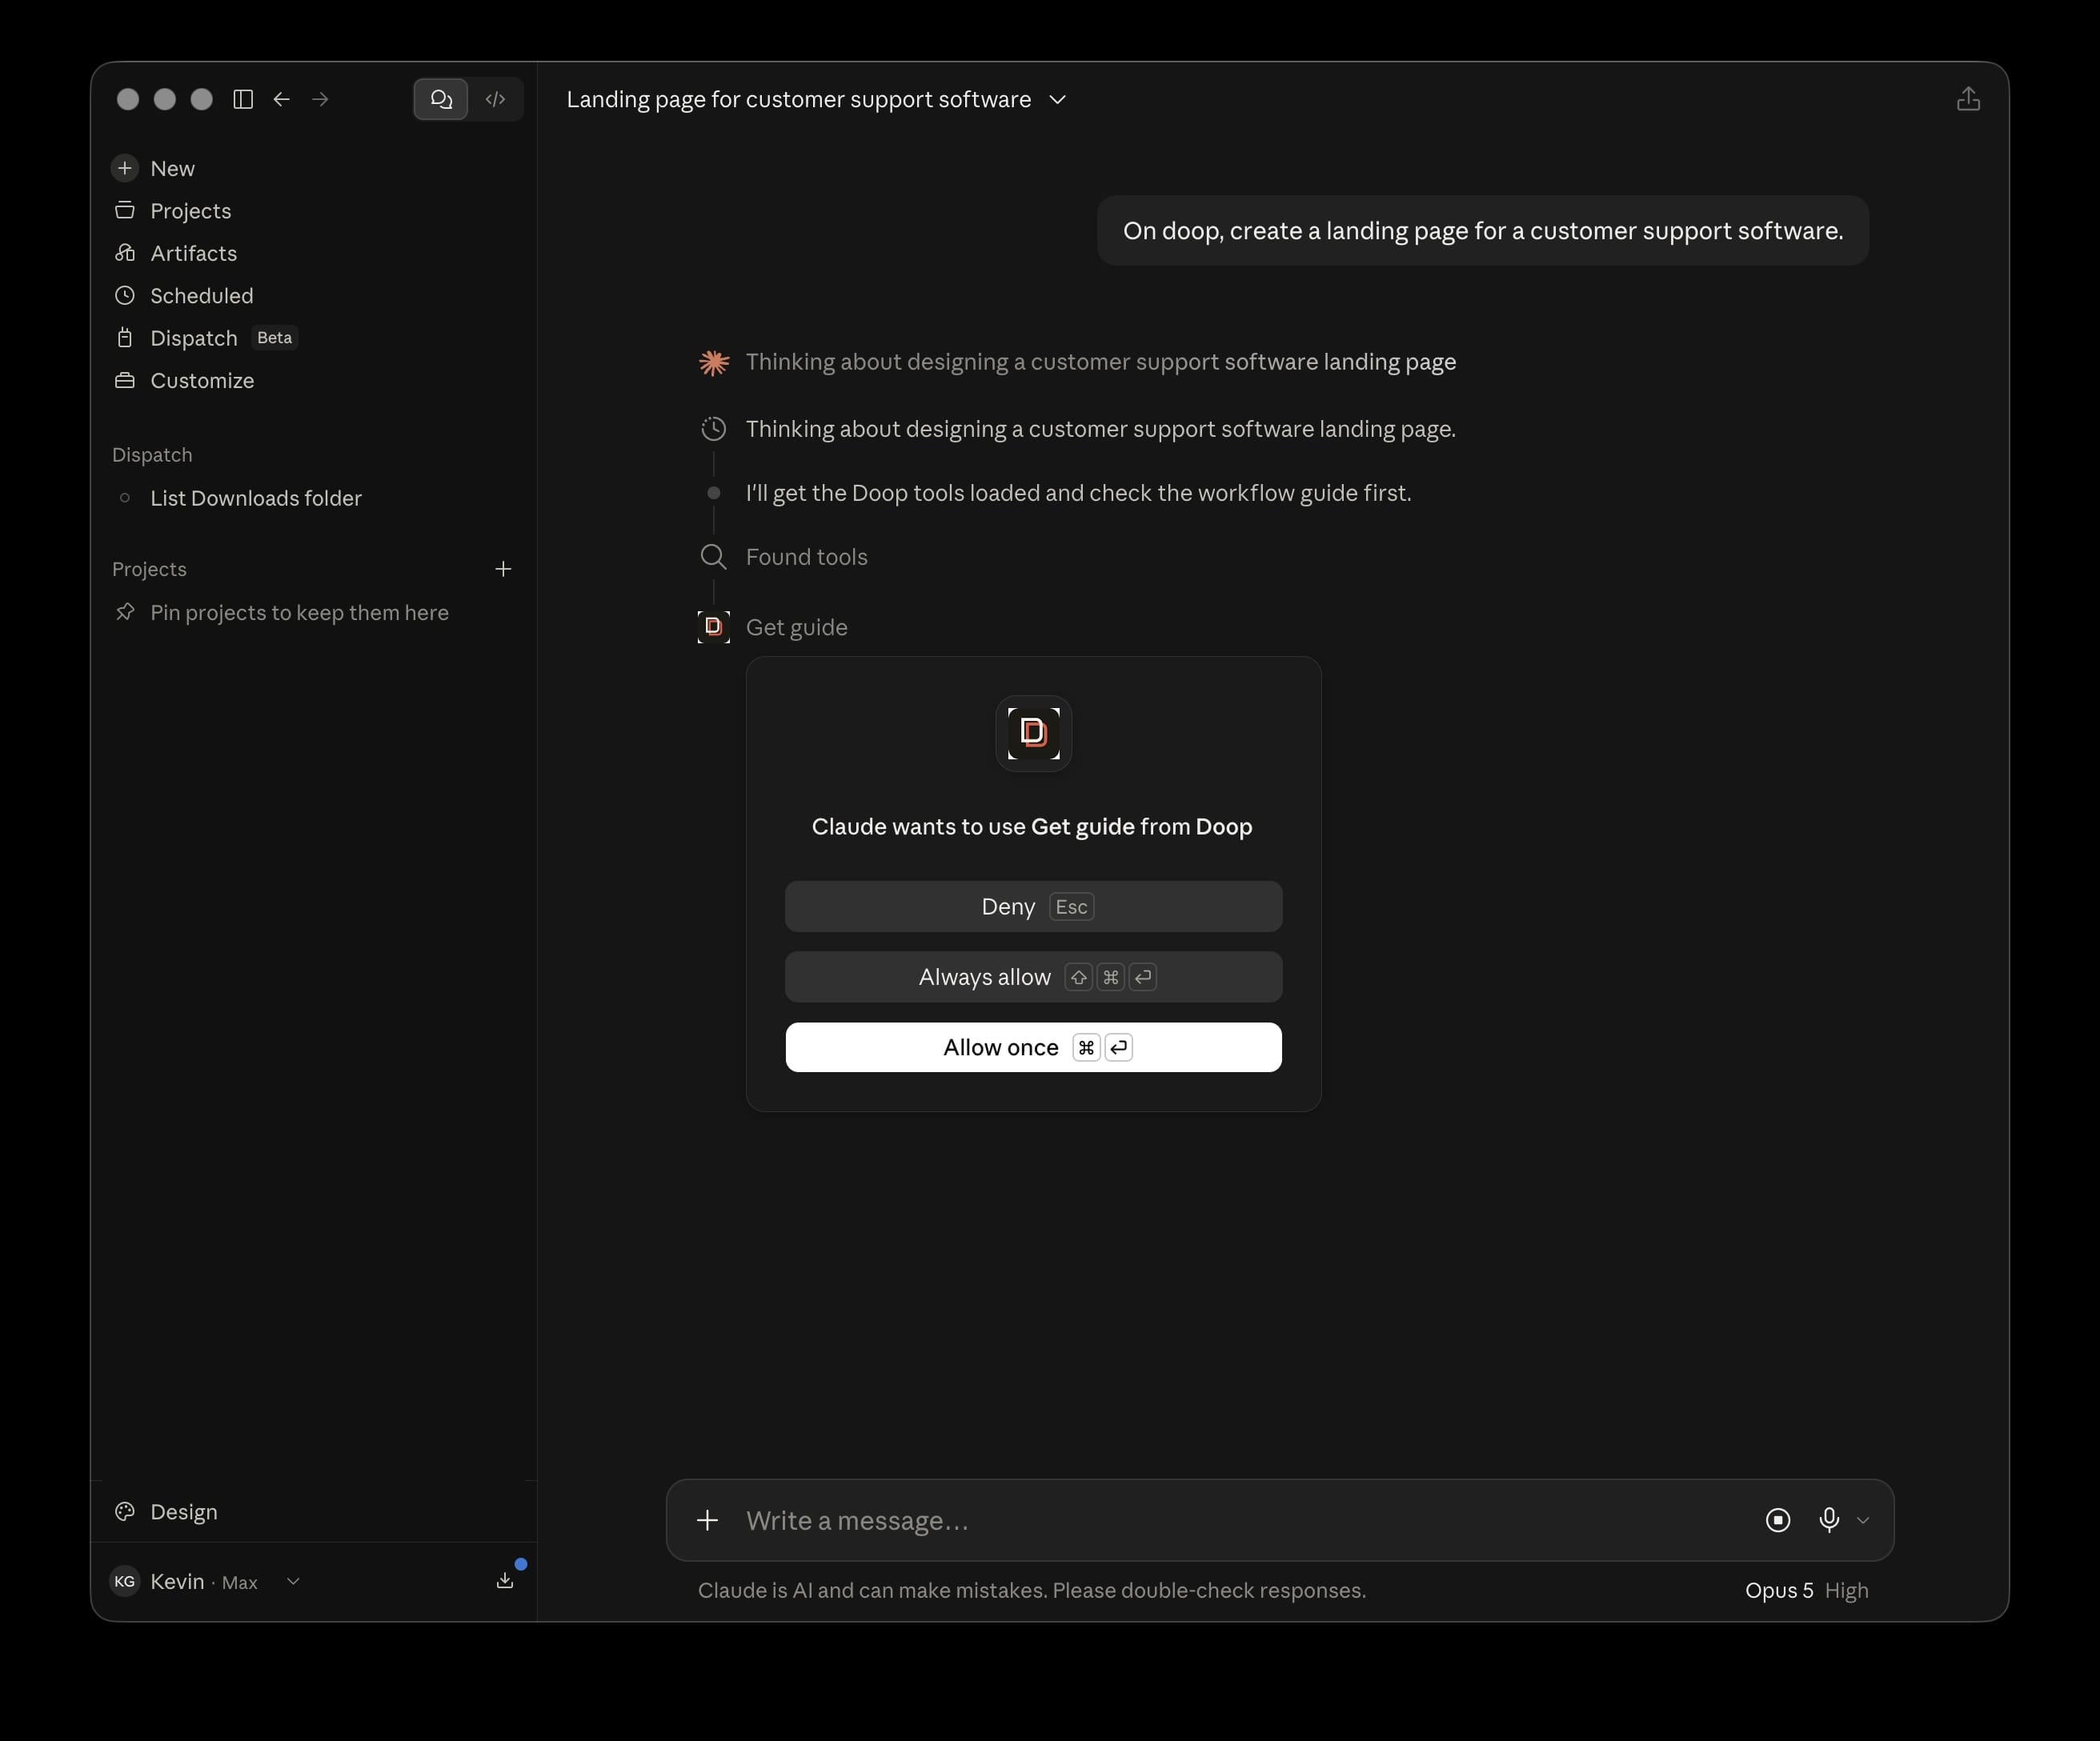
Well-behaved agents call get_guide first — it returns Doop's playbook: the streaming workflow, frame
sizing, review checkpoints, and multiplayer etiquette. If your agent skips it, just tell it to "read the Doop
guide first".
Self-hosting
Doop is open source (AGPL-3.0). Run the whole thing locally with:
$ git clone https://github.com/kgoedecke/doop && cd doop
$ npm install
$ npm run dev
The app runs on http://localhost:4300 with an embedded Postgres — no external dependencies. Everything
on this page works the same against a self-hosted instance; just swap https://doop.design/mcp for
http://localhost:4300/mcp. See the repo README for production deployment with Docker.
Troubleshooting
- Agent gets a 401. The OAuth token expired or the approval was never completed. Re-run the
authentication step for your client (e.g.
/mcp→ doop in Claude Code) and approve in the browser. - Tools stop responding in a long session. Very long agent sessions can go stale. Start a fresh agent session first; restart the host tool if that doesn't help.
- The browser approval never opens. Some headless or remote environments can't open a browser. Complete the connection once from a machine with a browser, or copy the printed approval URL into one manually.
Tool reference
What your agent can do once connected:
Orientation
get_guide— the Doop playbook: workflow, sizing, review checkpoints, etiquette.list_canvases— your canvases with ids, names, and frame counts.create_canvas— start a new canvas.get_canvas— a canvas's frames with positions and sizes (plus any waiting feedback).
Frames
create_frame— add a frame: a live HTML artboard everyone sees appear instantly.append_frame_html— stream a design in section by section, rendered live as it arrives.set_frame_html— replace a frame's HTML in one shot.edit_frame_html— targeted find-and-replace edits that morph in place.get_frame— read a frame's full HTML.get_frame_screenshot— render a PNG so the agent can review its own work.export_frame— public image URLs of a frame for use elsewhere.update_frame/delete_frame— rename, move, resize, or remove frames.
Collaboration
set_status— broadcast a live one-line status next to the agent's name.get_feedback— fetch and claim open human feedback requests.save_decision— record design decisions made in conversation into the canvas's Memory.
Style guides & references
list_guidelines/get_guidelines— the canvas's style guides in summary and full.set_guidelines— write or update a named style guide (markdown).get_reference— read a design a human pinned as "more like this".
Assets & sources
upload_asset— upload images and get permanent public URLs.search_images— free stock photography with visual thumbnails.search_icons— 200,000+ open-source UI icons as hotlinkable SVGs.search_logos— real company marks by brand name or domain.-
generate_image— draw a visual from a prompt with AI: hero backgrounds in your palette, illustration, product renders. Runs on your connected ChatGPT or OpenAI account and returns a permanent asset URL. view_website— inspect a public page (screenshot + text) without touching the canvas.import_webpage— snapshot a public page onto the canvas as an editable source frame.
That's it — open a canvas, connect an agent, and design together. Get started →