The Doop Agent
Doop's resident agent — a design team that lives in the canvas, no client to connect.
The Doop Agent is built into Doop itself. Unlike connecting your own agent over MCP, there is nothing to install and no terminal involved: it picks work up on its own the moment you ask for something, and everything it does streams onto the canvas live — presence, status, tasks, and edits playing back as they happen.
It's actually a team. Doop is the generalist that builds; the specialists each own one pass — UX Lead, Copywriter, Brand Compliance, Accessibility, and Visual Polish. A single card can be routed through several of them in order, so a brief can go design → copy → brand → accessibility without you in between.
1. Connect a model account
The Doop Agent runs on a model account you connect — it's yours, so there are no limits and nothing is metered. Open Settings from your home screen (or follow the link the canvas shows next to the prompt box) and pick one of two kinds:
- Codex Plan — sign in with your ChatGPT subscription (Plus, Pro, or Business). Doop routes the agent's runs through the plan you already pay for.
- OpenAI API key — pay per token on your own OpenAI account, no subscription involved.
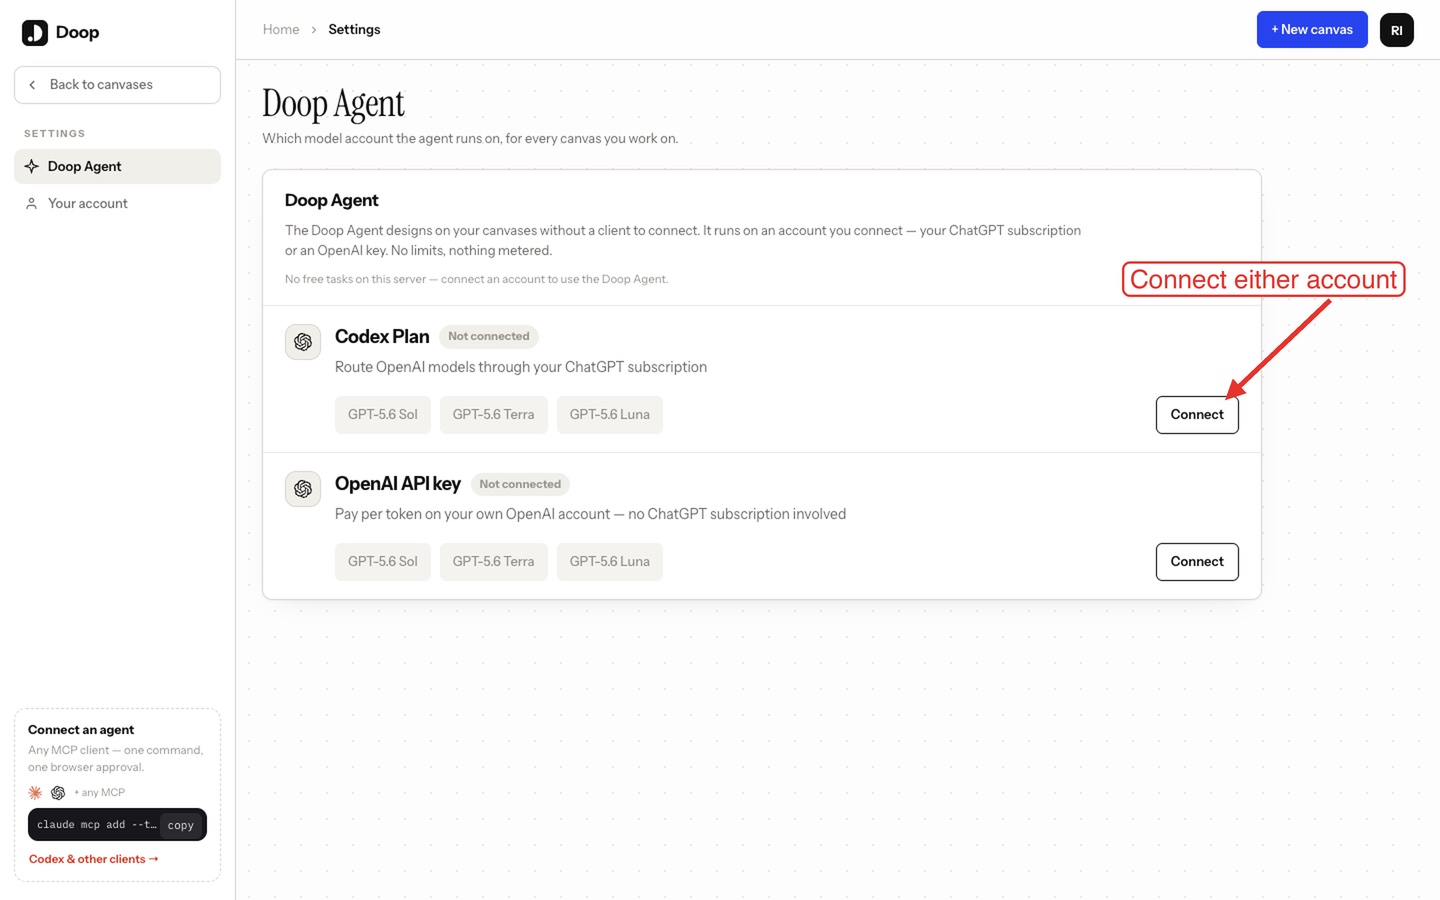
Either way you pick the model tier the agent designs with — GPT‑5.6 Sol (flagship), GPT‑5.6 Terra (the default workhorse), or GPT‑5.6 Luna (fast and cheap). You're paying for it, so the choice is yours, and you can switch any time.
Connecting a ChatGPT subscription opens OpenAI's device sign-in: approve in the browser tab that opens and, if Doop
shows you a short code, type it at auth.openai.com/codex/device. Workspace accounts need
device code authorization switched on in ChatGPT → Settings → Security — members may need an admin for
that. The API-key path is a single paste.
2. Give it work
Three ways in, all ending at the same team.
Ask from the canvas
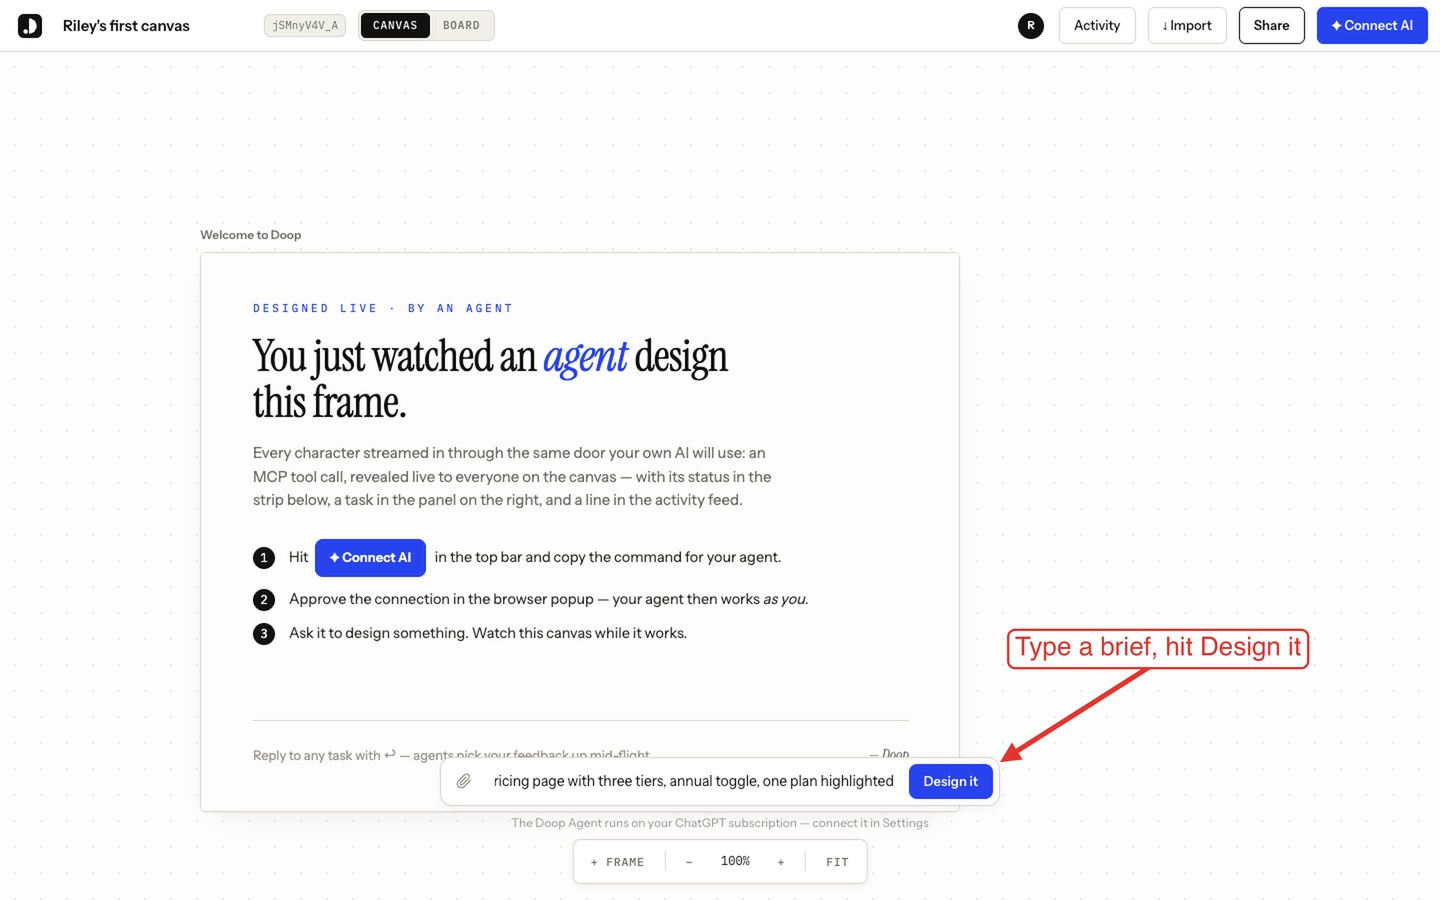
Every canvas has a prompt box along the bottom. Type a brief (attach reference images if you have them) and hit Design it — Doop claims the task and the frame streams in while you watch.
Queue a board card
Switch the view toggle in the top bar from Canvas to Board. The board shows the team with what each role is doing, plus queued, in-progress, and done columns for the canvas's tasks.
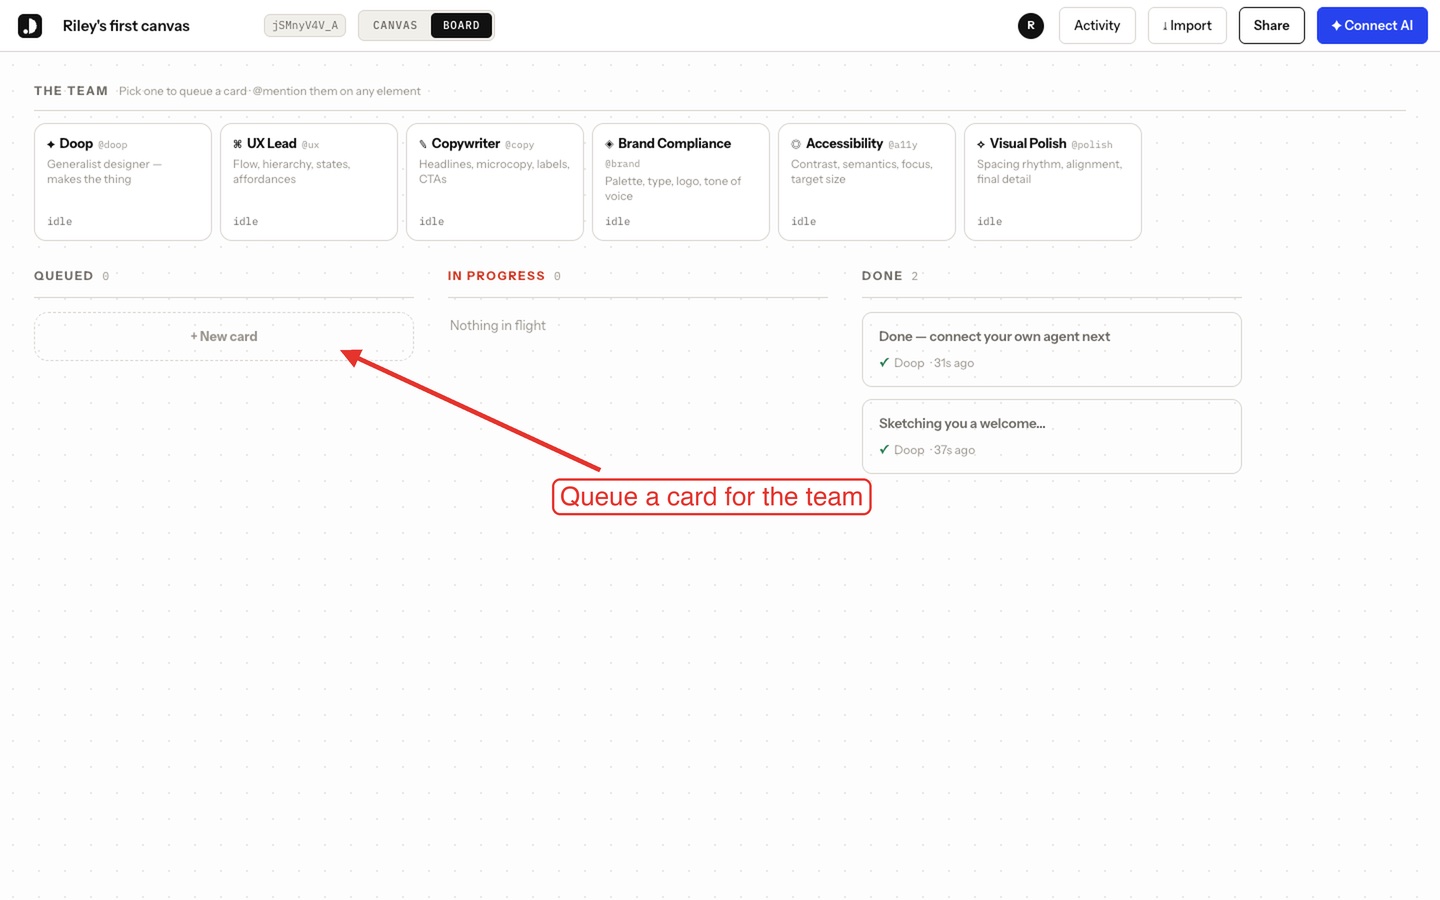
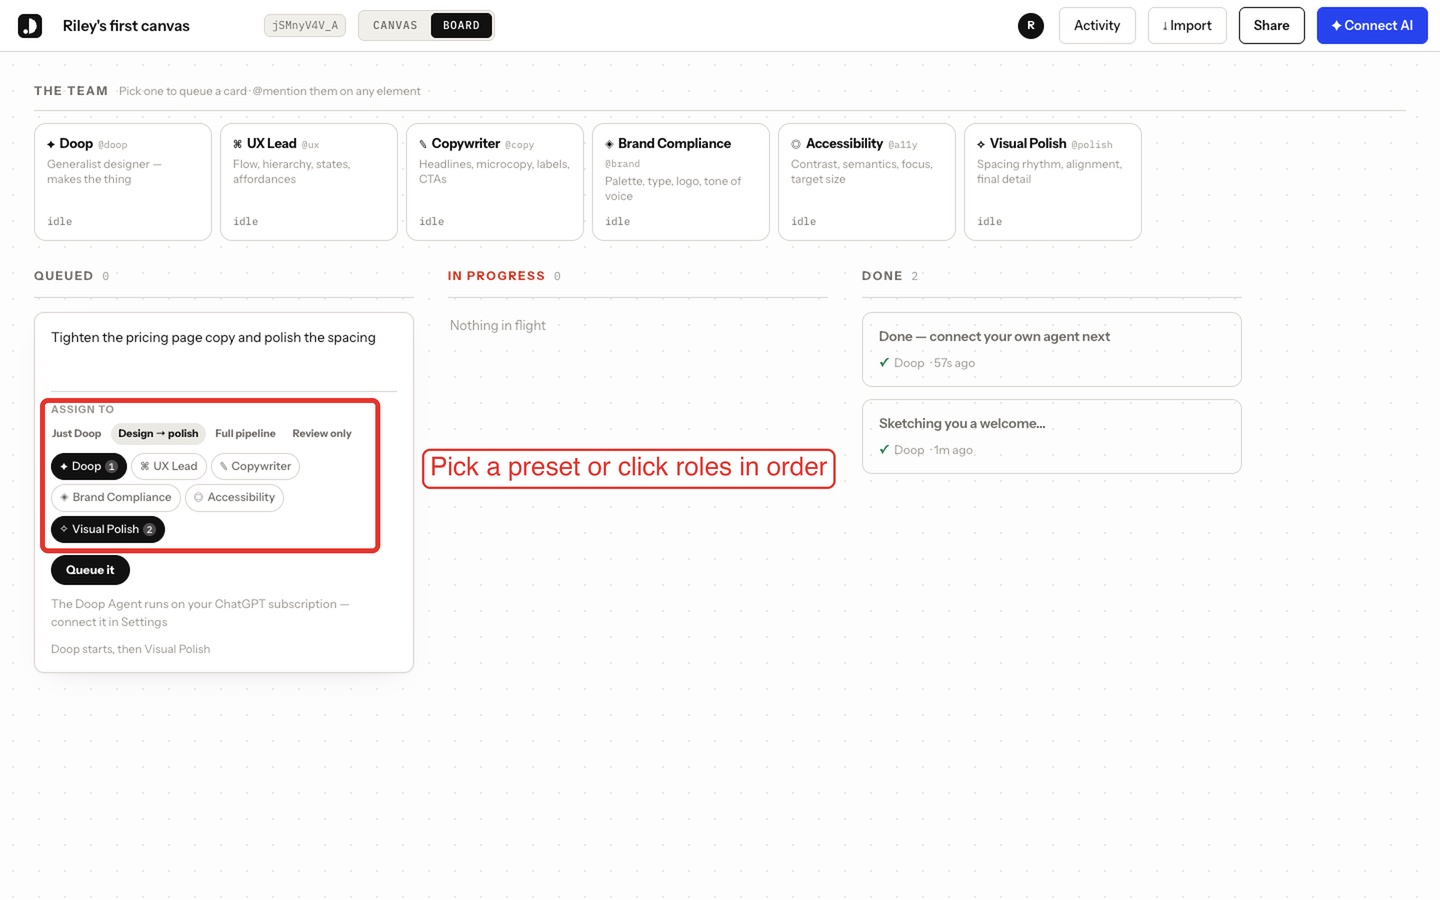
Click + New card, describe the work, and assign it. A card names an ordered pipeline of roles — pick a preset like Design → polish or click roles in the order they should run. The card moves down its pipeline one stage at a time, each specialist handing off to the next.
@mention a role
Comment on any element and mention the role you want — @doop, @ux, @copy,
@brand, @a11y, or @polish — and that specialist picks the comment up as a
task scoped to that element. Replying to any running task works the same way: your note becomes feedback the agent
reads mid-flight.
3. Watch it work
Doop Agent runs look exactly like a connected agent's: the role appears in the working-now strip with a live status line, a task shows up in the panel on the right, and every edit streams onto the canvas as it lands. The agent reviews its own work with screenshots before calling a task done. If a run ends somewhere you don't love, reply to the task — feedback queues a follow-up pass automatically.
Generated imagery
When a design needs a visual no stock site has, Doop draws it. The place it shines is the hero: a full-bleed scene in your exact palette, with the calm space a headline or a product window needs, is something stock search almost never returns and generation gets in one prompt.
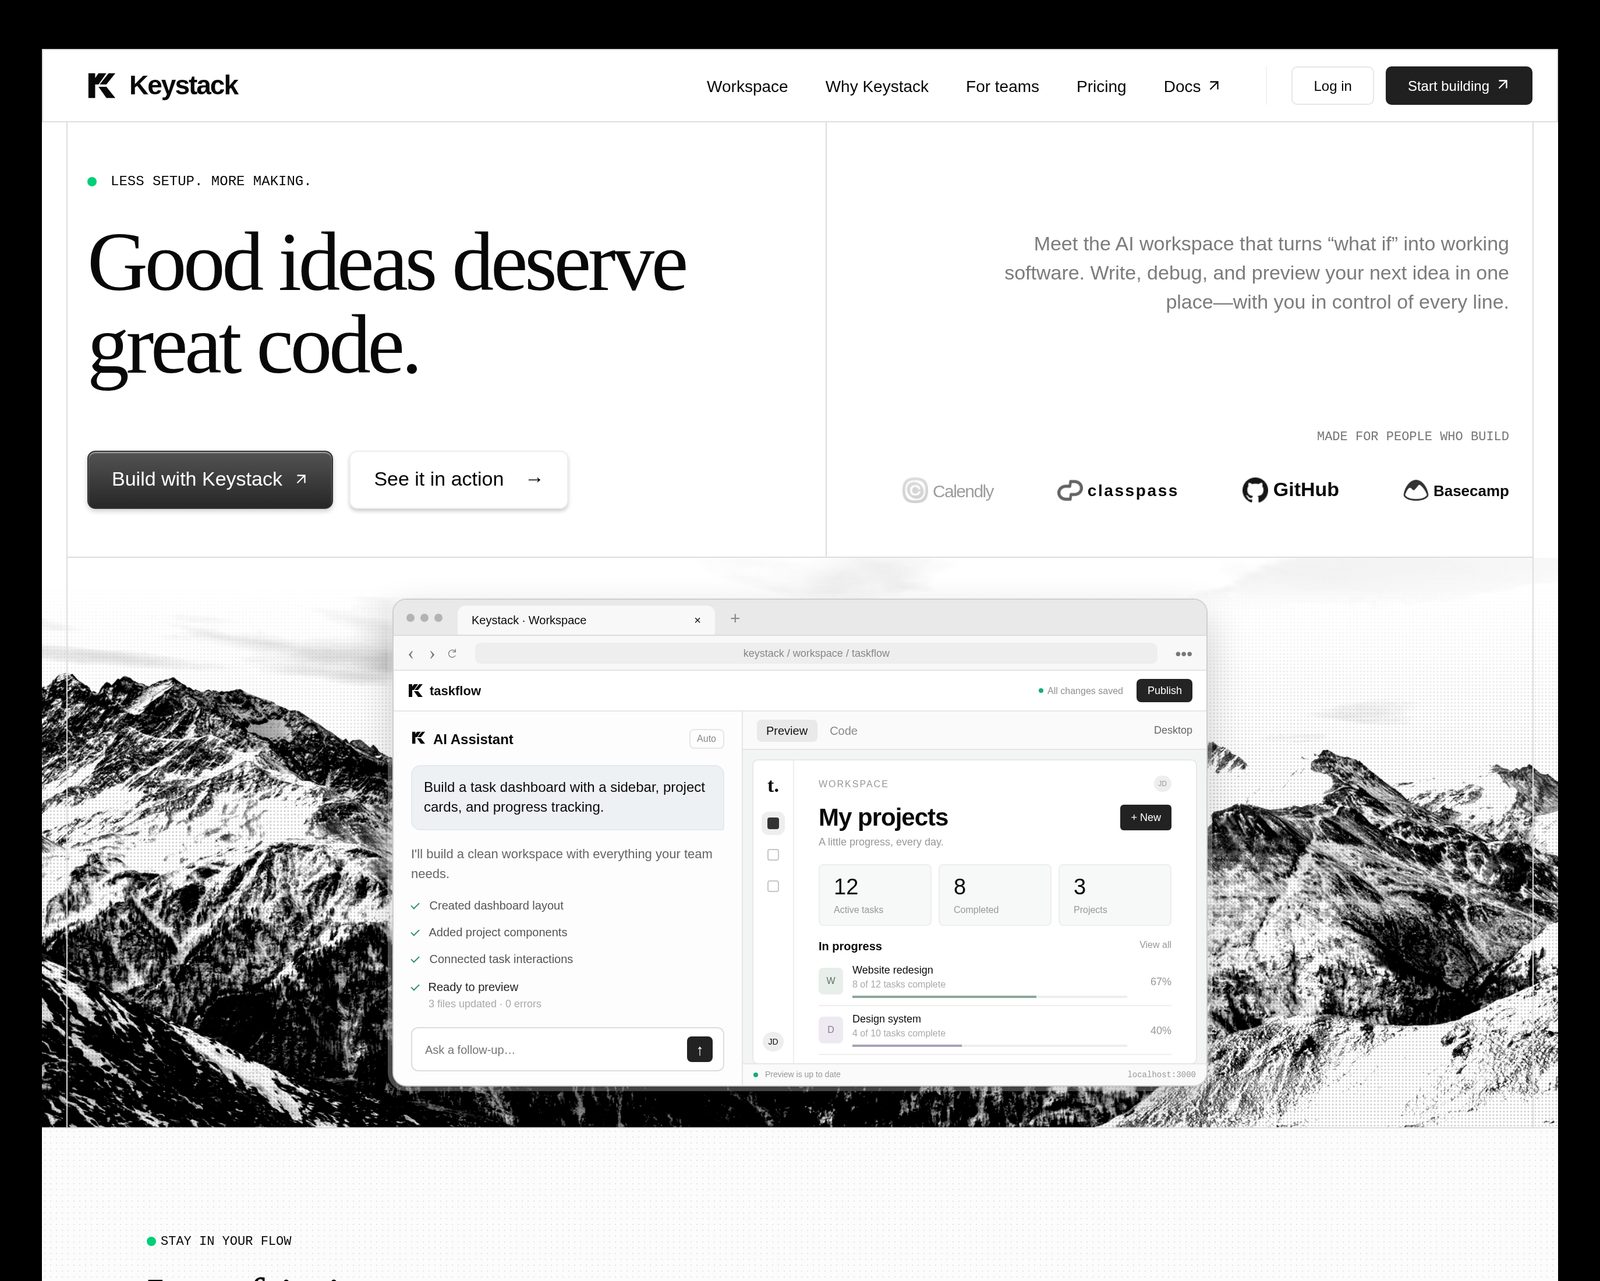
Ask for it the way you would brief a designer: "a hero background — snowy alpine ridge, monochrome, soft haze, keep the middle calm for the product window." Landscape, square and portrait are all available, and every image lands as a normal canvas asset you can reuse in other frames. Illustration, mascots and product renders work the same way; photography that exists in the world still comes from stock search, which is free.
Generation runs on the model account you connected in step 1 — your ChatGPT subscription (no extra charge) or your
OpenAI API key — never on anyone else's. A single task stops after four images, and the agent is told to refine a
near miss by prompt rather than roll the dice again. Agents connected over MCP get the same tool:
generate_image.
Doop Agent vs. your own agent
The two are independent and happily share a canvas. The Doop Agent lives server-side and runs on the model account you connect in Settings. Your own agent — Claude Code, Codex, Cursor, anything that speaks MCP — connects from outside on whatever model it already uses, and is never metered. Set that up in Get started.
Troubleshooting
- Cards sit in the queue and nothing happens. No model account is connected — the work waits, by design. Connect one in Settings, or connect your own MCP agent and mention the task to it.
- The ChatGPT connection fails at the device step. Device code authorization is off for your workspace. Turn it on in ChatGPT → Settings → Security, or ask a workspace admin — or use the API-key path instead.
- A run failed. Failed cards surface on the board with the error. Requeue the card, or reply to the task with what to change — retries pick your note up.